Thrifty Kiwi
Like our Facebook page
  • Home
  • Blog
  • Homesteading
  • Gardening
    • 2025 Garden
    • 2021 Garden Blog
    • 2019-2020 Garden Blog
    • 2017-2018 Garden Blog
    • 2016-2017 Garden Blog
    • Kiwi Urban Homestead 2013-2015 Garden Blog
    • Pest & Diseases
  • Recipes
    • Autoimmune Protocol
    • Meals and Snacks
    • Preserving
    • Household Cleaners
    • Health & Beauty
  • Skills
    • Menu Planning & Grocery Shopping
    • Money & Budgeting
    • Preserving How-Tos
    • Housekeeping
    • DIY
    • How to Find Stuff Free or Cheap
  • Animals
    • Critter Blog
  • About
  • Contact

Garlic - Harvesting, Storing & Preserving

7/2/2016

1 Comment

 
Picture
Garlic is traditionally planted on the shortest day (June 22nd) and harvested on the longest (Dec 22) or thereabouts. However, it's actually fine to plant garlic from April through to August, and harvest will be six months later. You might like to experiment to find out what timing produces the best results in your garden. One of my neighbours planted some in April, some in May, and some in June one year. His April crop was fairly pathetic, but both May and June ones did really well. I tend to be running behind so have planted in July/August so far. Having just harvested this season's crop, I'm so looking forward to planting more that I just might get this in earlier this winter! Garlic is easy to grow and very satisfying. I'll talk more about preparing to plant garlic as that time of year approaches, but today let's take a look at what to do with your harvested garlic. First, though, let me share my experiences, both good and bad.......

My garlic growing experiences....

This is the third season I've grown garlic. The first year, being fairly clueless as to how to get started, I planted 1/4 of my garden bed with cloves from bulbs of NZ garlic I bought from a local market garden shop, and the rest with NZ garlic from the supermarket. I made sure to get NZ garlic, as I knew enough to know Chinese garlic should not be grown here. The supermarket stuff was a failure - only a couple of them sprouted at all, and those turned out tiny. The rest were non-starters. I learned later that the stores often spray the bulbs to inhibit them from sprouting.

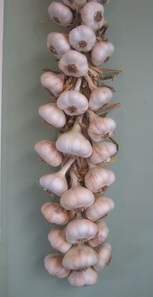
The market garden garlic, however, did very well, and produced large, satisfying garlic bulbs. In due course I hung them to dry, then braided them to hang on the wall near my kitchen. The following winter, I took cloves from the fattest bulbs, and planted my crop. They grew well. But.....

Last summer, when I harvested the garlic, quite a number of the bulbs had split open and appeared to have a fungal infection. They smelled really bad! I still got a lot of useable garlic, but any bulbs that were even slightly damaged did not store well.
So when it was time to plant again this past winter, I was a bit dubious about putting all my garlic in one basket so to speak, and planting only my own garlic. What if they carried the spores for the infection, and I lost the lot? After some humming and haa-ing, I decided I would plant some of my own garlic, picking the best and healthiest looking bulbs to take cloves from, but also bought in some new seed garlic - a variety called Prinator - supposed to be a favourite variety of both commercial and home growers. I planted half the bed in each, with a couple of rows of bunching shallots in between.
Being very behind in everything in 2015, I didn't get the garlic planted until August, but that's ok. Meanwhile, I read an article about another local gardener with a large edible garden, and she explained that she doesn't wait for her garlic to die back all that much before harvesting - she says that once the tops begin to yellow, no more growth is happening, and harvest is close. She does not wait for them to die right off, because by that point the bulbs are likely to have begun to split. Considering this, I realised in hindsight that maybe I just left it too long to harvest last year.

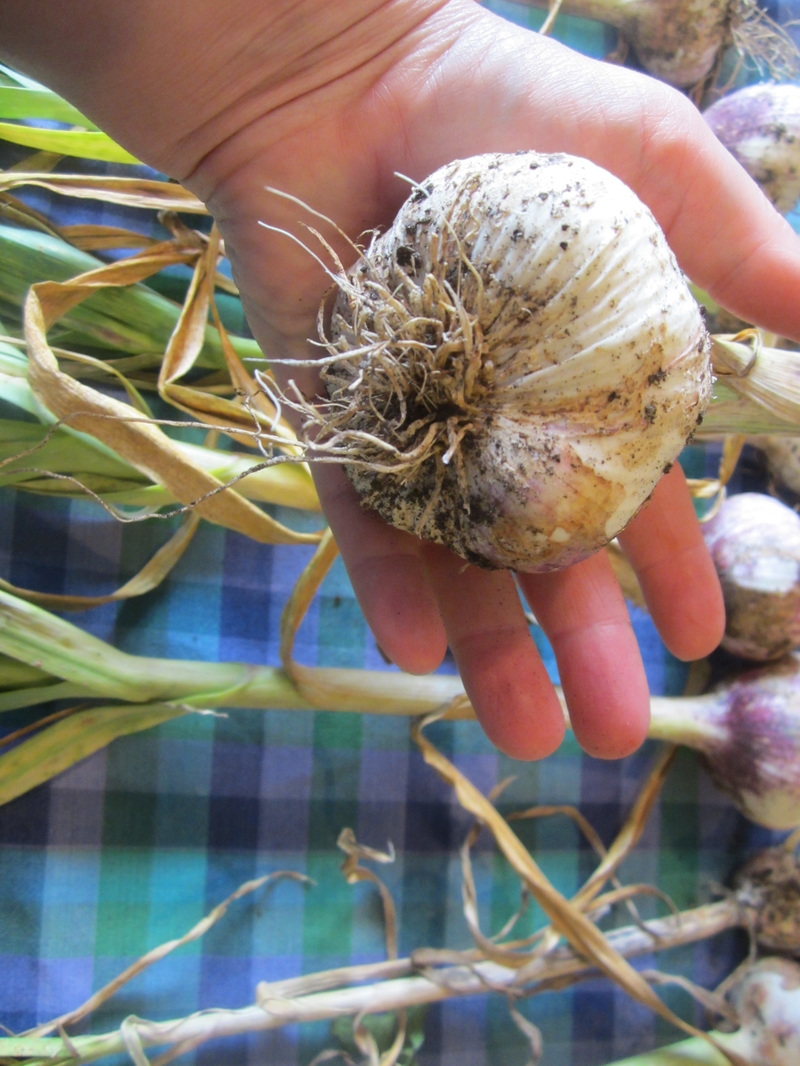
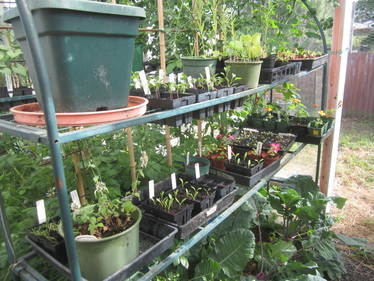
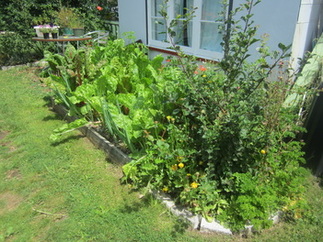
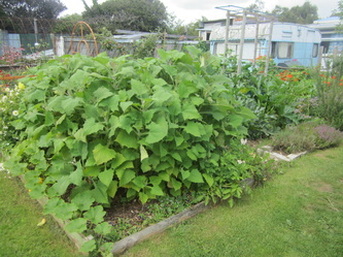
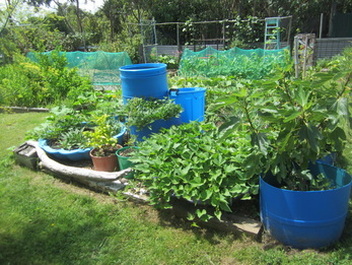
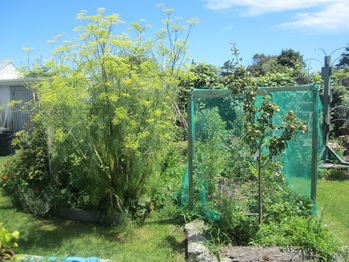
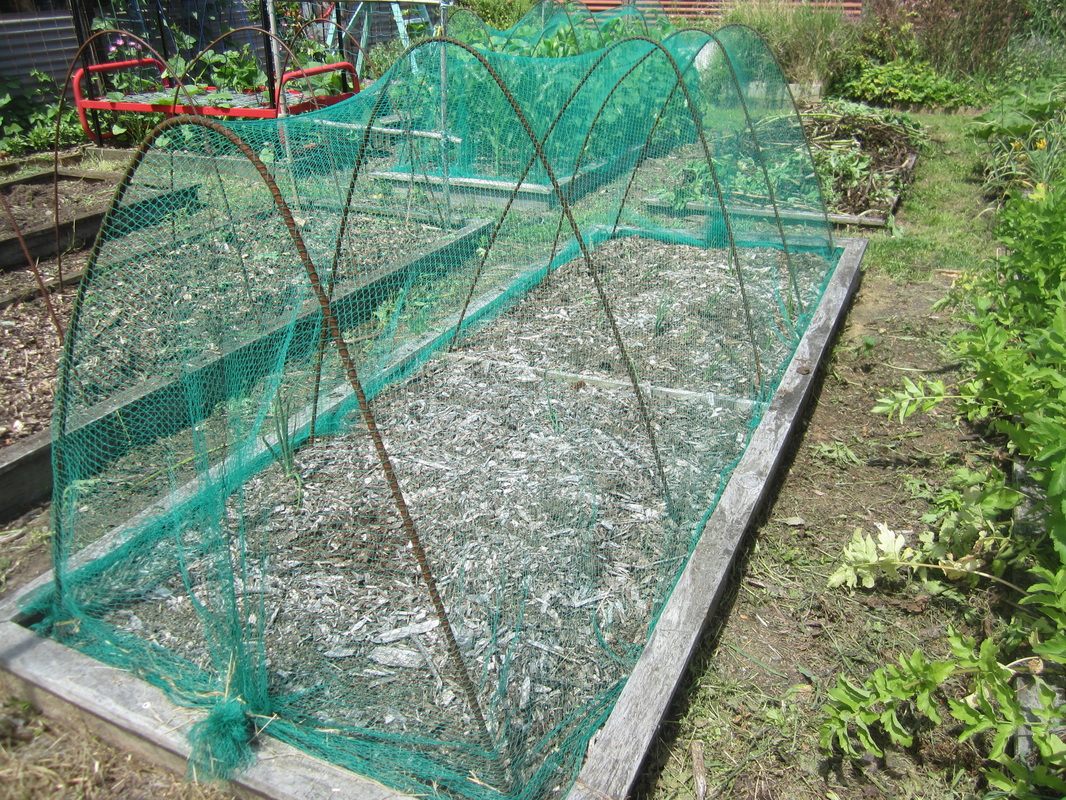
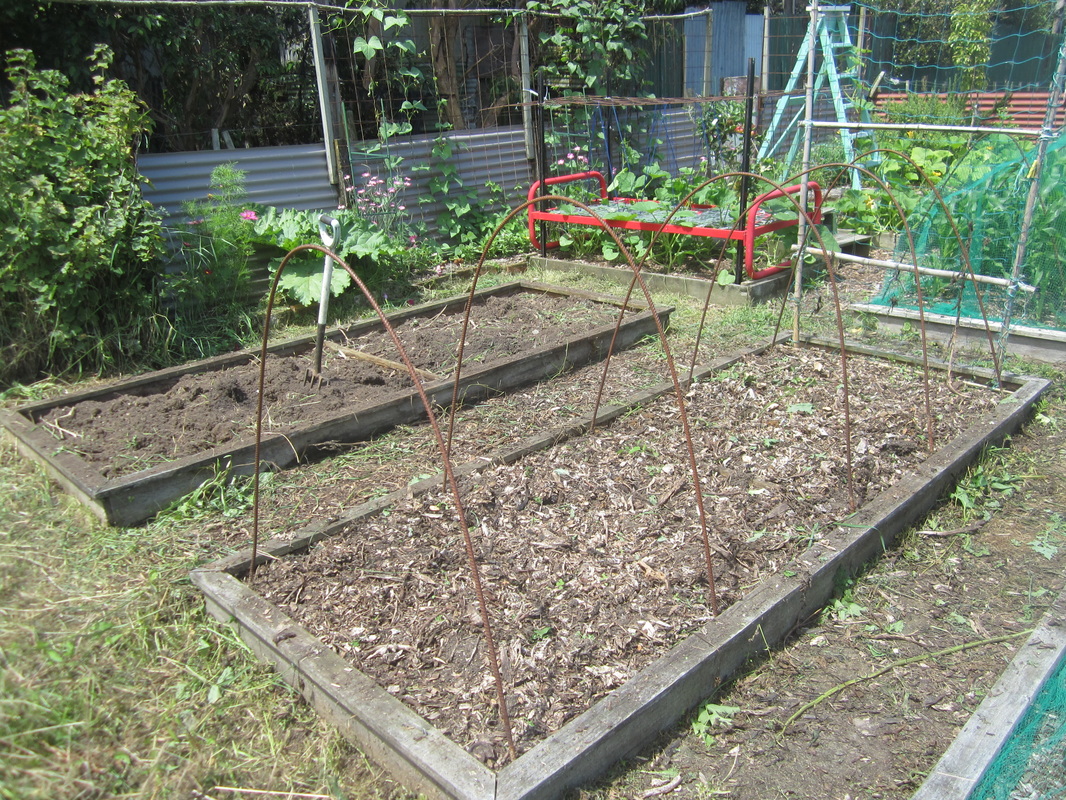
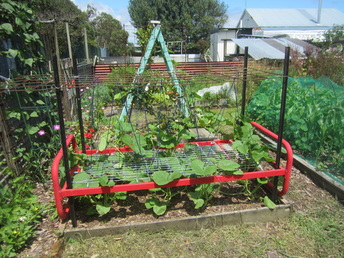
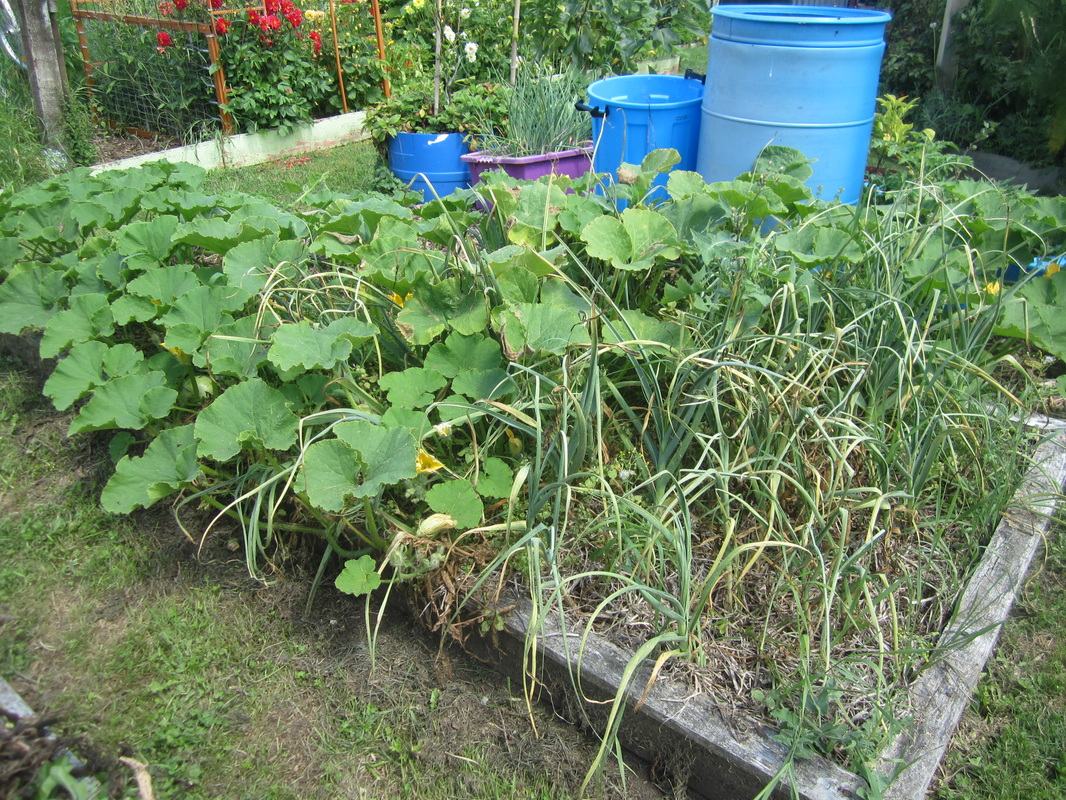
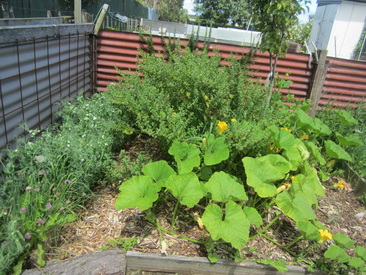
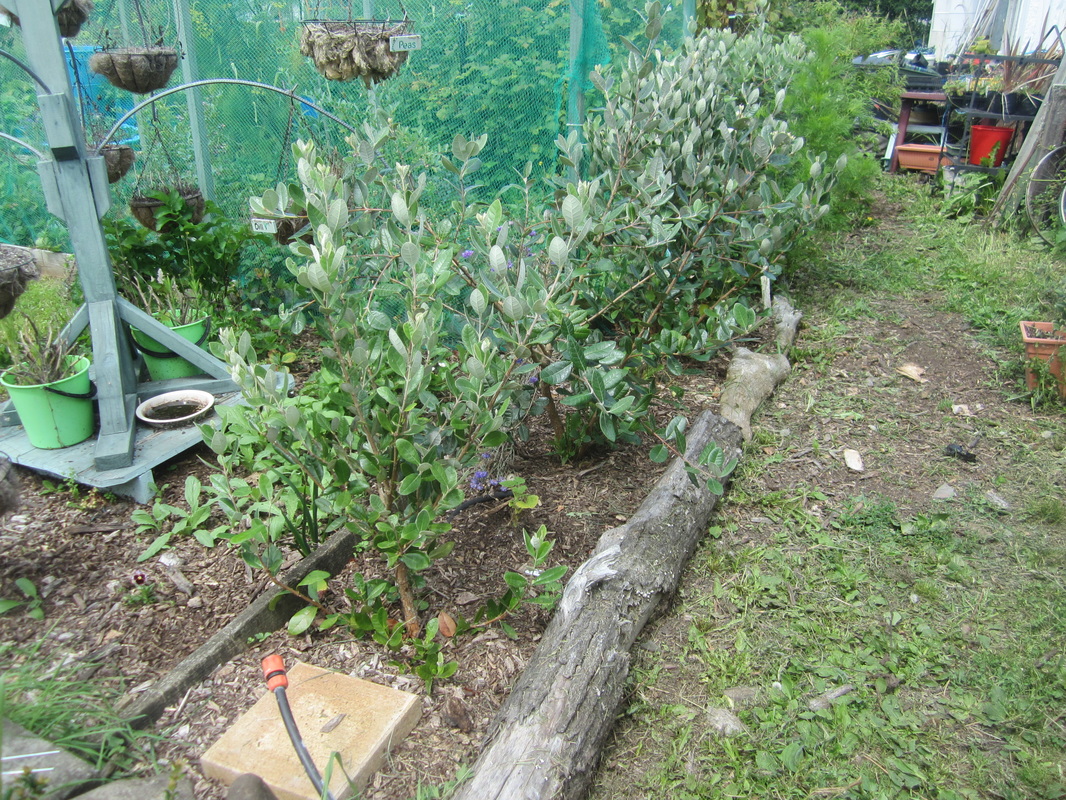
I was also aware you need to have a least three dry days before harvest. So on the 17th of Jan, noting the forecast for rain in the next few days, I went and checked on my crop. The garlic I had grown from my previous crop was looking like it might be ready to harvest. I dug around in the soil with a finger, and sure enough, nice fat bulbs with defined cloves. So I whipped out that half of the bed. The other half, the Prinators, though, didn't seem to be there yet, so I left them in. I hung the harvested garlic in bunches in an airy shed to dry. Here are some photos taken before I hung them up:
Picture
Picture
Picture
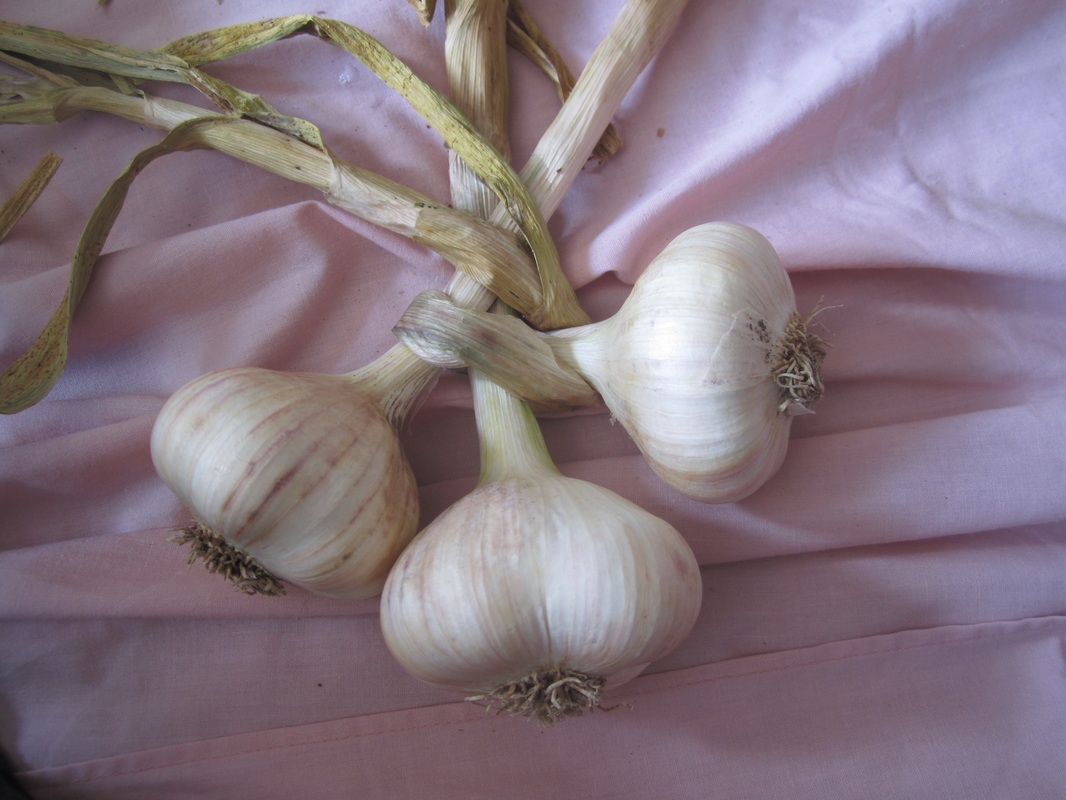
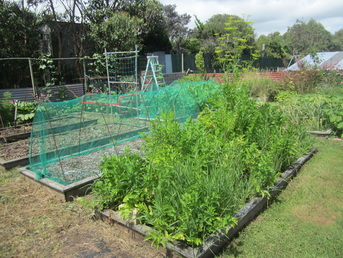
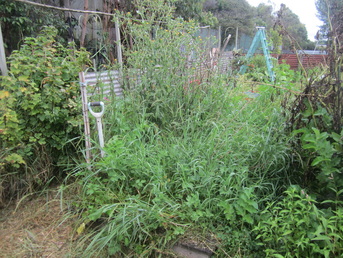
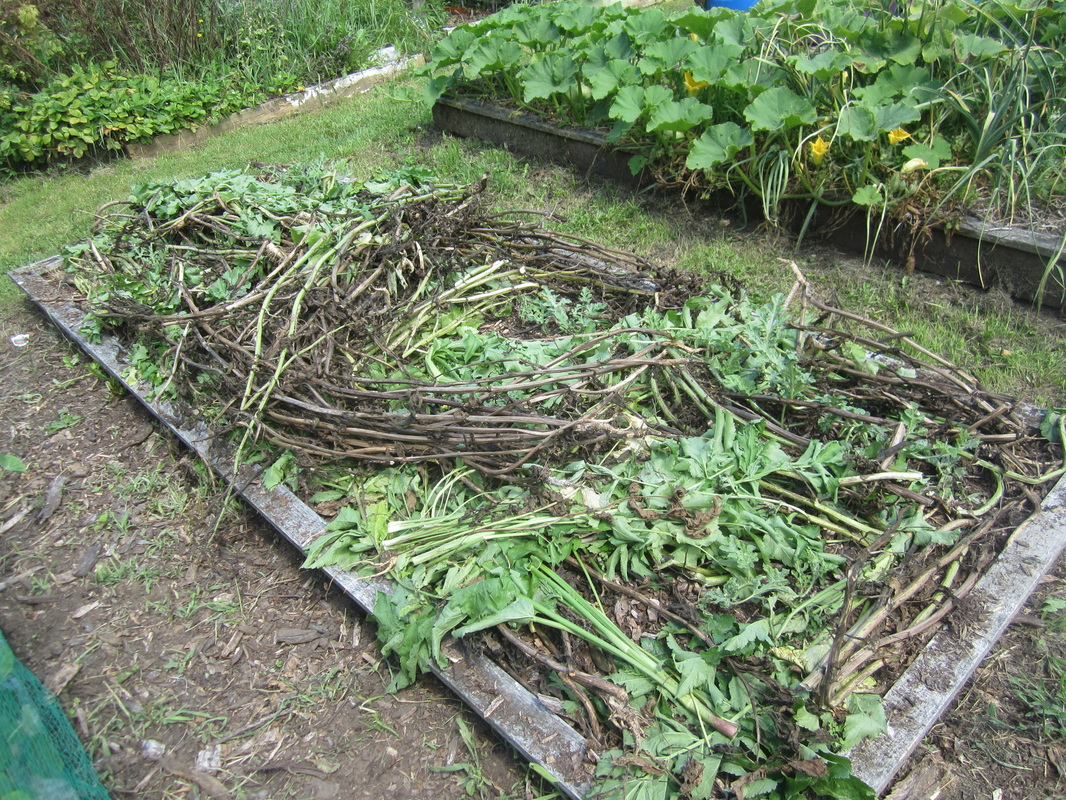
3 weeks later, I took another look at the Prinators. There was plenty of yellowing of the leaves, and they have some rust. I decided to harvest them for better or worse. Because they were mostly very immature, unformed bulbs, I decided rather than hang and store them like I usually would, to just use them up in various preserving ways. Here's a pic of the pathetic Prinators after I cleaned off the outside layers of dirty covering, trimmed the roots, and chopped off the leaves (as I'm going to use bulbs and green stalks).
Picture

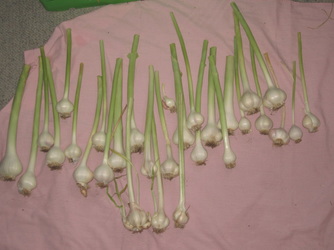
Harvesting & Curing Garlic

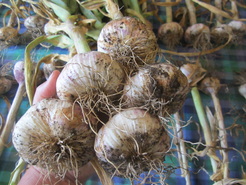
When you decide it's time to harvest your garlic, loosen the soil around each bulb and gently lift it out of the ground. Before storing, garlic must be cured by allowing it to dry thoroughly. If you're going to preserve your garlic by immediately making such things as garlic oils and garlic butters for the freezer, or by pickling, you can skip this step. (Recipes below). Otherwise, hang your garlic up by tying small bunches with strings, and hang it somewhere airy and dry, out of the sun. I use our semi-enclosed carport, and hang the bunches from washing line ropes strung up in there. Cure for about 2 weeks.

The next step is "cleaning" the garlic. Some people like to do this before curing, but I do it after. Cleaning involves peeling off an outer layer or two (don't take too much as you don't want to expose the cloves too much) of the "wrapping" on the bulbs, along with any dirt that might be on it. Each leaf on a garlic plant is part of one layer of wrapping, so you'll be also removing a leaf or two from the stem. Be careful not to damage the cloves as you do this - I just peel with my fingers, and use fingernails to pick up the harder to remove pieces. But this can be painful - sharp pieces of dried garlic wrappers can poke you right under the fingernails! As well as removing the outer wrapping, the roots also need to be trimmed off with some scissors. Cleaning garlic is simple by takes some time - this year I decided it was too hot to work outside, so spread out a sheet on the living room floor, put a nice cold drink close to hand, and watched a DVD while I cleaned.
Picture
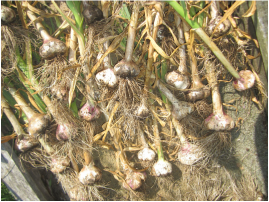
Above: Garlic just lifted from the ground.
Below: Cured and cleaned garlic, ready for braiding.
Picture
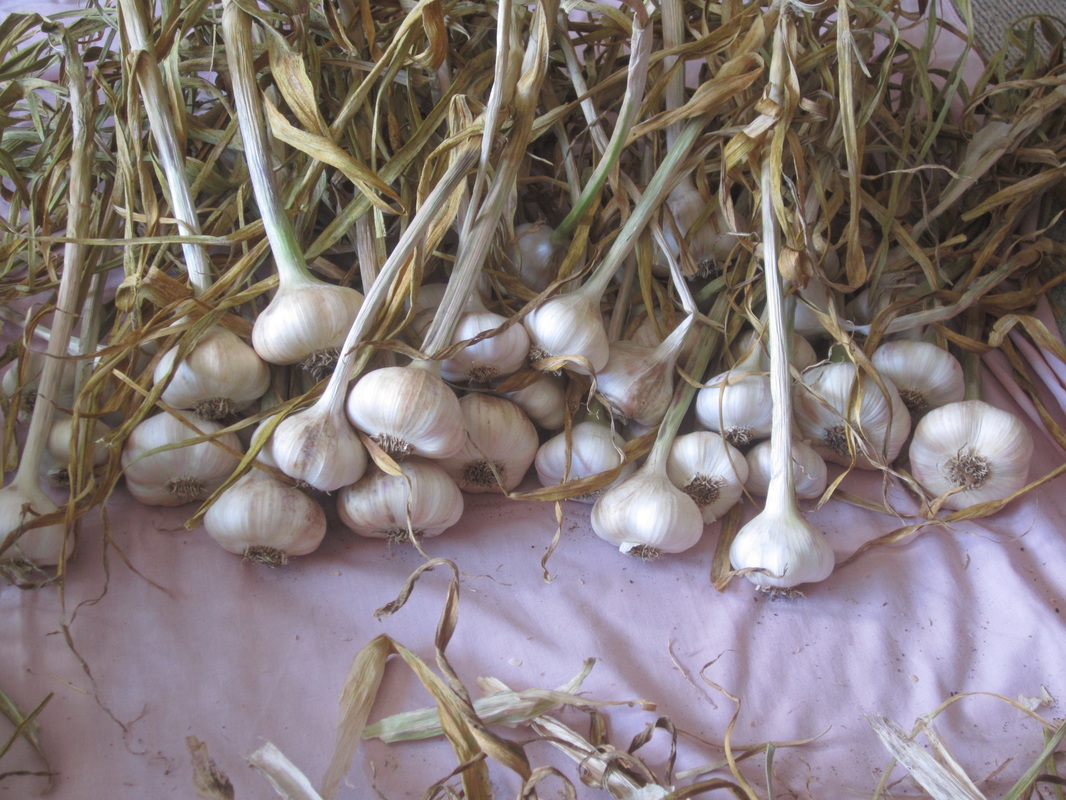
Now your garlic can be prepared for storing. Some folk like to just cut off the stems above the neck of the bulb, and store the bulbs in loose mesh bags or in trays somewhere dry. I prefer to braid them - a braid of garlic hanging on the wall is a great decoration as well as being functional, and I can see at a glance how much garlic I have left, or which bulbs might need using first as the season progresses.

Braiding Garlic

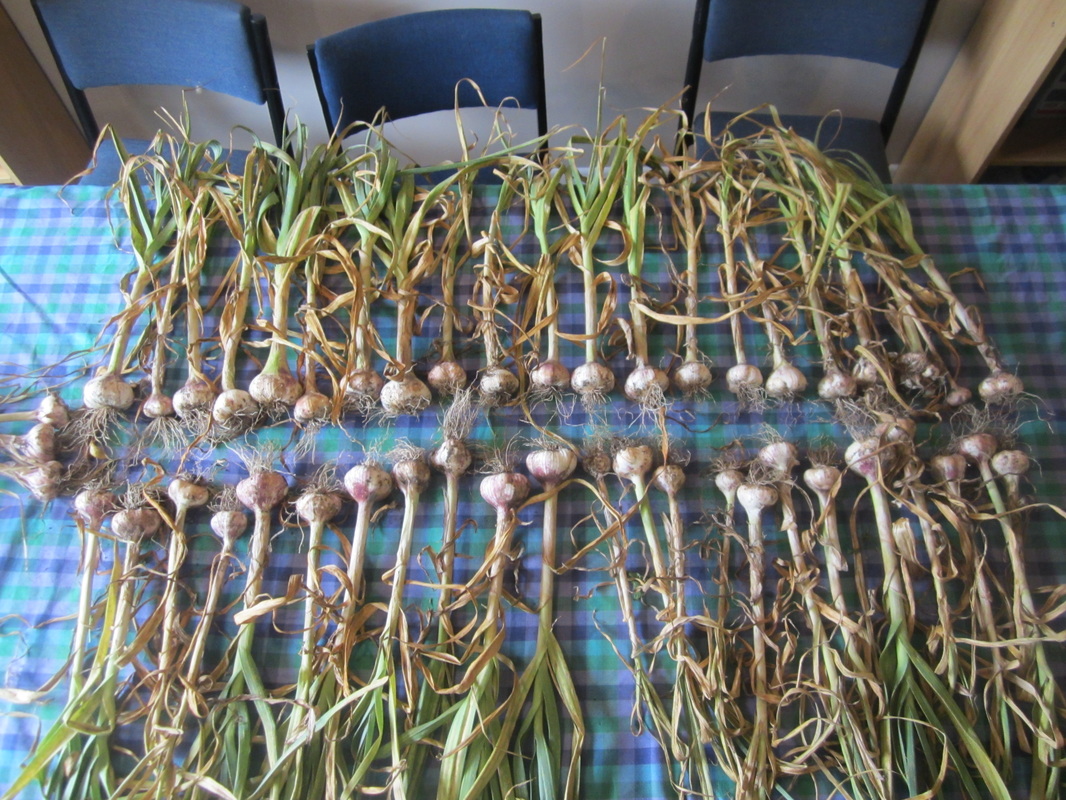
If you know how to do a simple three-stranded plait, then you can braid garlic! It's not very difficult at all, but your results will become neater with practice. I find it useful to prepare by laying my garlic out in groups by size, so all the biggest ones are together, the middle sized ones are together, and the smallest are in their own pile. The bottom of the braid will be formed with the biggest bulbs, and you'll work upwards from biggest to smallest, so it helps if the right ones are easy to grab. The first year I did this, I followed a recommendation to use the biggest bulbs up the middle of the braid, with smaller ones to either side. That's fine too, but I find just going in size order seems to make it easier to get a neat braid.
Picture
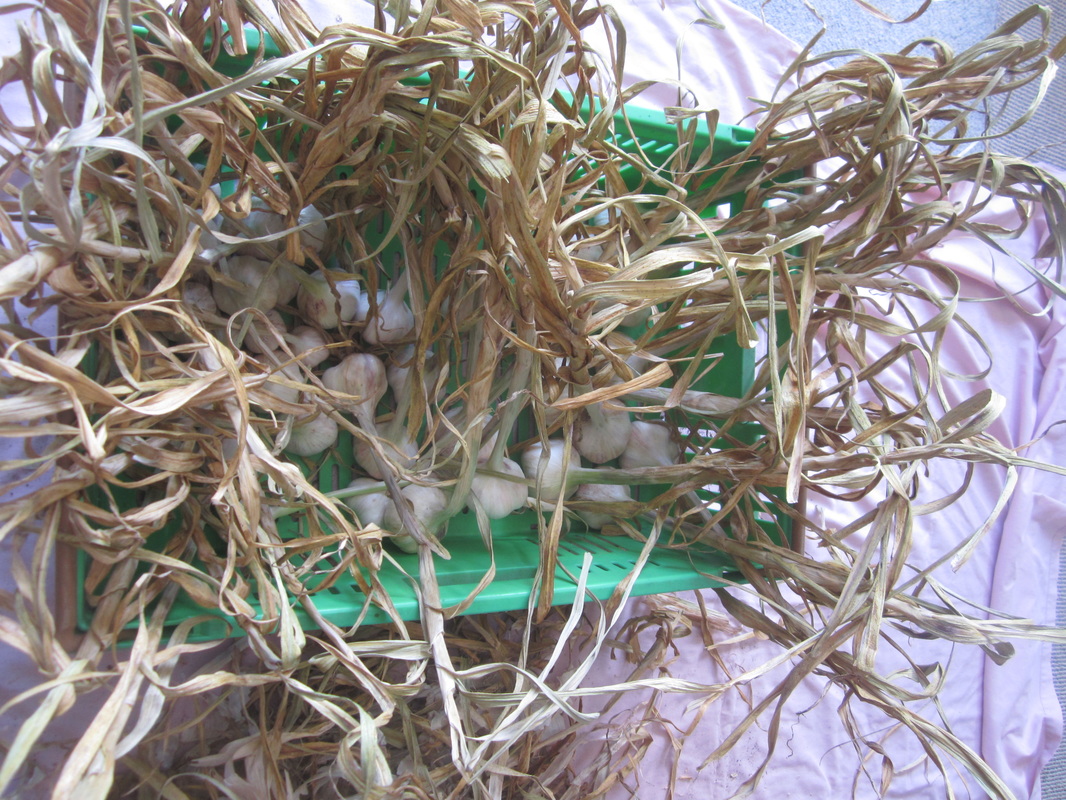
To start the braid, pick three of your biggest garlic bulbs. Lay one down with the stem pointing directly away from you. Lay the other two on 45 degree angles, crossing the first. Now, you can secure this bottom part of the braid in one of two ways - you can simply tie some string around the stems firmly and knot, or you can skip the string and use a fancy little twist with one stem to secure. This involves taking one of the side bulbs (the right one if you're right handed), and laying it underneath the other two rather than on top, then bringing the stalk back across the other two stems, down underneath it's own bulb and around, then back over the top of the other two to lay back on it's original angle. Here's a nice big photo so you can see:
Picture
After that, it's a simple matter of plaiting just like you did as a child - crossing each side over to the middle one at a time. But, each time you are about to place one side into the middle, you're going to add another bulb, laying it onto the braid so it's stalk joins the one that is in the middle. Starting with the above three I would next lay a bulb in the middle, joining the middle stalk. Then I'd cross the right hand stem over to the (two stems) middle, and add a bulb to the right side, laying it on an angle and joining it's stem with the now middle one. Then I'd cross the left hand stem to the middle, and add a bulb on that side, and so on. There are lots of great videos and diagrams on the internet - watch a few and then give it a go. Just keep braiding and adding bulbs, until you run out of garlic bulbs. Then braid a few more turns, and secure the top by wrapping string firmly around the braid and tying off. I tie a loop into the string, and use this to hang the braid. Or you can pass a wire through the braid below the string, and hang it with that.
Find a nice place to hang your braid. I don't put it in the kitchen, which tends to be too moist and warm, but hang mine on the wall just outside my kitchen, next to the main door - it looks nice, is an airy location, and it is easy to snip off a bulb when I need a new one in the kitchen. I tend to use up the smaller bulbs first, so that come June when I'm thinking about planting some more, there are plenty of big bulbs to chose from. The garlic hung here lasts just about right through until the next harvest, or whenever I use it up. From about August onwards, it does have a tendency to start sprouting, depending on conditions, so I check it and use up those ones first. Alternatively you can then take any of the remaining bulbs and use one of the other preserving methods discussed below.

Remember: The bigger the cloves you plant, the bigger the bulbs you will harvest, so you want to reserve the fattest cloves for planting. But, you do not want to separate the cloves from the bulbs until you're ready to plant, as doing so can trigger sprouting - therefore you want to leave your biggest bulbs intact until that time, when you will remove and plant the fattest cloves, and keep the smaller, inner ones for cooking.
Picture

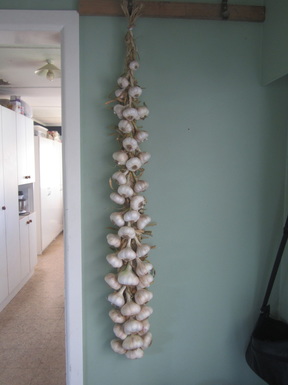
Other ways of preserving garlic

There are a number of ways to preserve garlic besides storing it as whole bulbs (hung or not) as above. This year, I have chosen to chop up the green stalks and freeze them in a ziplock bag - I will add small handfuls to various dishes I cook. I have also made jars of garlic oil which I have frozen, and a jar of refrigerator garlic pickles.
Note: Garlic is a low-acid vegetable and therefore fresh garlic should not be stored at room temperature in anaerobic conditions, such as in oils, as there is risk of botulism bacteria growing - this deadly bacteria does not show any obvious signs. Garlic and oil mixtures that are immediately frozen until use, however, are safe.
Freezing whole garlic cloves - garlic cloves may be frozen whole, peeled or unpeeled - they go a little mushy, but the flavour remains good.
Drying garlic - Cut undamaged cloves lengthwise and dry in a dehydrator until completely dry and crisp (may also be done in an oven on a low temperature). Dried garlic can be ground to make garlic salt, or stored in airtight jars or bags in the cupboard or freezer.
Garlic butter - Chop a 500g block of butter into cubes, add to a blender with about 10 large-ish cloves of fresh garlic, and blend, adding a drizzle of oil until you get a smooth paste. A pinch of herbs such as mint or parsley may also be added. Olive oil is good but has a strong flavour - if you prefer something milder, use sunflower oil or similar. Use a knife or spoon to smoosh the paste into silicon muffin trays, or roll into small logs, and freeze. Once frozen, wrap individual pieces in greaseproof paper and return to the freezer. Defrost as needed to make garlic bread, or as a lovely accompaniment to such things as a nicely grilled steak and/or baked potatoes. I made this last year, but went overboard with the amount of garlic I added. Don't!
Garlic salt - Process dried garlic in a blender until powdered, then blend with four parts sea salt to one part dried garlic powder just long enough to combine (too long and it will cake). Store in an airtight jar.
Garlic refrigerator pickles - loosely fill a glass jar with peeled garlic cloves. Cover with red or white wine vinegar (measure before pouring). Add 1 TBSP sea salt for every cup of vinegar, and dried (not fresh) herbs of choice such as bay leaves, oregano etc. Screw on lid and shake to distribute salt. Refrigerate. Will keep a long time in the fridge, so long as garlic remains fully submerged in vinegar.
Blended garlic oil - Combine in food processor 1 part peeled garlic cloves to 2 parts olive oil. Process until smooth. Pour into jars or containers, cover, and immediately freeze. The oil remains soft enough in the freezer to scrape some out with a spoon to use in cooking.
Picture
1 Comment

January Sowing & Planting

6/2/2016

0 Comments

 
Below I will list what I did and what I could have sown and planted in January, as a reference. (February's list will be posted soon). There are a number of handy websites and resources which give regional planting lists for each month. They can be a good starting point, but nothing beats local knowledge, as each area has it's own micro-climate. In fact, your garden has it's own micro-climate too, and thus the idea timing for certain plants may vary in your garden even from your neighbour's. But we all have to start somewhere - look at lists such as the one HERE, then talk to local gardeners, then observe what does well when in YOUR garden, and slowly you will get to know just when to plant what.
This year in January I sowed seeds of:
Broccoli (three varieties)
Kohl Rabi (purple and green)
Basil (purple, cinnamon and sweet green)
Kingfisher daisy (a last ditch attempt to see if I'll EVER get anything to sprout from that particular packet of seeds!)
Miner's lettuce
Dwarf beans (purple, French, yellow, and some mixed saved seed)
Salad mixes - mesclun, oriental gourmet, and something else - I put them in the shade, as lettuce etc often won't germinate in temperatures above 23C, and this time of year it is HOT!
Cabbage ruby microgreens - and they were YUM!
Pyrethrum (later then I would normally, but I want to see if I can still get some growing in pots to repel flies inside)
Calendula
A mix of saved seed which I *think* includes both Mexican sunflowers and freckle lettuce (they got mixed up a couple of years ago)
Picture
I could have also sown:
Beetroot
Cabbage
Cauliflower
Endive
Leeks
Mustard greens
Parsley
Oregano
Radish
Silverbeet
Salsify
Swedes
Turnip
NZ spinach
Cornflowers
Phacelia

Planting out
I didn't get around to doing any more planting out in January, though all of the above could have been planted out if they were ready, along with some last zucchini seedlings, onion or spring onion seedlings, and perhaps an extra cucumber or two.

January is generally a time of rampant growth (assuming enough water is available), but also of hot days - many new seedlings really struggle at this time of year, while established ones take off. It is often worth providing some shade to baby plants if you are planting out, until they get going. I also never plant during the heat of the day, but always plant out seedlings in the cool of the evening, and water well, so they have the cooler night to settle in a bit. To shade them during the heat of the day for the first week or two, I rig up an old sheet or some shadecloth on hoops or pegged to pieces of bamboo, often angled so they get some early morning sun, but are protected during the hottest part of the day.
Looking ahead to winter
It may seem odd in the middle of summer, but it's definitely time to be thinking ahead to winter. Brassicas need plenty of time to get established before the cold weather slows their growth - left too late they end up remaining small all through winter and then bolting to flower in early spring. Brussel sprouts should have been sown in December and planted out in Jan/Feb. All other brassicas, at least in my neck of the woods, need to be sown in Jan/Feb and planted out by March to do any good.
Similarly, parsnips, carrots, swedes and turnips need to be started in summer for good winter harvests. A lot of other quicker growing crops, however, can be sown repeatedly over the coming months. Always remember, growth slows right down in the coldest months, for just about everything, so it pays to think ahead and be getting thing started now or soon, to ensure plenty of fresh food is available from the garden in winter. Timed right, though, winter can actually be a very productive time!

Also, think about where you are going to store summer and autumn harvested crops such as pumpkins, squash, various fruits, herbs, onions, garlic etc. It might be time to find and wash your preserving jars, or clean shelves and wipe them down with a fungicide such as a vinegar or light bleach solution, prior to storing squash.
A little forethought goes a long way!
0 Comments

Garden Photos Jan 2016 - My Starting Point This Year

31/1/2016

2 Comments

 
It's time for a photo tour of my garden! These photos show my starting point for this year, with a few flash backs to how it used to be. Come along as I take you for a wander through my garden as it is today.....

I have felt sooooo behind this summer - last winter I ignored the garden due to being busy with other things, but somehow I never really got caught up in spring, and then it was Christmas, and January has been a month full of visitors end on end. Wonderful to spend time with everyone, but it has meant almost no gardening. However, I reminded myself of one of my "rules" when I started gardening: No beating myself up - learn from any mistakes and move on!

So, I decided to make a post showing all of my garden, warts (weeds) and all! I took some photos a couple of days ago, but the sky was very grey and the light wasn't good, so I decided to wait until the sky cleared to take new photos. Meanwhile I've been puttering a bit - an hour here or there - tidying up my plant pots, clearing a couple of beds, weedeatering a few paths - it's amazing what a difference that little bit has made! Things don't seem half as bad as they did just a few days ago!
Picture
This is the entrance to my main vege garden area - the fence and gate were built with mostly recycled or free materials by my daughter and I to keep the dogs out of the garden.

The Banksia rose on the left was a tiny, sick little plant I found at Mitre 10 2 years ago - it looked like it would surely die and I talked the guy into a discount. Clearly, it has recovered. It is thornless, has tiny white, deliciously fragrant flowers in spring. It's so lovely to walk out there and smell the delicate fragrance!

The nasturtiums on the right are all self-sown; I have them everywhere! Flowers are great on a salad.

Picture
Before we go on, let me show you a pic of what this area looked like in late 2012, before I started the vege garden. Yes folks, this garden is only 3 years old! (Info about my first year developing the garden will be put up soon).

Before I started the garden, this was just a rough area reclaimed from the paddock - low lying, wet, covered in dock, buttercup and couch grass. In winter I would literally wade out to the washing lines, and try not to drop clean items in the thick mud underneath them!

None of the garden beds existed - neither did the fence you see above or anything behind it!

Picture
Just inside the garden gate is a row of my most-used herbs growing in a series of squares I made from bricks I got off Freecycle. There are chives, oregano (now blooming and the bees LOVE it), rosemary, and behind the rosemary two kinds of thyme. Behind the herbs is a profusion of laden zucchini plants, with two Marketmore cucumbers growing in rubbish bins up over the arch I made from an old ladder. Behind all those are a lemon tree, a young triple-grafted apple, lemon balm, peas on the fence, zinnias, cosmos, a potted pomegranate, and more nasturtiums. On this side of the nasturtium-covered fence are also some beetroot, just out of the frame. Chaotic but bountiful!
Picture
On the other side of the path is a bed of rainbow silverbeet edged with spring onions. Behind them is a small table and chair (free from the dump). Behind the chair is a profusion of self-sown parsley, and lemon and peppermint geraniums. More parsley and some calendula is under a baby Damson plum in the foreground.

Picture
Beyond the zucchini is a bed full of yacon plants - yacon is a South American root vegetable that resemble kumara in appearance, but they grow in a big rosette under ground below the plants, which can reach up to 6 feet tall in ideal conditions. They bear tiny, sunflower like flowers in late autumn, if the frost doesn't kill them first. They are very easy to grow, and come up year after year from the crowns which are replanted after harvesting. Yacon can be eaten raw or cooked, and has a crisp, refreshing texture.

Picture
Behind the yacon is an arched climbing frame I built last year from dump finds - a couple of bed bases, some ends off an old greenhouse, plus some mesh and cable ties, painted with free paint from the dump. There is a choko in a pot starting to climb the side - it will cover it completely eventually, but is slow to get going this season, like may things. You can also see several dahlia plants I grew last year from seed, which have popped back up and are now flowering profusely. There are a number of volunteer potato plants here too - interestingly I've seen no sign of tomato-potato psyllid yet, though it's usually rife by this time of year.

Picture
Opposite the entrance path to the garden is a curved trellis on which boysenberries are growing. There need the spent growth pruning off, and new canes tying in. This bed and trellises was only created in the winter of 2014; the first year's growth has been incredible! Behind the boysenberries are the raspberries; they fruited very well in spring, and new fruit is now forming on the younger canes.

Picture
Next we have an area of container plants. Along one side I have a fig, a mandarin and an orange in pots. The two citrus are underplanted with strawberries and white alpine strawberries respectively. I have two clam-shell paddling pools and a half-drum planted with kumera. There are another mandarin, a gooseberry, and a cork oat in buckets, waiting to be planted out, and I have a tub full of leeks, Egyptian walking onions and garlic chives too. The tall empty drum will hold a liquid manure brew, and the blue rubbish bin will soon be planted with carrots.

I created this area by laying down doubled weed mat (to kill the grass - it will later be removed so I can extend the garden beds) and barking over the top, using whatever I could find lying around for the edging.

Picture
Next to the blueberry patch is my Herb Tree which I created last year and won a prize for, but which I haven't planted this year. I'm intending to take it apart and put it on Trade Me -  have to be realistic about the fact I just don't have the time for something that needs watering by hand every single day in summer. It's a fabulous structure for someone who wants lots of hanging baskets though!
At the end of the raspberry patch is this sweet-leafed fennel which is now well over 8 feet tall! It has regrown from last year's plants. I will save the seed and use it to brew a tea that is soothing to the digestive system and relieves wind.

The net-covered bed next to it is my blueberry and strawberry patch, with a young dwarf pear in front of it.
Picture
Picture
These 8 garden beds (pictured left), each 3.25 x 1.25 metres, are what I call my "main garden beds" - actually one of them has been replace by two 2x1m beds. The four at the front have been almost totally neglected for some time. Let's take a closer look at them all one by one.......

The closest bed is mostly full of self-sown parsnips. Parsnips are often reputed to be hard to grow, and I've had problems getting them to grow in the past. But last year I had 4 plants in this garden. I let them go to seed. Now I have parsnips EVERYWHERE lol - from one end of the garden to the other, in beds, paths, cracks in bricks - you name it. Well, they do say you need fresh seed for success - can't get much fresher than blown straight off the parent plant! I also have a bag full of saved seed for planting where I actually want it. :-)


The next bed over was carefully planted in rows of red and brown onions. Sadly, only 16 remain - the rest turned up their toes. Oh well, I have more seedlings in the greenhouse, and some other things that can fill the rest o the bed, which I'll plant out in the next week or so. The nets on steel hoops are the easiest way to keep the birds from digging up freshly planted beds!
Picture
Picture
Picture
The next bed with bare hoops was planted in broad beans, which finished a while ago and had just been left, along with all the self-sown parsnips that were growing underneath. I finally cleared the bed a couple of nights ago - interestingly, quite a number of the "dead" broad beans had new stalks sprouting from the base, complete with flowers and some baby beans. But I've had enough of broad beans for now - there are plenty in the freezer still, so I cleared the bed anyway, ready to plant in something else.

The other bed you can see here, with the fork in it, was a huge overgrown jungle of weeds, which has been ignored since I harvested the spaghetti squash, cucumbers, watermelons and parsley that were growing there last summer! I cleared it only this morning - surprisingly it only took me an hour! This is one of the advantages of using woodchip mulch - the soils become so soft and loose, weeds are easy to pull out. WHY did I put this "huge" job off so long?? It's really been bugging me! To the left is what the bed looked like this morning, before I got stuck in while it was still cloudy.

I do, however, still need to spend some time removing the rest of the mass of couch roots that have spread through it during my neglect. I'm actually intending to remove the wooden beds one by one, starting with this one, and go for row planting in heavy woodchip mulch. The bed frames are beginning to break down, and I can't afford to replace them.


In the border garden along the fence next to these beds are some rhubarb, cosmos and zinnia flowers, corn cockles, geraniums, and various types of runner beans growing up the trellis.
Picture
Picture
I picked up this single bed from the local Sallies - I've placed it over this garden bed which I planted with spaghetti squash, so they can grow up through the mesh of the bed, and sprawl all over the top of it, keeping the fruit off the ground. This morning I added some warratahs and an offcut of steel mesh, to make an "upper bunk" with some strings going from one layer to the other, so the squash can climb up.

Spaghetti squash are a small oval yellow squash that stores really well (I used the last of last season's this past weekend). It is baked in the oven, then stripped out with a fork to yield vegetable spaghetti - naturally gluten free. :-)
This old step ladder has had some mesh added to one side and the back. Buttercup pumpkins are growing up the steps and around the base. Telegraph cucumber seedlings are around the side and back and will climb the mesh. I had to start again with seeds planted between strips of wood after birds dug up all my original seedlings. So they're a bit behind!

The spaghetti squash were also planted very late - hopefully they will have time to produce this season, but if not, oh well - I'll get onto it earlier next year.

This has been quite an odd summer so far - it seems summer has hardly started! Today I saw 5 white butterflies - the first time this season! Normally the garden would be thick with them by November! Also no psyllid yet - usually a major pest by the beginning of January. Many of the plants, even if planted at the regular time, have been slow to get going. The real indication of where the season at is the self-sown plants; most of them have appeared much later than normal for their species. The only question is how late the first frosts will come, and whether there will be time for things to produce first!
Picture
Picture


This bed is planted in sweetcorn - just about time to remove the nets. More self-sown nasturtium has popped up among the corn. I should probably remove most of it.

Again planted much later than I normally would, though any time up until Christmas is usually ok here - this was sown just before Christmas on Dec 18th.
This bed has 7 watermelon vines in it - Sugar Baby and Crimson Sweet. I had old freezer baskets over each one to keep the birds off, but now they're getting too big I removed those. The dratted birds have been digging close to the roots though, so I used the parsnips and broadbeans I removed from the other bed last night and put them all around the watermelon as rough, large mulch, which should deter the birds, as well as suppress weeds and retain moisture, and give the watermelon plants a bit of extra shelter. The mulch will soon begin to settle and break down, and the vines should take over without trouble, all going well.
Picture
Picture
Picture
This bed was planted in two varieties of garlic plus bunching shallots. A random pumpkin popped up in the middle recently. Since I had failed to get most of my intended pumpkin plants in the ground, I let it grow. The back half has been harvest of one garlic variety, but the rest wasn't ready yet - it is due to come out soon.

I'm pretty happy with the ones I've harvested so far - pictured below. These are now hanging in our shed to dry before I braid them.
Picture
Picture
Along the southern fence of my garden are a couple of beds - this one has a gala apple planted in the middle, surrounded by herbs. At the moment there is Lovage, Echinacea, Clary Sage which is coming to the end of it's flowering, Feverfew which has finished flowering and is drying off, Common Sage which is making a come-back and some Dwarf Munstead Lavender. There are also white alpine strawberries which are staging a take-over, in hot competition with the weeds I need to pull out! As you can see, I have a rain gauge on the top of the fence post. This is a location not (currently) overhung by any branches that would deflect rain. I empty it once a month and record the monthly rainfall - I always put in a few mms of oil to prevent evaporation. January so far is looking pretty good!

Picture
Skipping conveniently over the two old, overgrown beds between which are (still) waiting for me to pull them out, we come to the other corner of this fence. This bed has a double-grafted dwarf pear in the middle, with a lemon balm and Queensland Blue pumpkin underneath. Rosemary is against the rear fence, and a random dahlia is re-emerging. Along the side fence there is a patch of Novella dwarf peas, as well as some chives. Novella have the most fantastical tendrils! Peas are great for either eating the shoots in a fresh salad, or for picking the peas themselves.


This north-eastern corner of my garden is a bit of a mess! The grass and weeds were chest high - I've just cut them mostly down with a weedeater. Under it all is a big coil of irrigation hose I need to pull out.

Along the fence are some tyres I planted 3-4 years ago with rhubarb, a gooseberry and a red currant - they all need moving. In the corner is a tractor tyre I foolishly planted with blackberry. I've been meaning to remove it all. I'm not sure what I'm going to do with this area - I've considered fencing it and using it as a chickens-make-compost area, or perhaps put the ducks in there; I could then tip out their poo-y pool water and it would seep into the lower-lying garden area through the ground. Hmmmm......

The northern fence is a real jungle - there are lots of blackcurrant bushes along there, but the flowering perpetual spinach, self sown leeks, nasturtium, celery and weeds make it hard to tell! I need to clear all this and plant more leafy greens, which will appreciate the shade at this time of year.

Under the second washing line is another Queensland Blue pumpkin.
Picture
Picture
Picture
This elevated seating area was one of my favourite spots last summer, it looked so pretty. Now it's overgrown and messy. The stauntonia on the right hand trellis is never, I don't think, actually going to produce fruit; I think I'll pull it out and replace it with kiwifruit. There is a grape along the fence behind it, laden with fruit, and baby kiwi fruit vines below the left trellis, but they've been overshadowed by the self-sown sweet peas I keep pulling out. The swing seat as free, recovered by my daughter, but we should have put drain holes in the seat - it tends to collect water and leaves and then get very messy. It's also awkward to weed around/behind, so I'm intending to remove it from there and put in a bench seat instead.

There is a bed of Chilean Guavas along the front of this area, just developing fruit.
The path to the paddock gate (beyond which the chickens free-range). The grape on the left, despite repeated prunings, is completely covering the four compost bins.

On the right are a row of young feijoas.

The wormwood growing in tyres at the end of the compost bins, under the grapevine, needs pruning again. I spread the clippings in the chicken's nesting boxes and house, as it deters lice and mites.
Picture
Picture
Picture
Now we're about to head around the other side of the grapevine to my greenhouse. First we pass the worm farm bath-on-a-stand, and some old shelves from the dump, filled with spare pots, also from the dump.

The greenhouse was made out of recycled windows I found on Trade Me, which my darling husband put together for me to my specifications. I come up with the ideas, and he gets to make them work. :-) Recently he put a spare window up beside it where I needed a new fence - it forms a windbreak/fence for now, and may become part of the future extension of the greenhouse - we'll see.
Picture
Picture
Picture
Picture
The shelves I use for seedlings were an old greenhouse frame, minus it's plastic, free from the dump.

This summer I'm mostly growing tomatoes and potatoes in the greenhouse, as the psyllid that plagues them in the garden don't survive the high temperatures of the greenhouse, even though I leave the doors and windows open all summer. It's only got to reach 37C for a couple of hours at a time to kill of the young. I've got potatoes I drums and spud planter bags - three varieties; two are different Maori potato varieties my neighbour gave me, the other is a variety I haven't grown before called......ummmm....something German sounding starting with "A" - will have to find the label. It's an early, but that's all I can remember right now.

I have two big Moneymaker tomatoes growing in the ground  - one on the front wall, one to the left, being trained on bamboo stakes. I also have two Sub Arctic Plenty tomatoes in buckets in the foreground, and three Tiny Tims in pots on the shelves.

There is also a Pepino out of frame in another bucket, and a lemongrass in a pot you can just see on the left near the end of the walkway. Should probably move that out into the sun.
Inside the greenhouse, I'm growing a couple of Tigerella tomatoes on the trellis of the side wall, some Kohl Rabi under the shelves (never grown them before, and expected white butterfly to be a major problem out in the garden) which also has chickweed underneath. The cyclamens I had in the house have done very well out here in the ground instead.

Along the back wall is a stainless steel bench and double sink - very handy for potting - which I got from Freecycle. Eventually we will connect the taps/mixer up. A piece of white trailer panel is up on the wall as an effective whiteboard where I list what needs sowing/planting each season. And a pin board also comes in handy.

The freezer baskets mounted as drawers underneath hold punnets and small pots.
Picture
Picture
Picture
Moving to the front yard now, the row of dahlias and other flowers, along with two young Kowhai trees, which I planted a few months ago are starting to do well. They've been netted to keep the birds off - time to remove that now.

Nice to have some bright, easy care flowers just inside the driveway gates to welcome visitors. :-)
I had plans to clear this area off again this summer and grow all my pumpkins here, surrounding black compost bins which I would half-fill with half-done compost and water the pumpkins through the bins, providing them with compost tea. But I just never got there.

My plan for winter is to hopefully have my husband build me a massive walk-in berry cage here, so I can plant currants, gooseberries, raspberries, boysenberries and strawberries under permanent protection from the birds, and access it without the hassle of lifting bird netting every day.
Picture
Picture
The row of tractor tyres that divides our parking area from the garden, planted last year in carpet roses and alyssum, and suffering from neglect (weeds) Need to tidy these up.
Well, that concludes today's photo tour! I hope you've enjoyed it! And know you know what my garden looks like right now! I'll also be creating posts about what I grow and harvest each month, as well as approximately monthly update photos, though not necessarily of EVERYTHING. :-)
2 Comments
Forward>>

    Categories

    All
    Alliums
    Beneficial Critters
    Berries
    Corn
    DIY/Upcycling
    Edible Garden
    Flowering This Month
    Garlic
    Harvest
    January Garden Photos
    Monarchs
    Monthly Garden Photos
    Monthly Sowing & Planting
    Pollination

    Archives

    May 2017
    January 2017
    November 2016
    October 2016
    April 2016
    March 2016
    February 2016
    January 2016

    RSS Feed

Powered by Create your own unique website with customizable templates.