Many weeds are actually useful in their own ways, but my three nemesises in the garden are: couch grass, creeping buttercup and convulvulos (bindweed). One of the things that has been frustrating about the layout of my main garden beds (in particular) has been the way that the couch and buttercup continuously creeps into each bed from the paths and edges.
One of the key concepts of permaculture design is to minimise edges. An edge is where a cultivated garden area meets a green path or an uncultivated area. It's from these edges that creeping weeds will, well, creep! These are the battefronts of the weed war. The more edges there are in a garden, the more fronts the gardener has to try and be viligent about. In a large garden like mine, that's a losing war! Besides, who really wants to spend all that energy keeping the creeps out of the garden when one has better things to do? In a garden set up like this, each 3.25m x 1.25m bed represents 12.25m of "edge" - multiply that by 8 beds, and there's 98m of edge battleground in my main garden beds alone - which ignores all the many, many other beds I now have in my garden.
One of the key concepts of permaculture design is to minimise edges. An edge is where a cultivated garden area meets a green path or an uncultivated area. It's from these edges that creeping weeds will, well, creep! These are the battefronts of the weed war. The more edges there are in a garden, the more fronts the gardener has to try and be viligent about. In a large garden like mine, that's a losing war! Besides, who really wants to spend all that energy keeping the creeps out of the garden when one has better things to do? In a garden set up like this, each 3.25m x 1.25m bed represents 12.25m of "edge" - multiply that by 8 beds, and there's 98m of edge battleground in my main garden beds alone - which ignores all the many, many other beds I now have in my garden.
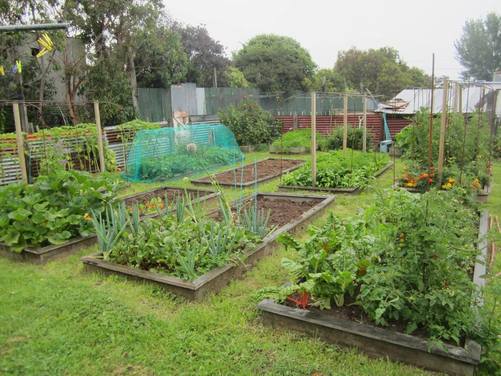 | This pic was taken in Feb 2014. I really liked the way the beds looked with the nice mown paths between them. BUT, that "nice" grass is mostly couch (and buttercup) and they are persistent devils that never cease to spread their talons everywhere they can. Since then, I have tried different things - eg laying old carpet between the beds, laying down cardboard and woodchip mulch and so on. These hold back the weeds temporarily, but don't help in the long term. These three nasty weeds will grow in, through and over carpet, cardboard, weedmat, or just about anything but concrete! I've even had couch send its roots literally THROUGH the wooden sides of the beds, and I don't mean at joins! |
I spent quite a lot of time pondering last season as to how I was going to change this. I had also observed that the more or less north-south lay out of these beds made tall things growing in them particularly vulnerable to the gale force westerlies we have here on and off most of the year, and thought it would be better to relay the beds east-west when or if I change them. Added to which, these wooden beds, built in late 2012, were made from untreated timber, and while they have lasted way longer than I expected, are definitely on their last legs (and the cost of replacing them with the same is prohibitive - I paid $1/m for the timber then, and the cheapest I can get now is over $5/m).
Naturally, I had all sorts of wonderful plans to overhaul this part of the garden over winter, so it would be all ready for spring planting. Suffice it to say, it never happened! In fact, with one thing and another, I basically had no time in the garden over winter. Even my intention to simply mow everything flat and cover it with black plastic to kill off the weeds until I could work on it didn't come to pass, except in one small corner.
So, when spring rolled around, these garden beds looked like this (pic taken 9th Oct 2017):
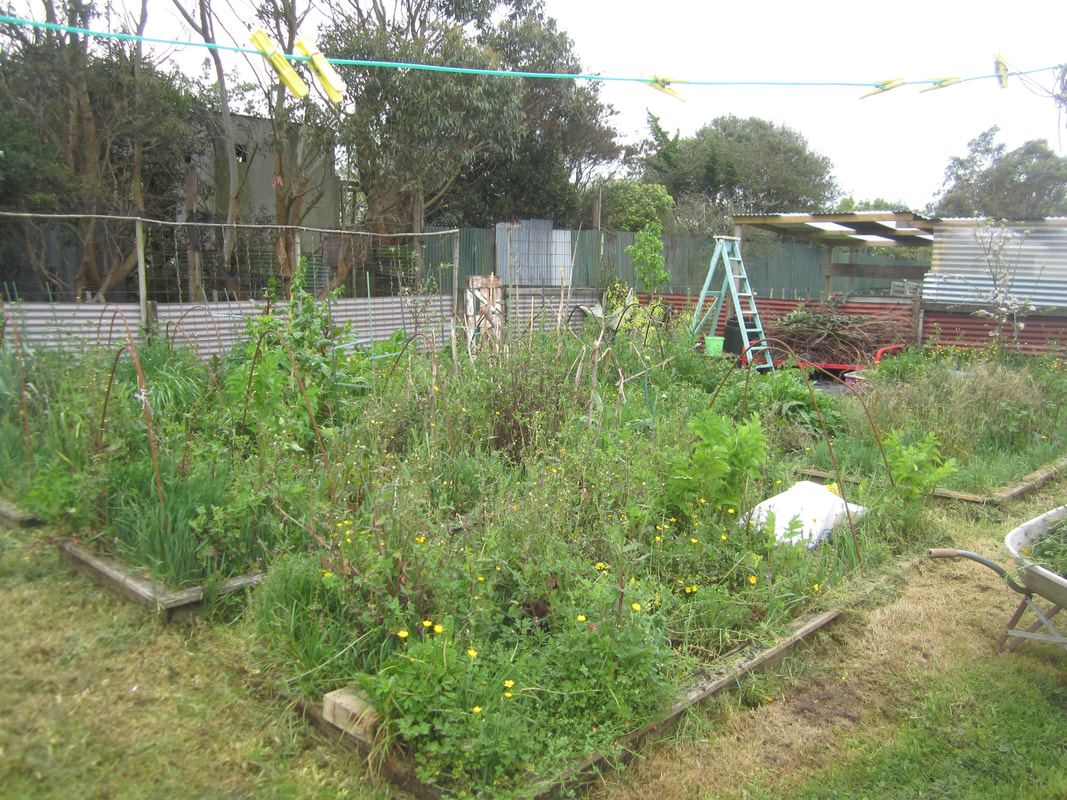
There are some silverbeet, leeks and chives in there, but otherwise, mostly just weeds. After the usual self-kicking for not having gotten it at least mulched or covered over winter, I did a bit more pondering and finally came up with a plan that just might work!
Key points:
- All the current wooden frames need to come out as they're falling apart.
- Remove all the hoops, stakes and other miscellany still in there from last season.
- Re-orientate the direction of beds.
- Minimise "edge"
- Create a barrier around the new edge that will keep out my three nemesis weeds.
- Make a "once off" major effort to clear these weeds from within the newly edged area, and thereafter minimise digging.
After much looking, pondering, walking around, and imagining, I finally came up with, what if I:
- Dig a 30-40cm trench around the outside edge of the garden area. This is deeper than I find roots of these plants. Yes, I know they can theoretically go deeper if so inclined, but I'm hoping to keep them disinclined.
- Line the trench with root barrier, a flexible, UV stablised plastic product that comes in a 60cm tall roll, 5m long. It's designed specifically to keep out roots.
- Curve the bottom of the root barrier up, away from the garden - the theory being that if a, say, couch root hits the barrier and then heads down looking for a way through, it will hit the curve and be turned back away from the garden.
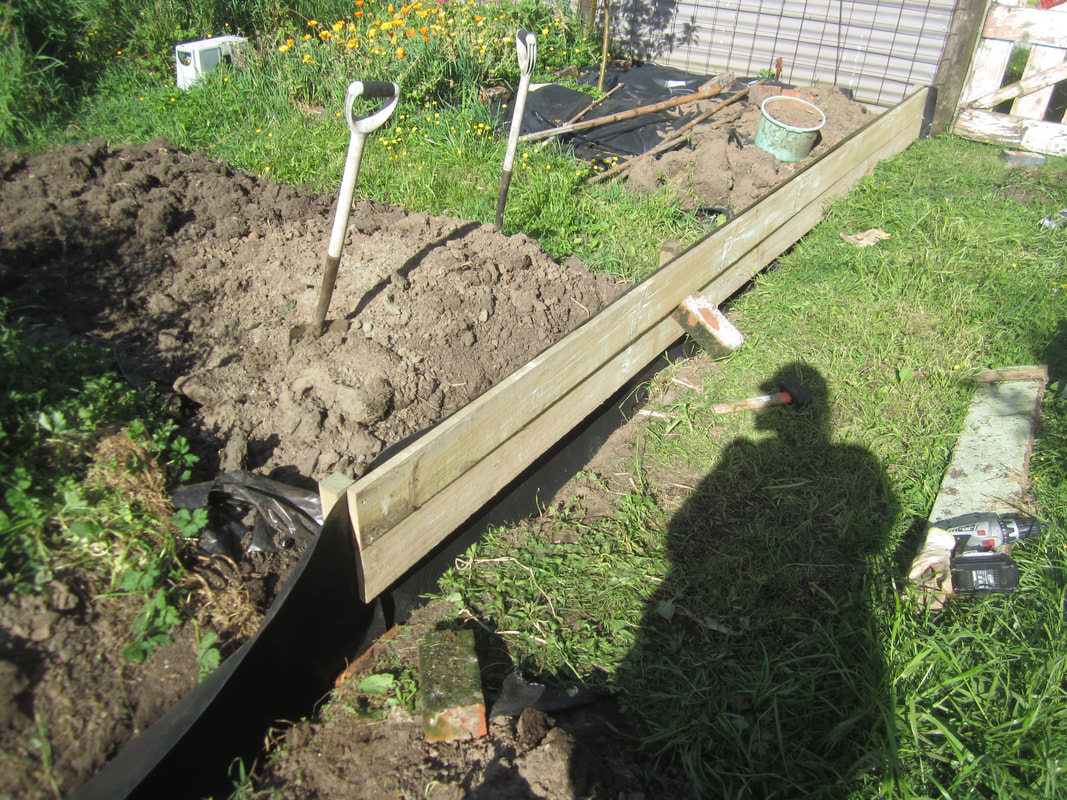
- Use treated timber to create 30cm high edges above ground, with the upper part of the root barrier being behind the timber, between it and the soil. This allows me to use timber that will last longer, but to effectively line it so that any contaminates aren't leeching directly into the soil of the garden beds.
- Use stakes to secure barrier and edging, and screws to hold them all together.
- Work on the edging bit by bit - tackle one long side, then turn over the soil adjacent to it to create the first bed or two (so I can get them planted) before working around the next side and so on. Because the season is already under way and I have things needing planting! Make sure to overlap the root barrier at any joins between sections.
So, this is what I have started to do. Pics below of the first long side being installed. It was a bit of a learning curve figuring how to make the theory actually work. But not overly difficult once one got going.
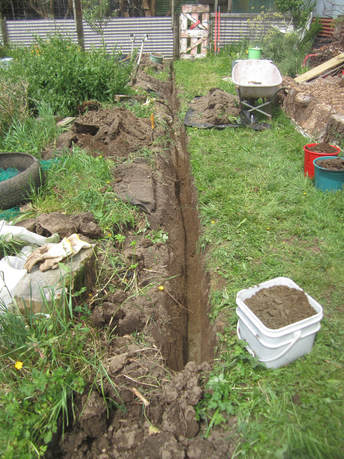 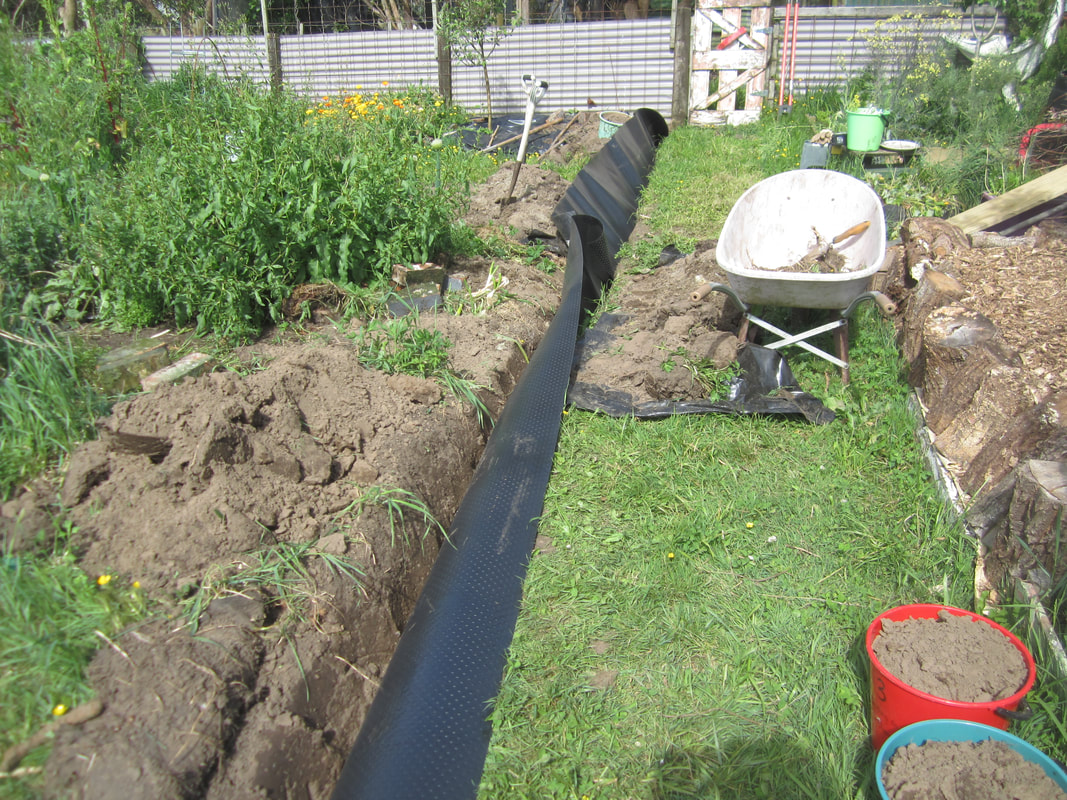 Laying out the rootbarrier - 2x5m rolls, overlapped at the join. | First 10m long side. I found it easiest to first dig a long shallow trench using a spade - going one spade's depth. And then to get down on my hands and knees with a hand trowel, and scoop out more soil along the length until I had it as deep and level as I wanted. Because the ground slopes upwards at one end, I decided to make the bottom of the trench level, which means the wooden sides will be partly buried at one end, with the thought that eventually I'll shift dirt around to make the garden itself more level. This higher end was created by a load of topsoil dumped there years ago, and never spread, except by the kids digging and playing in it, creating tunnels and mines, so that it slowly creeped out but remained a high spot. It no doubt helps that my soil is quite sandy, so not as difficult to dig as it could be. Also, the sand line just happens to be 30cm down, so making it easy to get the trench floor level - I just scraped and scooped until I was going a little down into the sand all along. 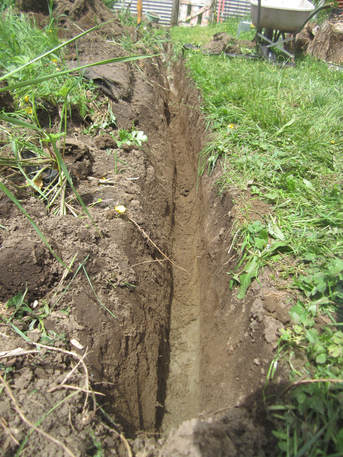 |
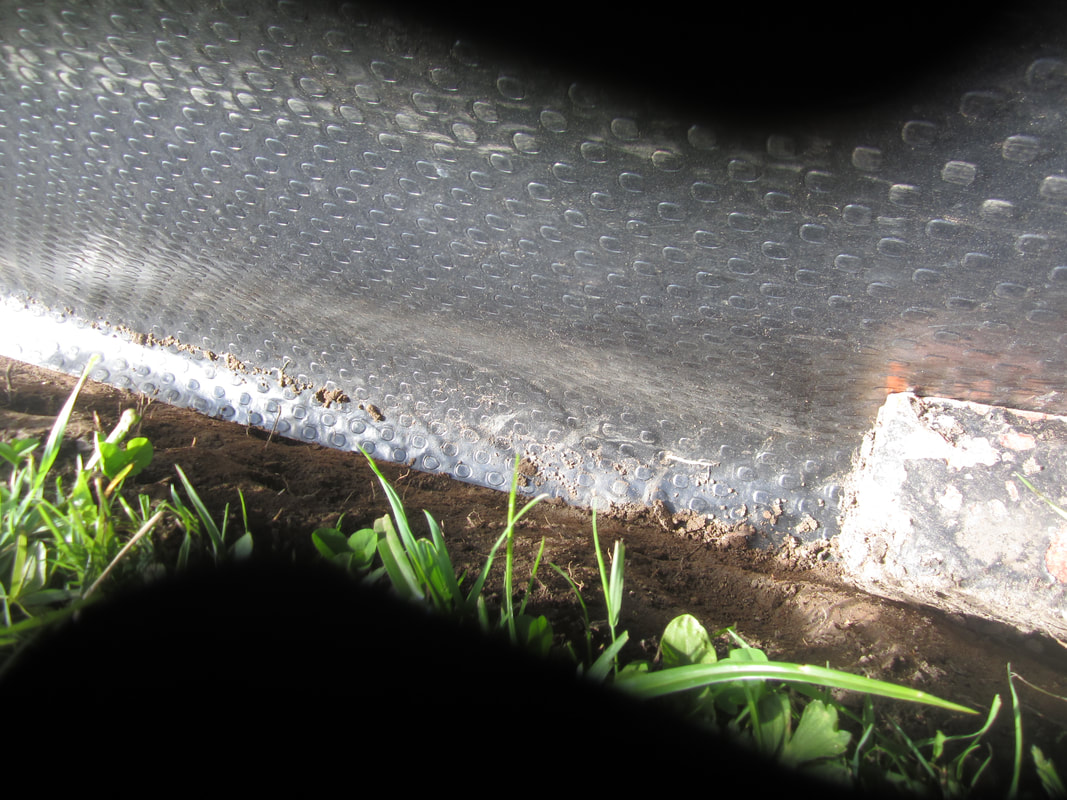 It's hard to get a pic of the curve at the bottom of the root barrier (above). I used old broken bricks to hold the plastic down in the curved shape. At the far end of the trench, I carefully cleared all pieces of weeds/roots from the post beside the gate, and firmly screwed the root barrier flush to the post above and below ground. | 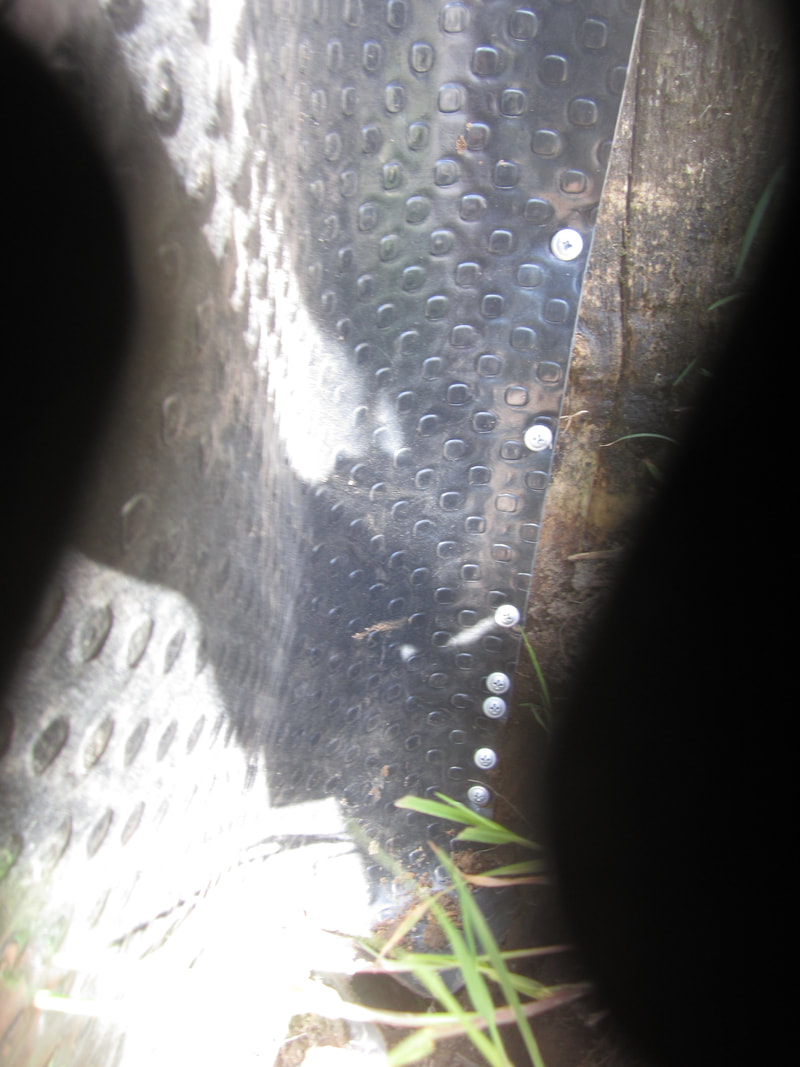 |
 | Next I hammered in 75cm stakes at each end of the first 5m section, and propped up 2, 5m lengths of 150mm timber, adjusting the position of the stake until I would be able to screw both these and the next lengths of timber to it. I added 60cm stakes at intervals between the 75cm ones. The root barrier is between timber and stakes, and screws through them all hold it in place. Then repeated with the next section, leaving enough root barrier hanging out at the leading edge to overlap with the next section when added later. |
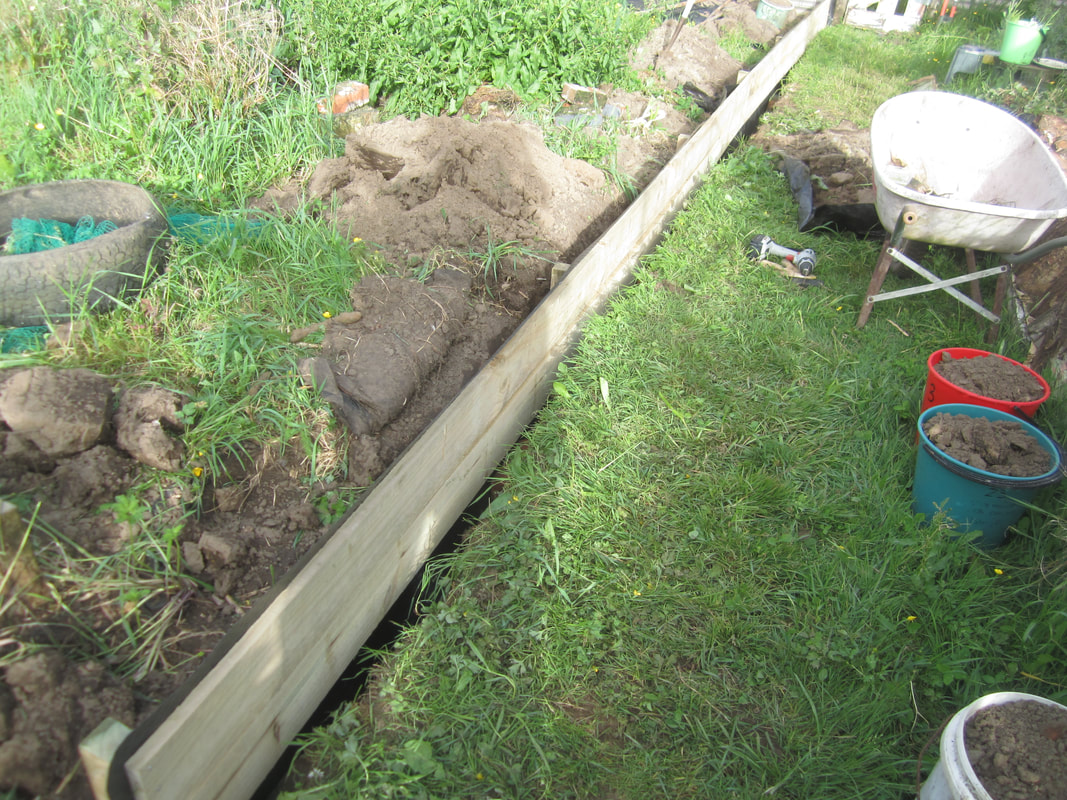
| Then I back-filled the trench on the outside of the edging. Finally, added small screws along the edge to hold the root barrier firming to the timber all along. 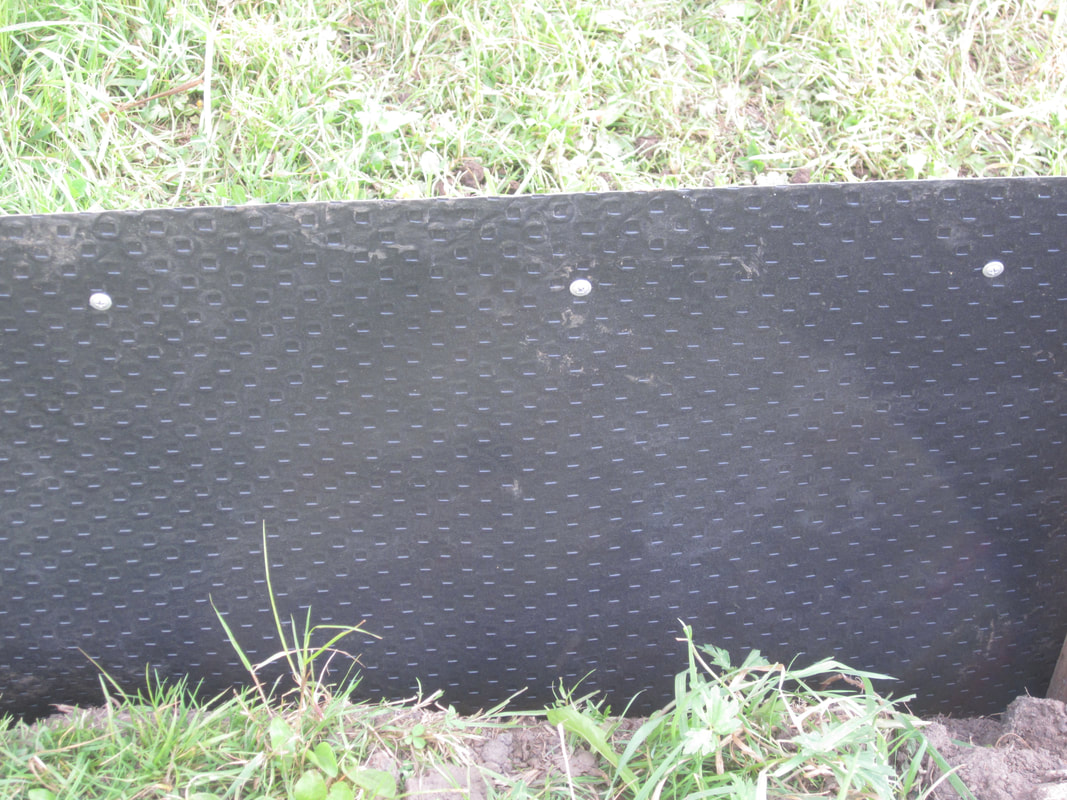 | 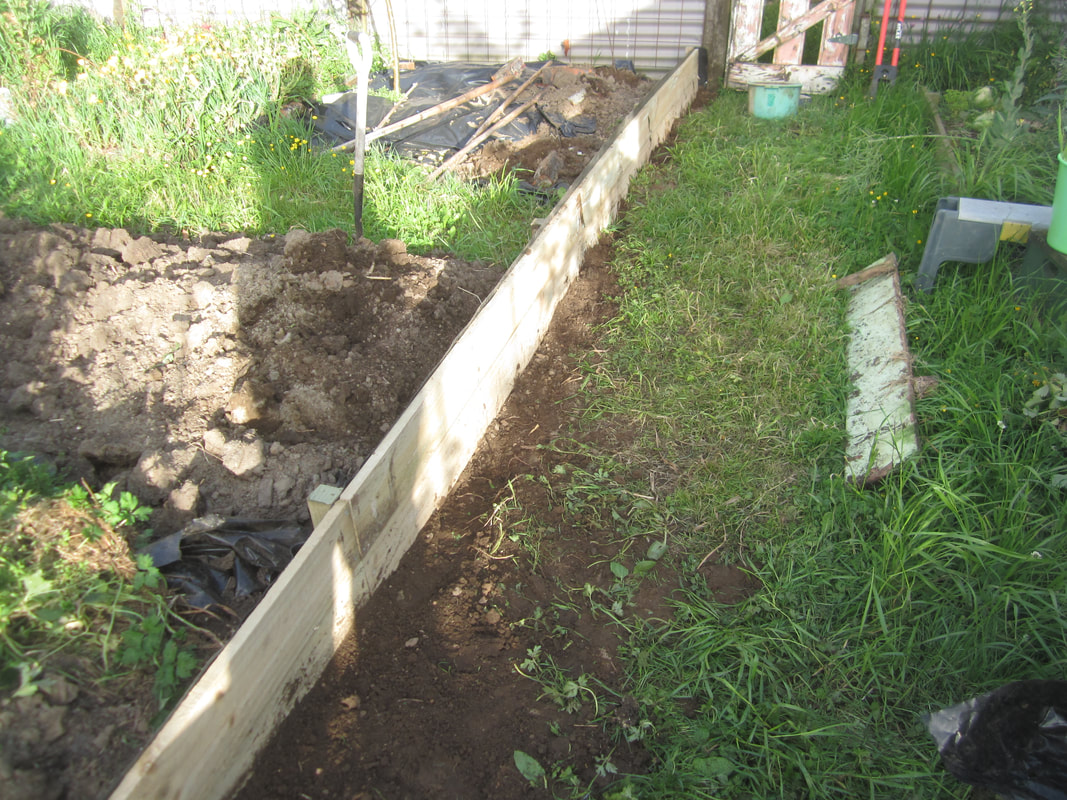 |
I'll be repeating this around the other two open sides of this section of the garden, and just placing root barrier along the outside edge of the fence that makes up the fourth side.
Next post: the digging and prep of the first half of the garden area, to eliminate weeds and create the first beds for planting.
Next post: the digging and prep of the first half of the garden area, to eliminate weeds and create the first beds for planting.
 RSS Feed
