Thrifty Kiwi
Like our Facebook page
  • Home
  • Blog
  • Homesteading
  • Gardening
    • 2025 Garden
    • 2021 Garden Blog
    • 2019-2020 Garden Blog
    • 2017-2018 Garden Blog
    • 2016-2017 Garden Blog
    • Kiwi Urban Homestead 2013-2015 Garden Blog
    • Pest & Diseases
  • Recipes
    • Autoimmune Protocol
    • Meals and Snacks
    • Preserving
    • Household Cleaners
    • Health & Beauty
  • Skills
    • Menu Planning & Grocery Shopping
    • Money & Budgeting
    • Preserving How-Tos
    • Housekeeping
    • DIY
    • How to Find Stuff Free or Cheap
  • Animals
    • Critter Blog
  • About
  • Contact

Apple Cake with Crunchy Spiced Topping

19/2/2018

0 Comments

 
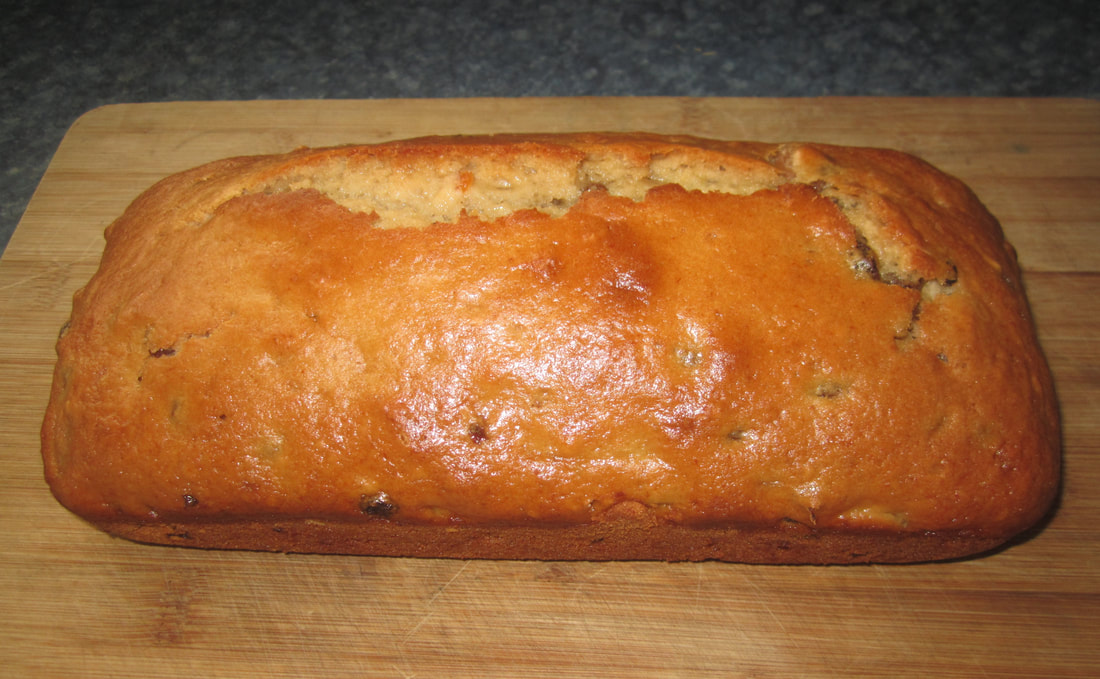
A family favourite, the original magazine cutting has been in my cookbook for decades! My daughter has been the one to make this for years now, so I'm a bit out of practice, but knowing how much she likes it, I cooked one for her birthday this week. She adds the tip that she likes to add extra slices of apple arranged on top before cooking, which looks really good. I'll do that next time. :-)

A simple to make cake, this would also be wonderful with some whipped cream, yoghurt or ice cream, or with custard.
Ingredients:
2 2/3 cups (370g) wholemeal flour
4 tsp baking powder
1 tsp ground cinnamon
1/2 tsp ground nutmeg
1 cup caster sugar
185g butter (melted)
1/2 cup water
3 eggs, lightly beaten
3 medium (450g) applies, peeled and sliced (plus extras to decorate top)

For topping:
60g butter, melted
1/2 cup firmly packed brown sugar
1/4 tsp cinnamon
1/4 tsp ground nutmeg
Picture
Method:
Grease a 22cm round cake pan, line base and sides with baking paper. 

Mix dry ingredients in a large bowl. Add butter, water and eggs, mix well. Fold in apples. 
Spread mixture into prepared pan. (Optional: top with extra apple slices). 

Mix topping ingredients together. Carefully pour/spread over cake mixture. 

Bake 150C for 1 3/4 hours until cooked through. Cool in pan. Carefully turn out cake and remove paper. Serve.
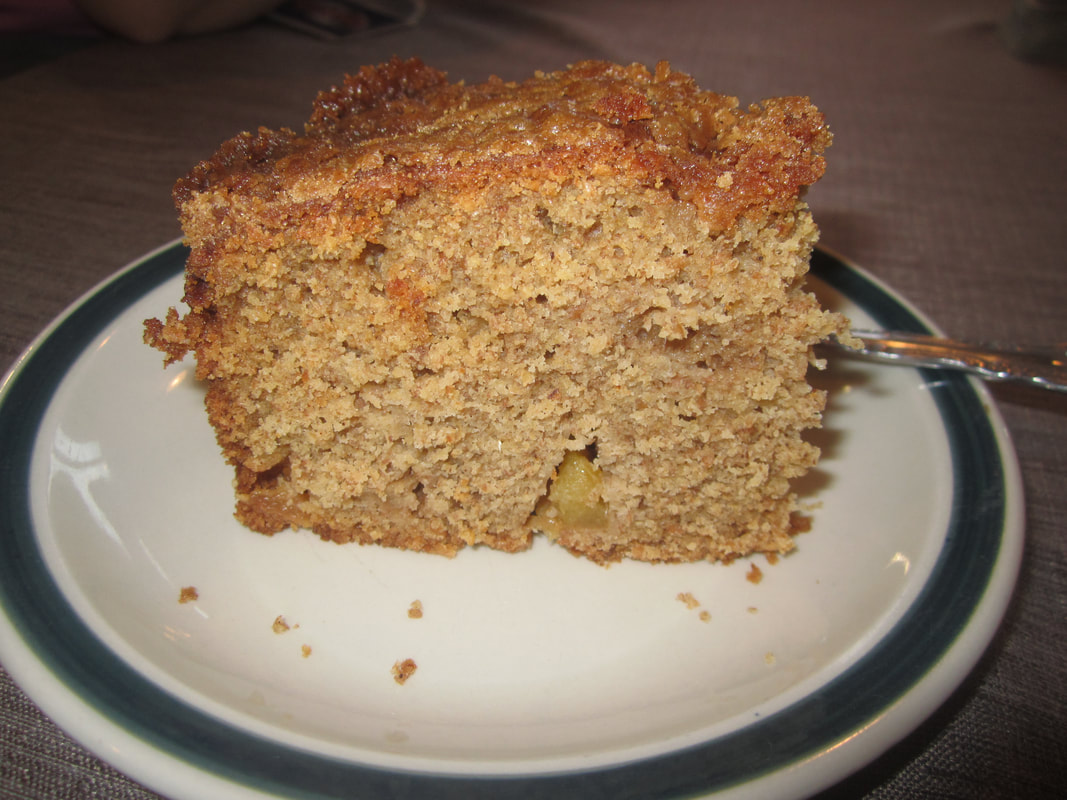
Picture
0 Comments

Duck & Bacon Casserole

19/2/2018

0 Comments

 
We raise our own ducks (they're super fast growing and quite hardy). This recipe could be made with domestic or wild duck meat. The secret to tender duck is twice-cooking; one fast, one slow. This recipe results in tender, melt in your mouth meat.
Picture
2 Ingredients (4 servings):
5-600g duck breast or other meat, cut into small cubes
2 rashers bacon (Henderson's dry cured old fashioned bacon is great if you want to avoid additives etc)
2 onions, diced
2 carrots, peeled, halved, and sliced
2 stalks celery, diced
2 bay leaves
Snippets of fresh herbs from the garden (eg chives, parsley, oregano and rosemary)
400ml home made chicken stock 
2 TBSP apple cider vinegar (this tenderises meat)
1 tsp sea salt
1-2 TBSP coconut oil
Cornflour for thickening
Optional: any left over saved drippings or fluids from cooking steak, meat patties, roasts or similar home made meals, fat removed (extra flavour)
Picture
Method:
Heat oil in frying pan. Add diced duck, and saute until lightly cooked through. Tip meat and all fluids into oven proof casserole dish. Fry bacon in frying pan. Remove and dice. Add to casserole dish.
​Add all other ingredients except cornflour. Stir. Cook at 150C for 2 hours, stirring occasionally. 

​Remove bay leaves.
Mix cornflour with water to form runny paste. Add to casserole, stirring to combine. Return to oven for 10 mins. 

Serve with rice or cauli rice and seasonal vegetables. 
Picture
0 Comments

Home-made Sausages

12/2/2018

0 Comments

 
A while back I asked our butcher to make some sausages with straight meat from our sheep, no additives, flavourings or fillers. I have multiple food allergies, and wanted to see how they would taste. They really were tasteless, and so I put off using them for some time. However, as part of my current Spend Next To Nothing Challenge, in which I also want to empty the freezer of things that have been hanging around for a while, I started to get creative with these, making them into my own handmade sausages. My husband loves sausages (ask him what he wants for dinner and that's his default response lol), so this way he gets to still have sausages when I'm not buying anything. After some playing around, I came up with a really tasty mix. This would be easy to replicate with any suitably finely processed mince - you can use an electric mincer to make it at home, or ask a butcher to do it, or just try putting mince in a food processor and processing it until smooth (haven't tried that last yet - let me know if it works!) 

When we get more sheep butchered, I'm going to ask for some of the meat to be made into plain sausage meat and bagged - I will then use this recipe or variations of, and may also get some casings and stuff them myself. However, sausages formed by hand with no casings work just fine, as below. 
Ingredients:
500g plain sausage meat
Quantities of various fresh herbs
2 dessertspoons dried onion
1 tsp garlic powder
1 tsp tumeric
1 tsp ground coriander

(Feel free to use whatever spices and herbs you like)
Picture
Method:
Wash herbs, shake off water. Strip leaves off woody stemmed herbs like oregano, thyme, rosemary. Place in food processor with other herbs such as parsley, nasturtium leaves etc. Process, scraping down sides a few times. Add dried onion and whiz for a bit. Add sausage meat (squeeze from casings if necessary), garlic powder and spices and whiz until well combined. 

Working with wet hands, form into 6 sausage shapes (all that rolling of playdough you once did will now come in handy). 

Heat oil in frying pan - I use a combination of coconut oil and olive oil. Fry over medium heat, turning often until browned on all sides and cooked through. Serve with tomato sauce and your choice of vegetables. 
Picture
Picture
Picture
0 Comments

Making Bread By Hand

12/2/2018

0 Comments

 
Making bread is very simple at it's essence, but can be daunting for the newbie; there are a few tricks to the process that you learn from experience or someone telling you, that can make all the difference. I used to make bread by hand every day - grinding the organic wheat in my grinder, making the bread, and then cooking it in a wood-fired coal range with no functional temperature gauge! But it took me time to get to that point - and many failures. A friend set me right. :-) For the last number of years I've mostly made bread in a breadmaker (with the home-ground flour or without), but with our number at home dwindled down, it's not worth bothering with a breadmaker - easier to make smaller batches to suit us by hand. 

But that reminds me of a story....with an important lesson.....
Back in my early breadmaking days, Y2K was a *thing*. For those of you too young to remember, the theory was that all the world's computer based systems were set up with an internal calendar that only went up to 1999. The hypothesis was that when the year rolled over to 2000, all those computer systems could have a meltdown, and suddenly we'd be without power, water, fuel, check out registers etc etc etc. I.e. global disaster! So a lot of folk started prepping for Y2K by stockpiling food and water etc. Now a lot of the homeschooling families we knew were large, and making their own bread was important. So some of them ordered in large amounts of wheat for breadmaking. Ordering a ton (a pallet load) per family was not uncommon. One family we knew did just that. Being the curious sort who likes caculating, I asked some questions....how long does it take you to grind enough wheat to make bread using your hand grinder? (30 mins) How many loaves does your family use per week? (8-10 I think). Who's going to do all that grinding? (the kids) How long will all this wheat last? (I did some figuring - about 2-3 years worth). They were kind enough to allow me to buy a bag of wheat from them to make my own bread with. I had a fancy electric grinder - 5 mins for me. Now, I started making bread. I tried it by hand, by machine - every time, the loaves were dense to the point of inedibility! I adjusted everything I could think of - same results. I had just about given up when we visited another friend's place for lunch. She served up beautiful home made bread, made with wheat she ground, in her breadmaker. OK - what are you doing that I'm not? I asked. Her first question was "Where did you get your wheat??" When I told her, she informed me that lots of folk she knew had got wheat from the same source, and it was all too low in gluten to make good bread. She suggested I feed it to the chickens and buy some good breadmaking wheat from another source. That's when I learned that gluten content of wheat varies season to season and by variety, and that good suppliers test the content of the wheat they get in, and mix lower-gluten batches with high-gluten ones to give an overall effective result, if it's being sold for breadmaking. 

In breadmaking, gluten is very important - it's the protein in bread that gives the dough it's elasticity. As the yeast works, it releases carbon dioxide, and the elastic dough traps that gas in itself, causing the bread to rise. With low gluten, litte CO2 is trapped, and the resulting bread is dense. (That's the simplistic version, but you get the idea). So if you have trouble making good bread, and you've checked you're following all the steps right, then check the source of your wheat or flour and it's qualities. 

How to make bread....

One of the things I learned to do is to allow plenty of rising time. I do a triple-rising, with the first one being overnight. This makes for a better textured loaf. And also has health benefits - long, slow ferments (ie rising) alter the composition of the wheat dough, making it more digestible. Today's commercial bread is forced to rise in an incredibly short time, and is nowhere near as good for you, other ingredients aside.

This is one of those things I started doing for convenience - with no internet access living in a remote spot, I had no one to tell me this was a good idea. What I did have was 5 young children, and getting up early enough to make decent bread ready for lunch every day was not convenient. So I would set the dough to rise the night before, knowing it would often "over-rise" and collapse, and then just beat it down in the morning and do the second rising before shaping into loaves or buns, doing a final rising and baking. These latter risings took way less time if they'd had an overnight-er first, the texture was better, plus I saved the initial mixing time by doing it the night before. 
Picture
Picture
Ingredients: for two loaves of any shape or 24 normal sized buns (in my pic here I've made 6 larger hamburger buns with half the batch)
8 cups flour - plain or wholemeal or a mix. The pictured bread has two cups wholemeal.
4 tsp sugar
2 tsp salt
3-4 TBSP olive oil
4 cups warm water
2-3 tsp yeast granules or 4 tsp Surebake yeast (Surebake has other additives to make better textured bread, but they're not real good for you). 

Method:
1) Mix boiling water and cold water in a bowl until you get a nice, warm water. It should feel warm when you put a finger in it, but not hot (hot will kill the yeast. Cold will not make it rise). If using yeast granules, stir into water and set aside to activate for 15 mins, at which point the mixture should be very frothy. If using Surebake, just put in with sugar in the next step: 

2) Place flour in a large bowl. Make a well in the centre, and a small valley on the outside along one edge. Place the salt in the valley, and the sugar in the well (along with Surebake if using). Pour the oil along the valley too. 

3) Pour the water and/or yeast into the well. Using a flat knife, begin stirring from the middle outwards, mixing the liquids with the flour, aiming to incorporate the salt near the end of the process. The resulting dough should be quite wet and sticky - that's fine - but not total mush, though it actually doesn't matter if you make quite a wet dough at this stage (and sometimes gives better results). Ensure fully mixed and everything is sticking together more or less in a big lump. 

4) Coat the inside of a very large bowl (ideally glass or steel) with oil. Dump your dough in the middle, and turn it over once so it gets a bit oiled. Cover the bowl  with a damp teatowel or some glad wrap. Set aside in an ideally just slightly warm location, but room temp is fine unless extremely cold. Leave overnight. If your bowl is not very big, then divide the dough and place in 2 or more containers. You want room for a lot of expansion without overflow!

5) In the morning, the dough should have risen considerable. If it rose and collapsed, that doesn't matter. Using your fist, lightly pound down on the surface of the dough until it has shrunk. Now sprinkle a handful or two of extra flour around the edges. Begin kneading by drawing up one edge and folding over, pressing down. Turn slightly and repeat. Continue to lift, fold, press over and over, incorporating the flour, and adding more little by little if the dough is still sticky. Once it's of handle-able consistency, turn out onto a lightly floured and continue to knead. Aim to knead for about 10 mins, but know that if you've never done this before, your arms will start to get tired and protest (it gets easier with practice!). The more kneading you do, the better for the dough, as kneading incorporates the trapped CO2 more evenly through the dough, forcing it into smaller and smaller spaces. This is the part where experience will benefit you - you are aiming for a smooth feeling, elastic dough that is not sticky when kneaded. Once you've got the hang of how it should feel, your bread making will be consistently successful. 

Once you've kneaded it, return to a clean, lightly oiled bowl and cover. Set aside in a warm place until doubled in size - about 1 hour. 

6) Now, divide the dough in two, and form into loaves or buns. It can be placed in two large loaf tins, or made into hand-shaped loaves, or plaited, or rolled into buns of whatever size you like. Place the resulting loaves or buns in tins or on a tray, cover with a teatowel and set aside in a warm spot to rise once more until about doubled. 

7) Preheat oven to 180C/350F. Brush the tops of loaves or buns with milk or beaten egg (optional, but gives a nice glaze/browning) and bake. 35 mins for a plaited loaf, about 20-25 mins for buns, and 45 mins or so for a loaf in a tin. The bread is done when it sounds hollow if you rap on it with your knuckles, and the bottom is lightly browned. If in doubt, flip upside down and cook an extra 5 mins or so. Cook on a wire rack. Fend off the ravening hordes drawn by the smell of baking bread until it's cool enough to cut. :-) 

Well cooled bread slices much more nicely than hot bread, but sometimes it's nice just to tear it apart with your hands and eat it. 

Notes: 
  • In cold conditions or if you store your flours in the freezer, warming the flour and utensils before you start can make a big difference to your results! Place a bowl of flour in a heat proof container into an oven preheated to 50C or low, and let warm through before you start. 
  • If your room temp is too low for the second and third risings, heat oven to 50C while kneading etc, then turn off and place dough inside to rise. Remove before heating to baking temp. 
  • In mid winter, the first rising may be best in the hot water cupboard or on top of the fridge, both warm locations. Don't put it anywhere too warm though, unless you have lots of room for rising in your bowl, or you may wake up to a mess! 
Picture
Ready for first rising. Fine if your dough is a bit wetter than this.
Picture
After kneading
Picture
Half the dough shaped and flattened ready to make a plaited loaf
Picture
Simple plait/braid - lift alternate sides into the middle, and when you get to the end, simple press the dough together.
Picture
Buns ready for third rising
Picture
The next morning....
Picture
After second rising
Picture
Cut in three, left joined at the top, with a large share knife, ready to plait (braid).
Picture
Ready for third (final) rising
Picture
Ready to bake
0 Comments

Kohlrabi & Tomato

12/2/2018

0 Comments

 
This recipe is from The Cooks Garden - a wonderful NZ book that describes how to grow and use a wide range of vegetables. The book, and it's follow up, More From the Cook's Garden, are out of print, but well worth looking for in op shops and second hand book stores. 

Kohlrabi is a member of the brassica family - popular in Europe but relatively little-known here. The plant forms a fat globe at it's base, and this is the part you eat - if picked young and tender, the skin may be kept on, but otherwise it gets a bit tough and needs to be peeled. They come in green and purple varieties. Here's one in my garden this summer: 
Picture
Picture
Ordinarily, I never bother to peel tomatoes - a great deal of the phytonutrients are in the skin, and who can be bothered anyway? But for this recipe, it's worth the effort, as the result is a very creamy mixture. 
Ingredients:
4-500g prepared kohlrabi - remove leaves but snapping off, cut off the top and bottom, peel well, then cut in quarters and slice thinly. 
1 small onion, finely diced
2 cloves garlic, crushed and finely chopped
2 TBSP cooking oil (I use coconut)
3-4 medium sized tomatoes, skinned and chopped
1/4 tsp salt
1 tsp chopped basil
Picture
Method:
Saute onion and garlic in oil for a few minutes. Add kohlrabi, tomatoes and seasoning. Simmer for 10-20 mins (uncovered) until kohlrabi is tender and tomatoes have cooked down into a creamy sauce. Add basil and serve. 

This was especially nice with some cooked chicken mixed into it (an accidental discovery as I served it with some left over cooked chicken) - next time I might purposely add it. 

I thought this dish was absolutely delicious! But I grew the ingredients, and approached it with limited expectations, which it far exceeded. Plus I was breathing in the smell of the fresh veges and herbs as I prepared it. My husband thought it was ok. Next time I'll tell him it's average and make him smell basil before eating it. No doubt he will then be smitten. ;-) 

I used a combo of cinnamon and green basil, though any will do.
Picture
Picture
PS - this recipe inspired me to experiment with the same concept - a couple of days later, I made myself lunch by sauteing onion and carrots, adding chopped up left over roast new potatoes and left over cooked broccoli, and simmering in tomato etc as above. YUM! 
Picture
0 Comments

Vege-Nut Stuffer - Mexican Chereezo

12/2/2018

0 Comments

 
This comes from a raw food recipe book called Rejuvenate Your Life by Serene Allison, a wonderful resource for all kinds of raw food recipes. She likes this WAY hotter than I can tolerate, so I've modified it to suit. 
Ingredients:
4 large carrots, peeled and chopped up into chunks
1/2 onion - red is ideal, but use what you have - peeled and cut into about 1/8ths
1 1/2 tsp quality salt
1/4 tsp (or less) cayenne pepper
1-2 tsp cumin
1 big lemon, squeezed
Few sprigs or oregano, or 1 tsp dried
2 cups soaked nuts or seeds - or 3/4 cup not soaked. Almond and/or sunflower is best. For this batch, I used the left over frozen almond meal from making almond milk.
Picture
Method:
Place everything but nuts/seeds in the food processor and blend until smooth. Add nuts/seeds and process very well. (If using almond meal like I was, just chuck it all in together and whizz). 

​Keep covered in the fridge.

​Use like a dip, to stuff cabbage or lettuce leaves etc, or spread on crackers. 
Picture
Picture
0 Comments

Amazing Tea Loaf

12/2/2018

0 Comments

 
A great, economical and simple stand-by for feeding hungry kids or to take to an event, this is a family favourite. The ingredient list may surprise you! There are two steps - the soaking, then the mixing and cooking. I often do the first step and then move onto other things, and come back to complete it when I have time.
Picture
Ingredients:
​1 cup hot black tea
3/4 cup sugar
1 cup dried fruit - my fave is half and half diced apricots and sultanas
2 cups self-raising flour, or 2 cups plain flour plus 3 tsp baking powder
1 egg (optional)

Note: You can use any size cup to measure for this recipe, so long as it's consistent, as everything is based on the same measurement. I use a coffee mug (300ml) usually rather than a metric cup, and cook it in a large loaf tin.
Method:
Place hot tea, sugar and dried fruit into a bowl. Stir, cover, and set aside until cool. Add flour/baking powder and egg. Stir to combine well. Pour batter into greased loaf tin. Bake 45 mins at 180C/350F until cooked through - skewer comes out clean. Cool on wire rack. To serve: slice thinly and butter. 

Notes: Adding the egg makes the loaf rise much better and cook more evenly. Without it, it can be difficult to tell when it's properly cooked. Cooked it is delicious. Undercooked in the middle, not nice at all! So if you skip the egg, err on the side of well done. 

I have made this using my gluten free flour blend, but the blend I used had coconut flour rather than almond meal (coconut flour can be very unpredictable in baking) and the result tasted good but was very crumbly. I need to play with it a bit more. 
Picture
Perfect buttered and served with a nice hot cuppa, or some Water Kefir
Picture
0 Comments

Water Kefir

4/2/2018

2 Comments

 
A friend was kind enough to give me some water kefir grains the other day, so I set up a batch fermenting. Water kefir is fast to make, lightly sweet, tasty and refreshing (reminiscent of lemonade, but not acidic), and of course full of all that probiotic goodness. There are various ways to do this (look on the internet for lots of suggestions) - I followed my friend's advice and am very happy with the results. 
Method:
Dissolve 3/4 cup sugar in 2 litres filtered water. Place in large glass jar with kefir water grains. Cover with cheesecloth or similar, rubberbanded in place. Set on the bench and ferment for 3 days. 

Strain kefir through a sieve, catching the grains to start the next batch. Bottle the liquid into glass bottles, cap, and ferment for a further 3 days at room temp. Transfer to fridge and enjoy. 

Over time, the grains will multiply - when you have too many, then discard some, or put into a container with some liquid to cover, and distribute to friends so they can start their own kefir ferments!

Note: like all ferments, this can get quite fizzy, and the old overflow/explosive bottle is possible. So don't keep it in your linen closet! A chilli bin is a great, contained place to put bottles for the second ferment, whether for kefier, kombucha, or similar. 
Picture
2 Comments

French Dressing

4/2/2018

0 Comments

 
A simple tangy dressing. Use plain or flavoured vinegar. I used chive flower vinegar for extra flavour. 

Ingredients:
3/4 cup oil (I used olive)
1/4 cup vinegar or lemon juice
1/4 tsp mustard powder
salt and pepper to taste
1 clove garlic, crushed
1 TBSP chopped fresh herbs such as parsley, chives or basil

Method:
Put all ingredients into a jar and shake well. Or whiz in blender for a more creamy-looking dressing, which is what I did. Keep refrigerated.
Picture
0 Comments

    Archives

    October 2024
    April 2020
    February 2018
    January 2018
    April 2017
    January 2017
    September 2016
    April 2016
    March 2016
    February 2016

    RSS Feed

    Categories

    All
    Baking
    Basics
    Breadmaking
    Breakfast
    Dessert
    Dinner
    Dressings
    Drinks
    Fast Food
    Ferments
    Food From The Garden
    Left Overs
    Lunch
    One Dish Meals
    Quiches And Slices
    Salads
    Side Dishes
    Slow Cooker
    Snacks & Treats
    Soups
    Vege-nut Stuffer

Powered by Create your own unique website with customizable templates.