Thrifty Kiwi
Like our Facebook page
  • Home
  • Blog
  • Homesteading
  • Gardening
    • 2025 Garden
    • 2021 Garden Blog
    • 2019-2020 Garden Blog
    • 2017-2018 Garden Blog
    • 2016-2017 Garden Blog
    • Kiwi Urban Homestead 2013-2015 Garden Blog
    • Pest & Diseases
  • Recipes
    • Autoimmune Protocol
    • Meals and Snacks
    • Preserving
    • Household Cleaners
    • Health & Beauty
  • Skills
    • Menu Planning & Grocery Shopping
    • Money & Budgeting
    • Preserving How-Tos
    • Housekeeping
    • DIY
    • How to Find Stuff Free or Cheap
  • Animals
    • Critter Blog
  • About
  • Contact

More Harvesting....

24/4/2015

0 Comments

 
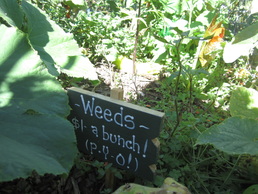
The days are getting shorter and colder, and it's time to gather in more of the summer's bounty. Bit by bit I'm getting things picked and appropriately used or preserved. A few days ago I picked......
Picture
Picture
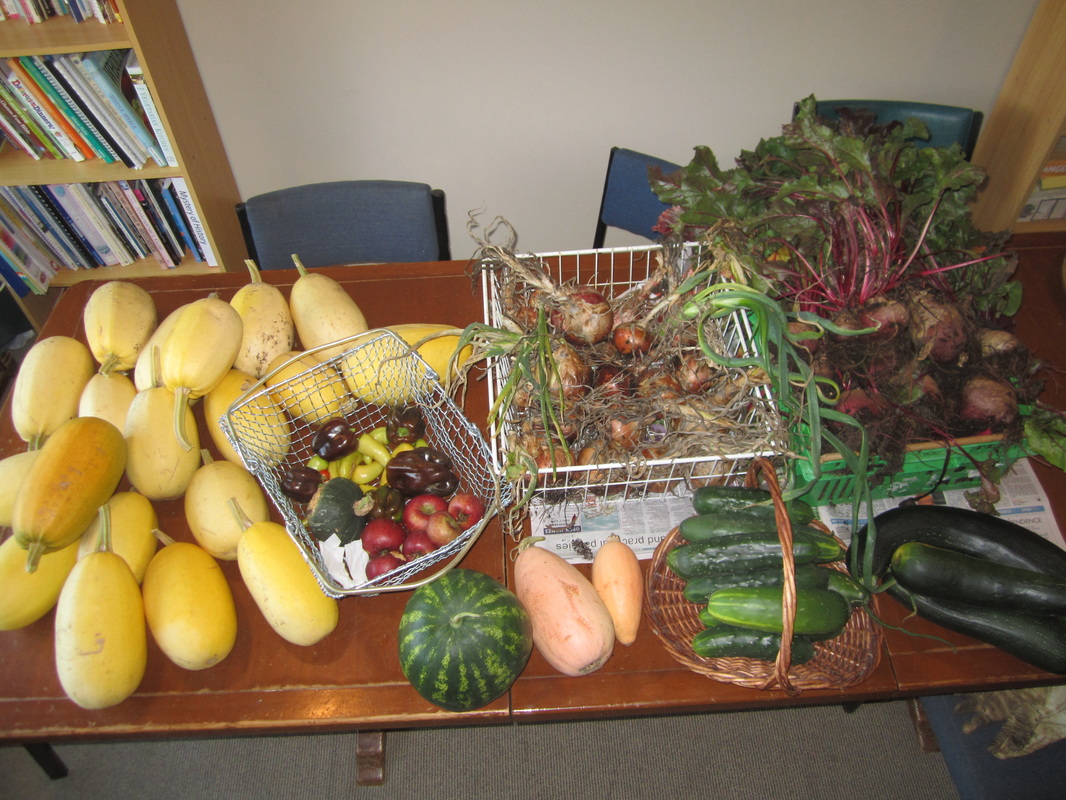
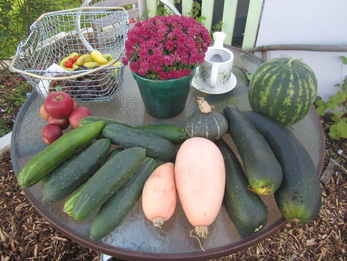
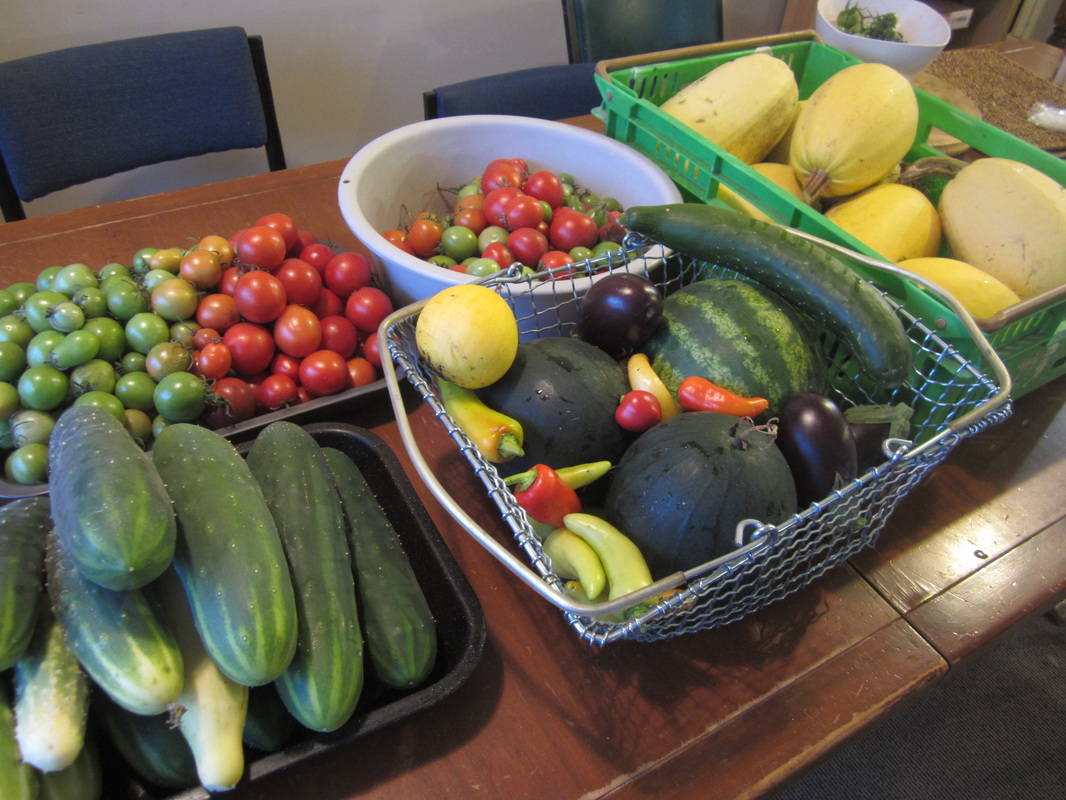
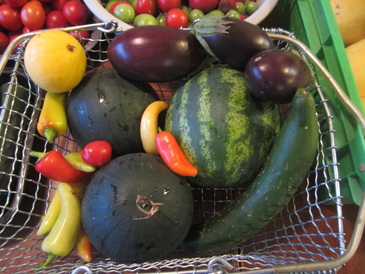
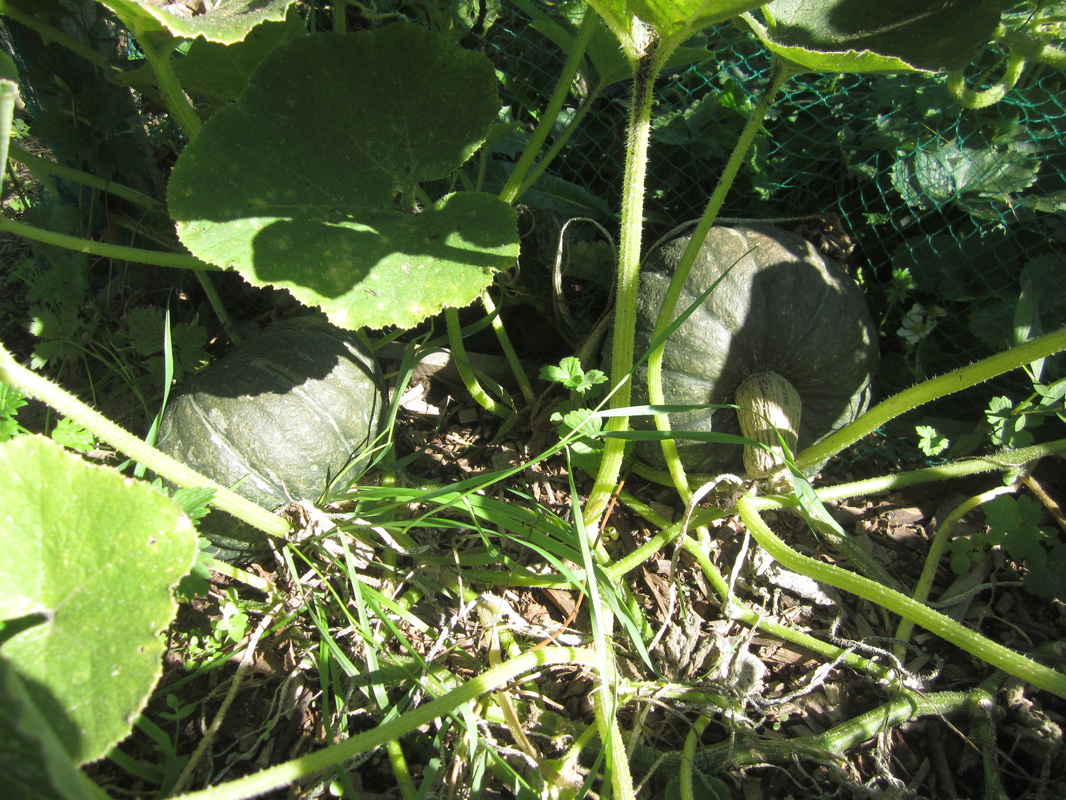
I went searching for hidden treasure in my garden - those things that might have been growing hidden away, and found three marrows and a small buttercup squash, as well as an unexpected telegraph cucumber that was just hanging around.

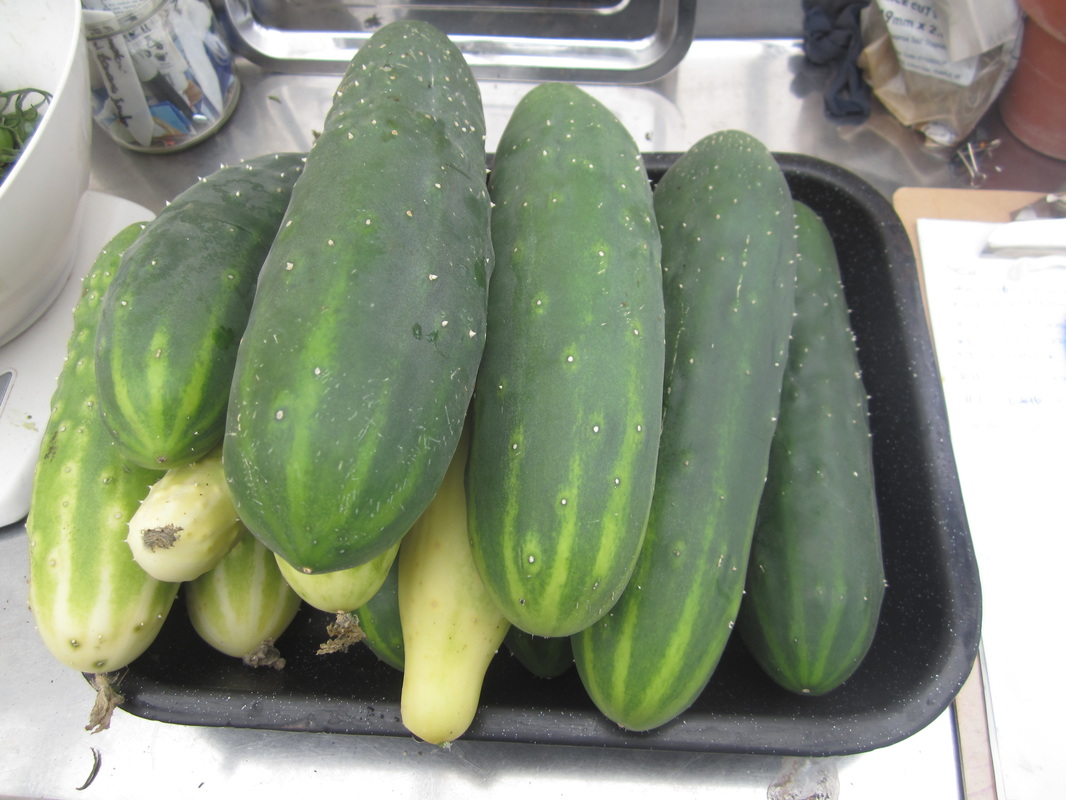
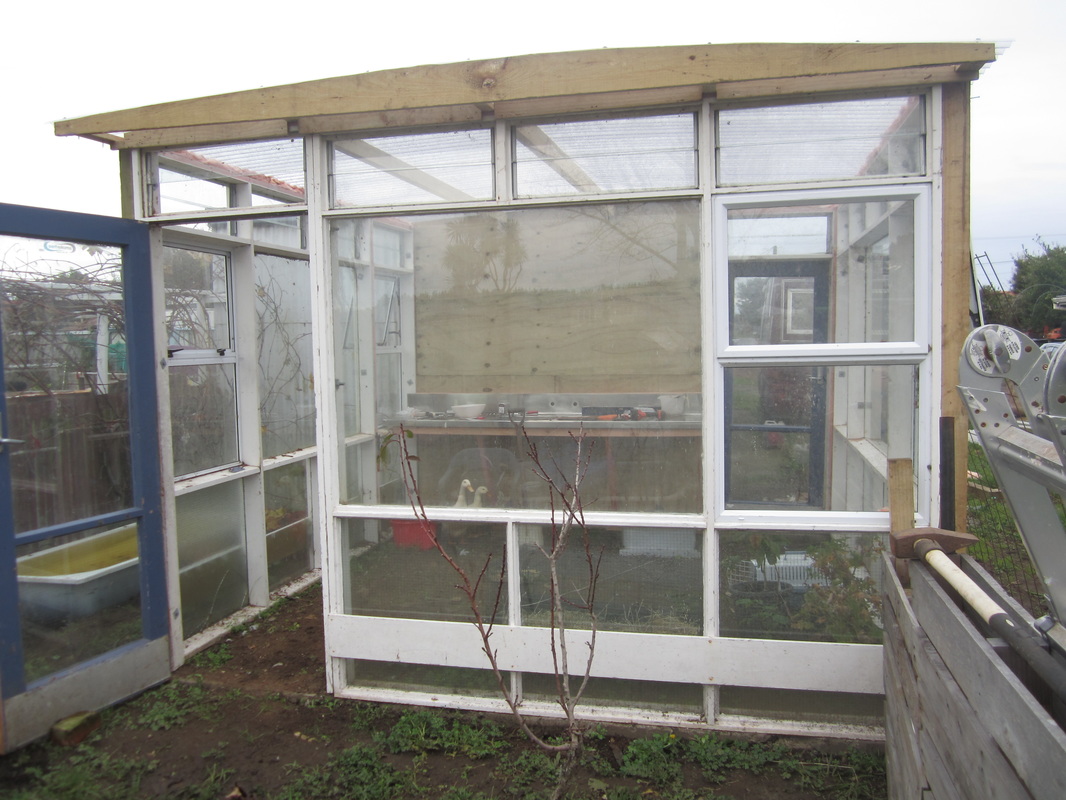
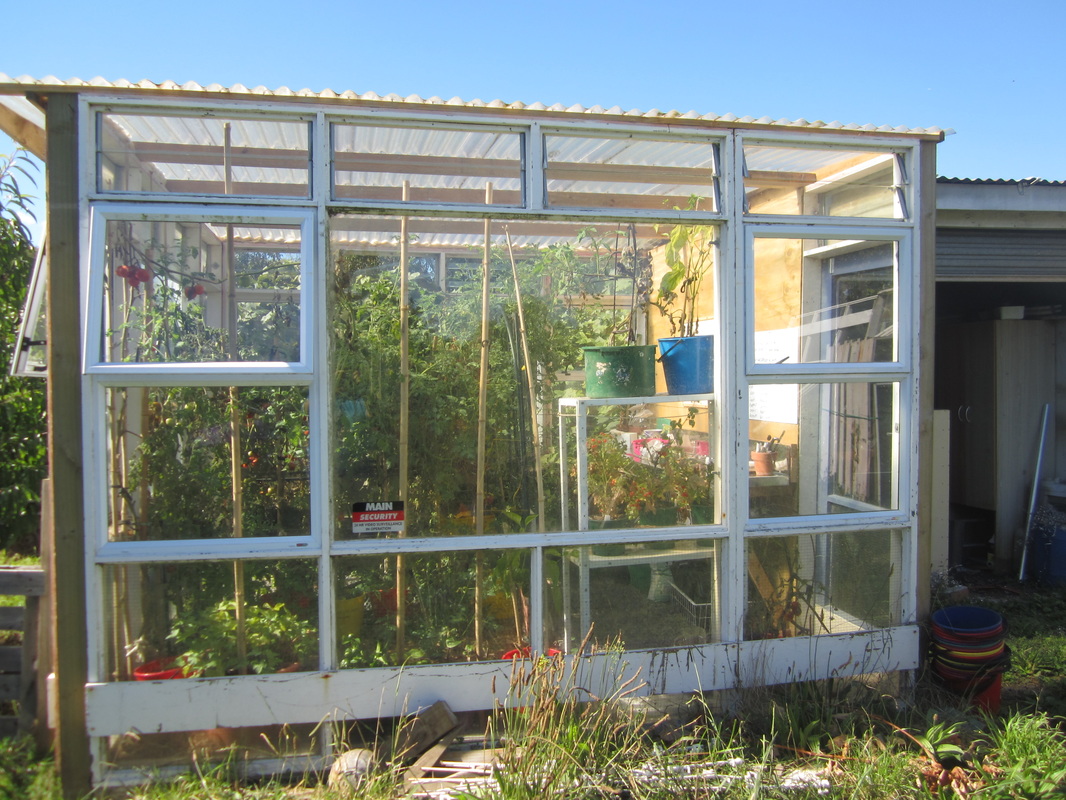
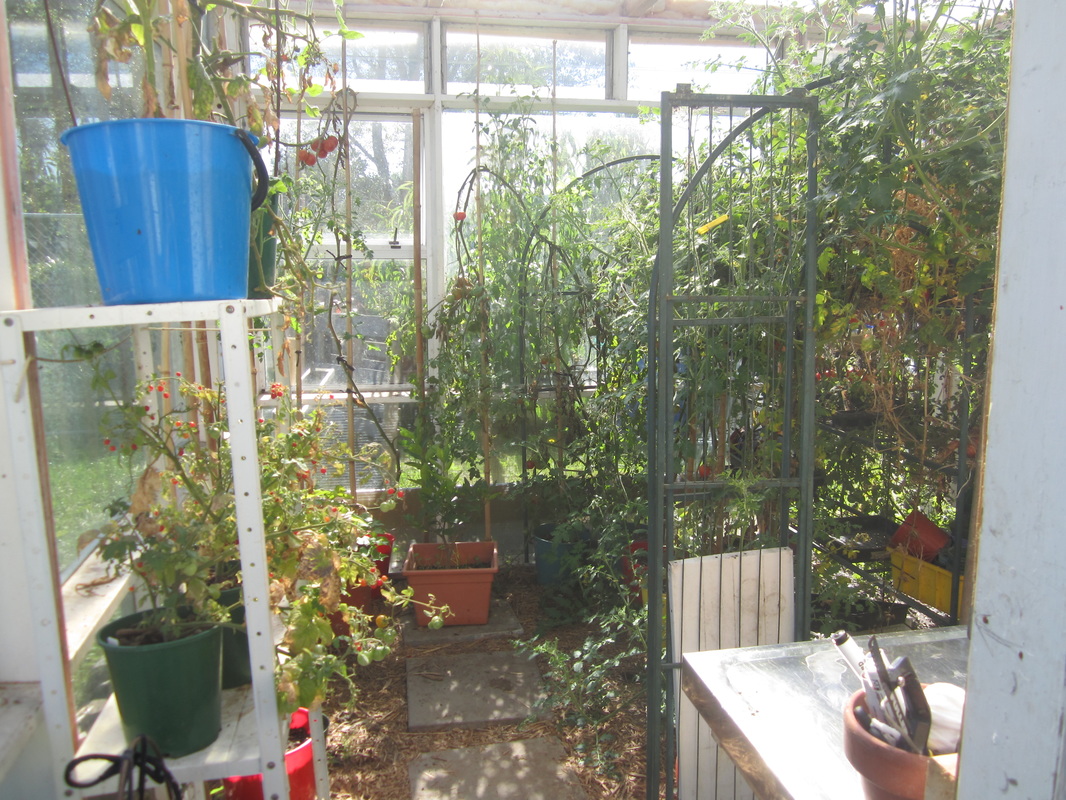
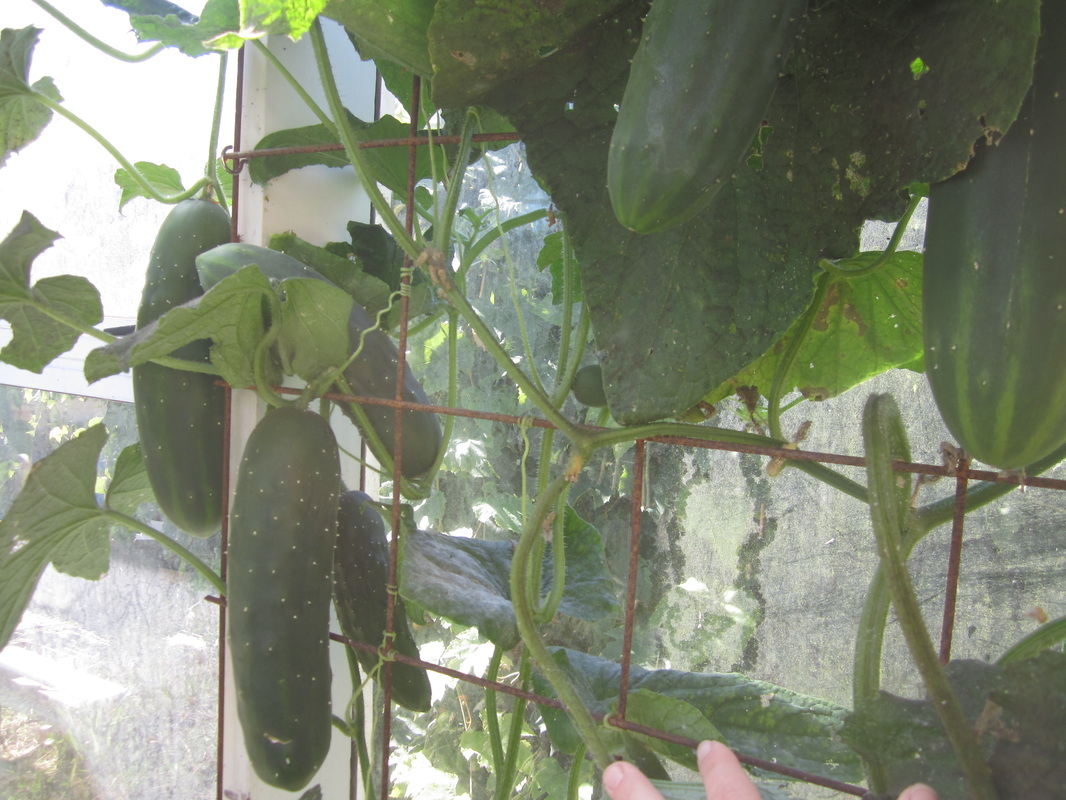
I picked more cucumbers from the vine in my greenhouse - which has now just about done it's thing for the season; I have left one large fruit hanging on it for seed collection later.

I also picked another Crimson Sweet watermelon from my melon bed - one more remains out there, not quite ripe yet, which I now have to provide with frost protection on cold nights.

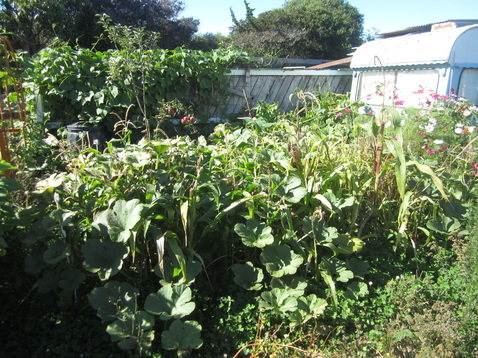
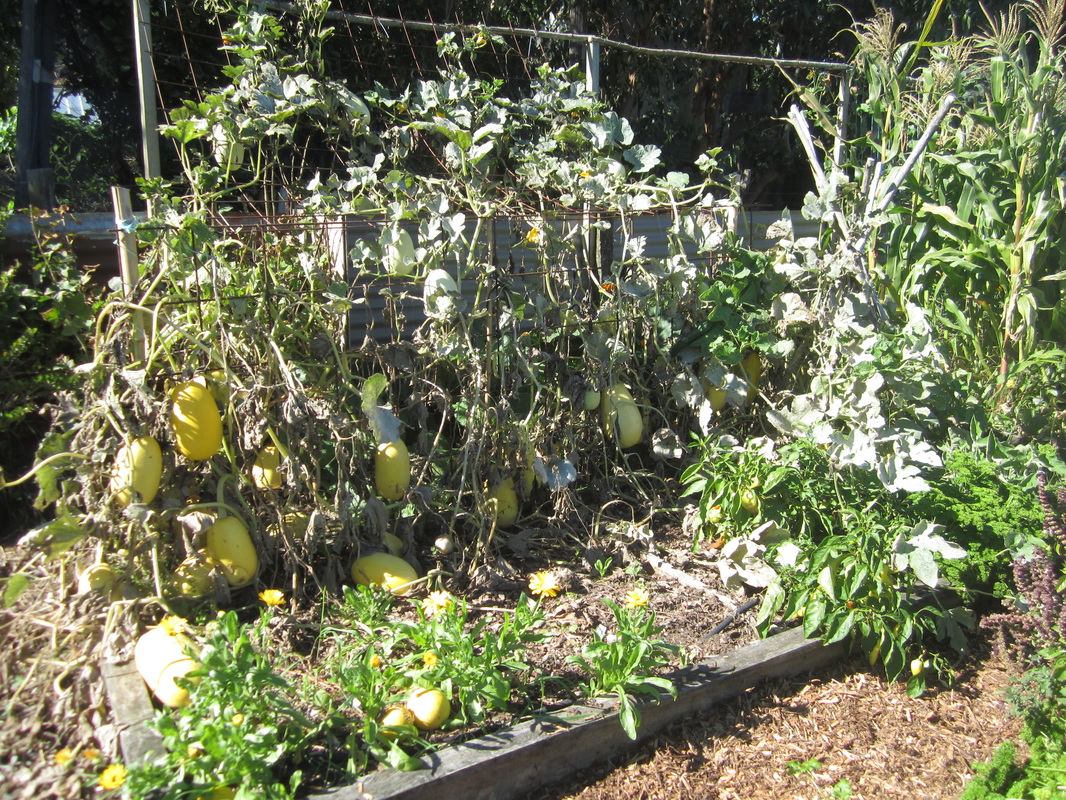
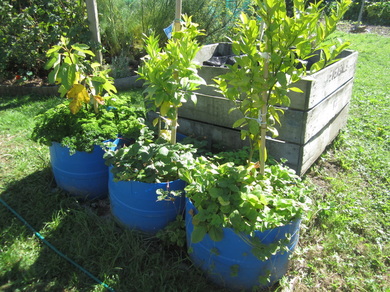
The two pale squash in the middle are Pink Banana Jumbo squash - they didn't get very jumbo though. The plants have died off, so they're not going to get any bigger!

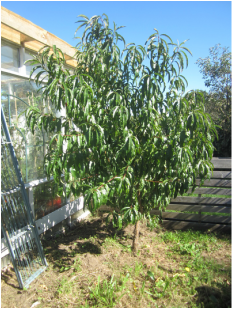
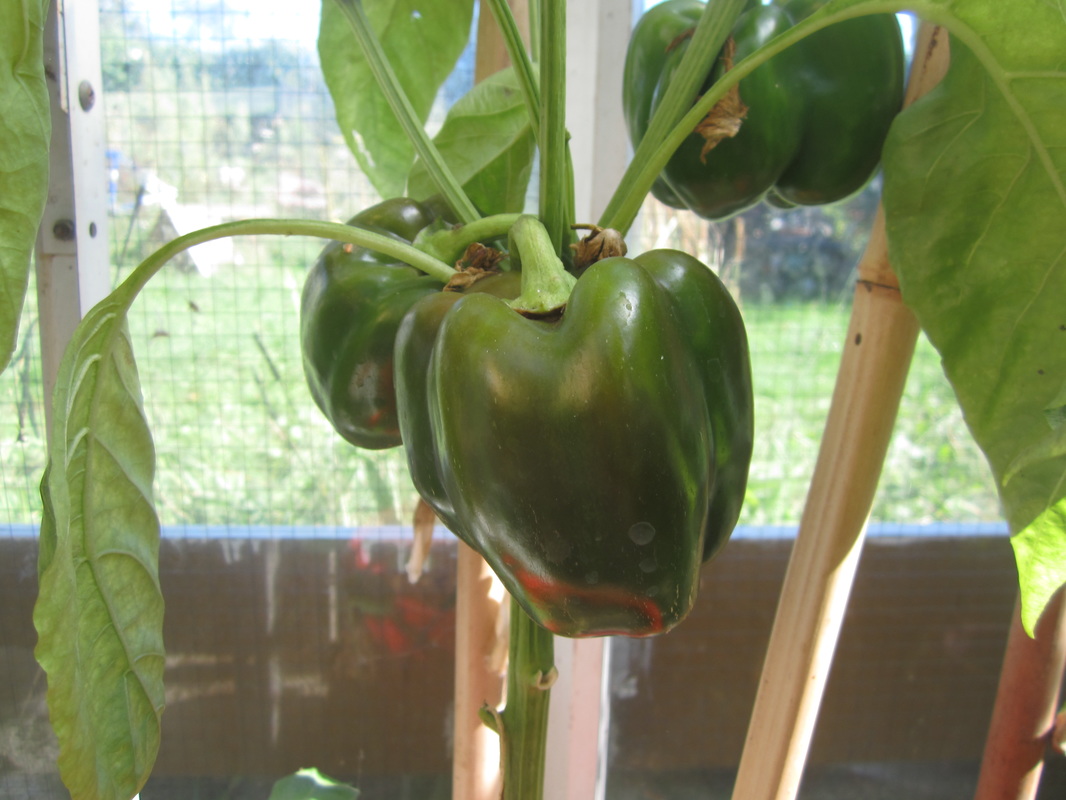
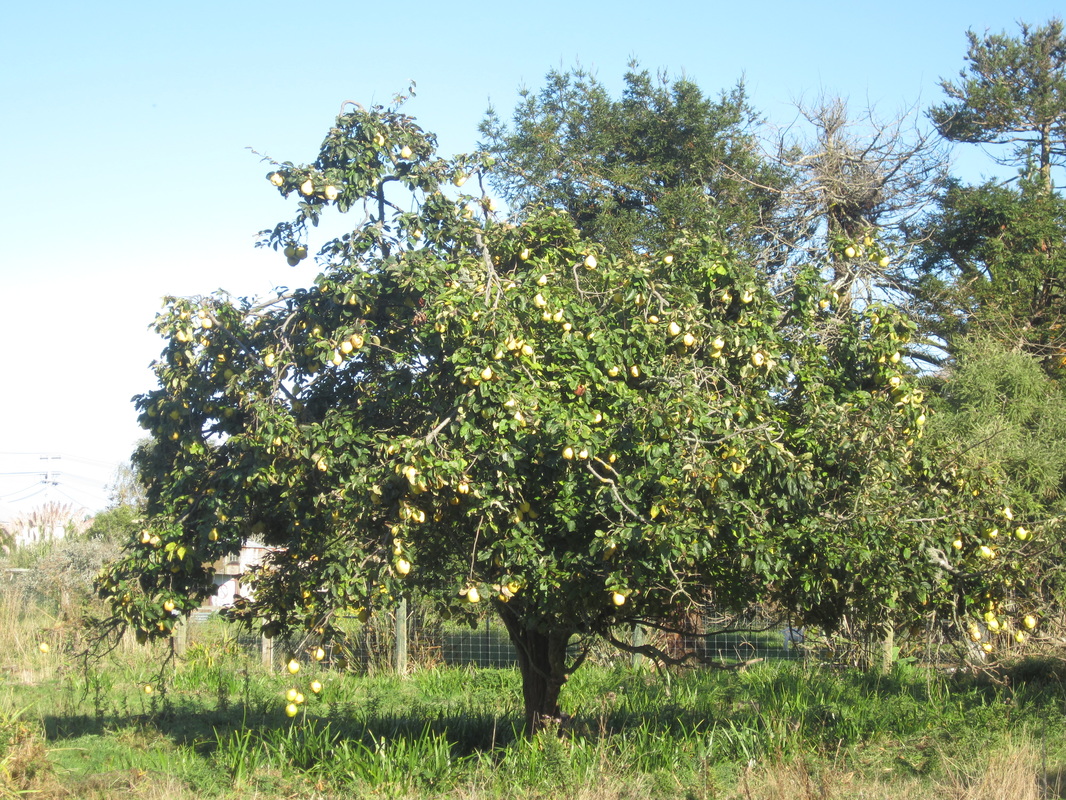
I picked a few apples from my triple-grafted apple tree, and a basket of Sweet Banana and Chocolate peppers.

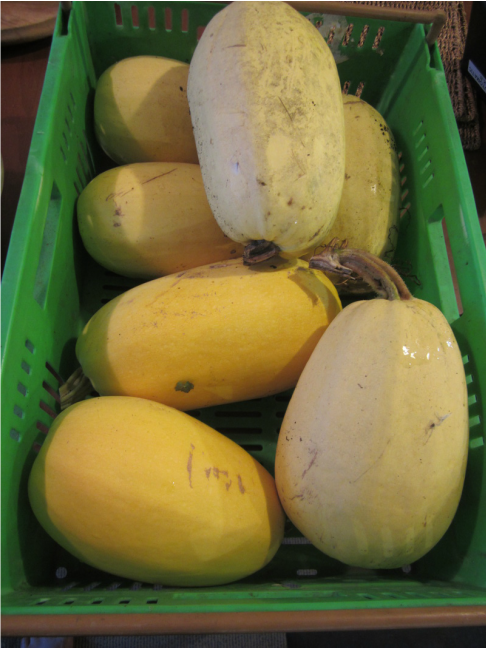
Spaghetti squash - lots of 'em! I have picked 28 ripe squash off 6 wee plants, and there are about another 10 out there still, that may or may not ripen up.

To store these, and any other long-keeping squash or pumpkins, I wipe them over with a solution of 2 TBSP white vinegar in 2 litres of water, paying especial attention to the area around the base of the stalk, then lay them out on shelves out on my porch to dry and harden off, before putting them away in a shed on more shelves, ensuring they do not touch.
Picture
Picture
Picture
Picture
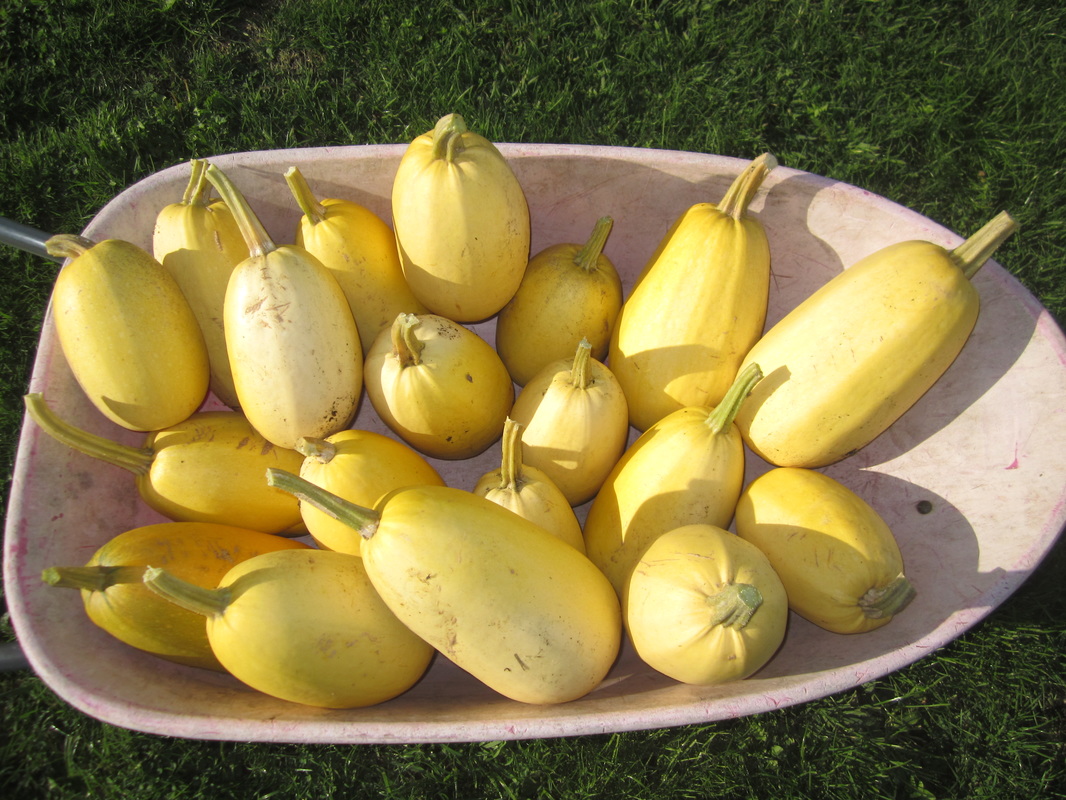
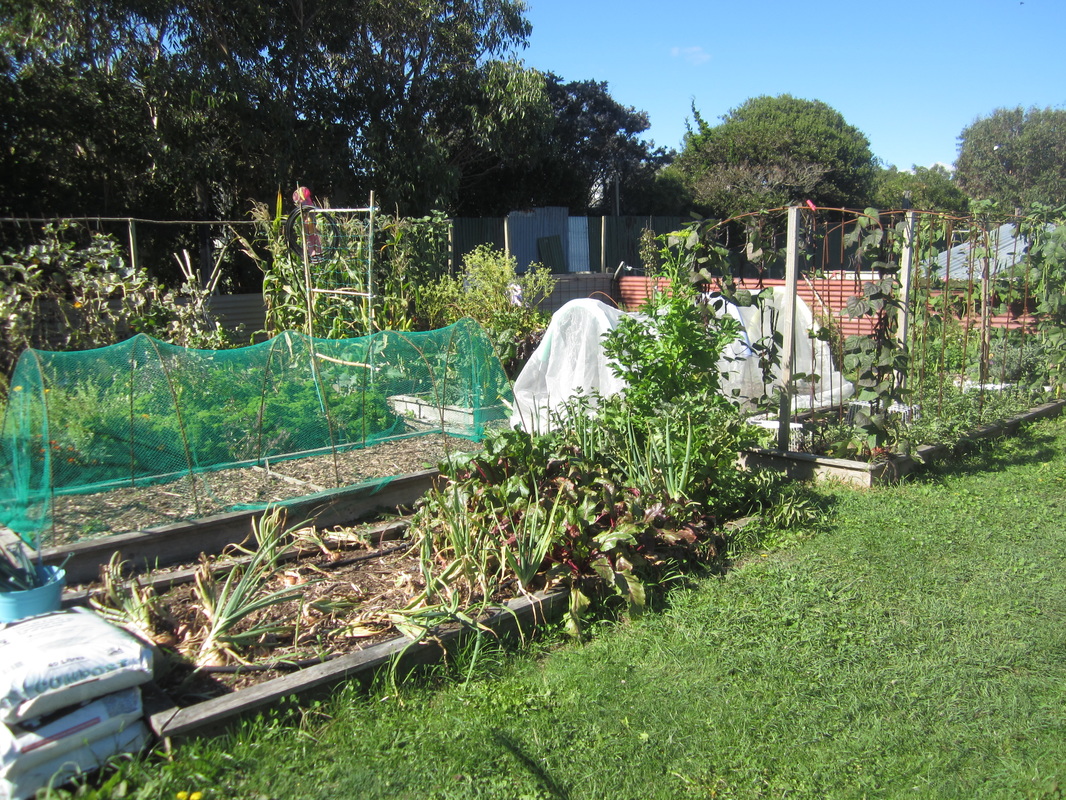
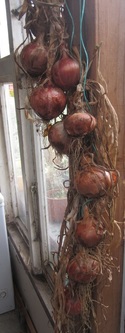
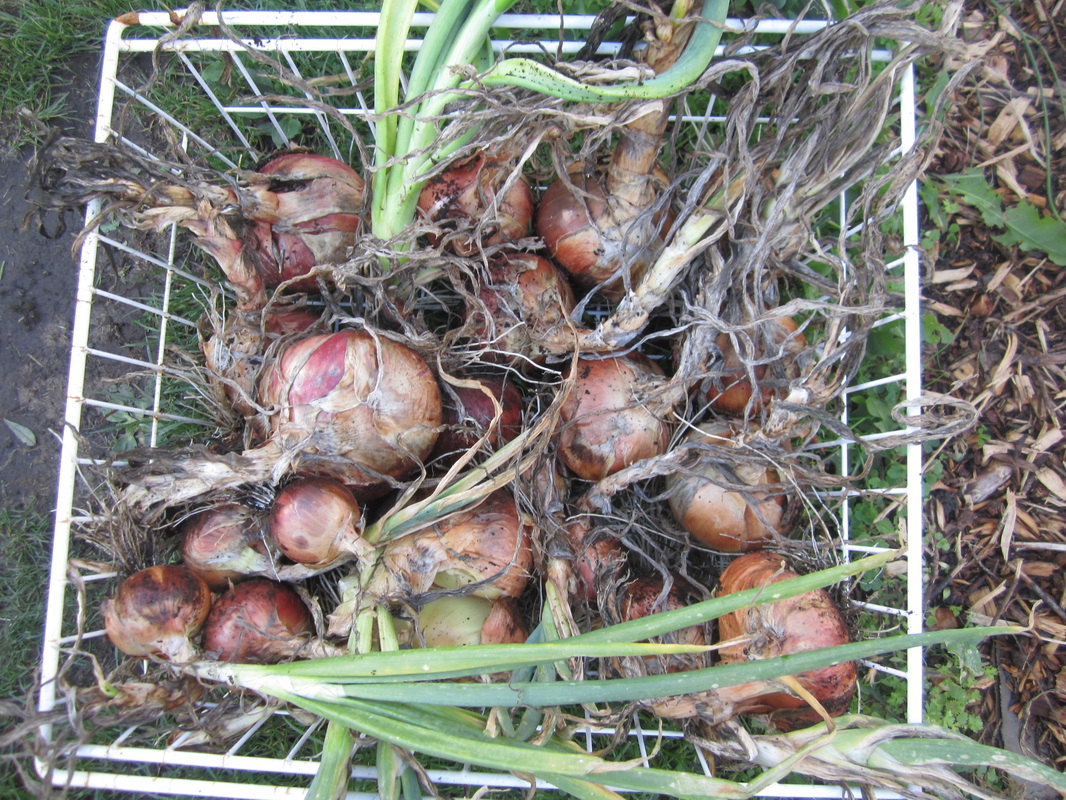
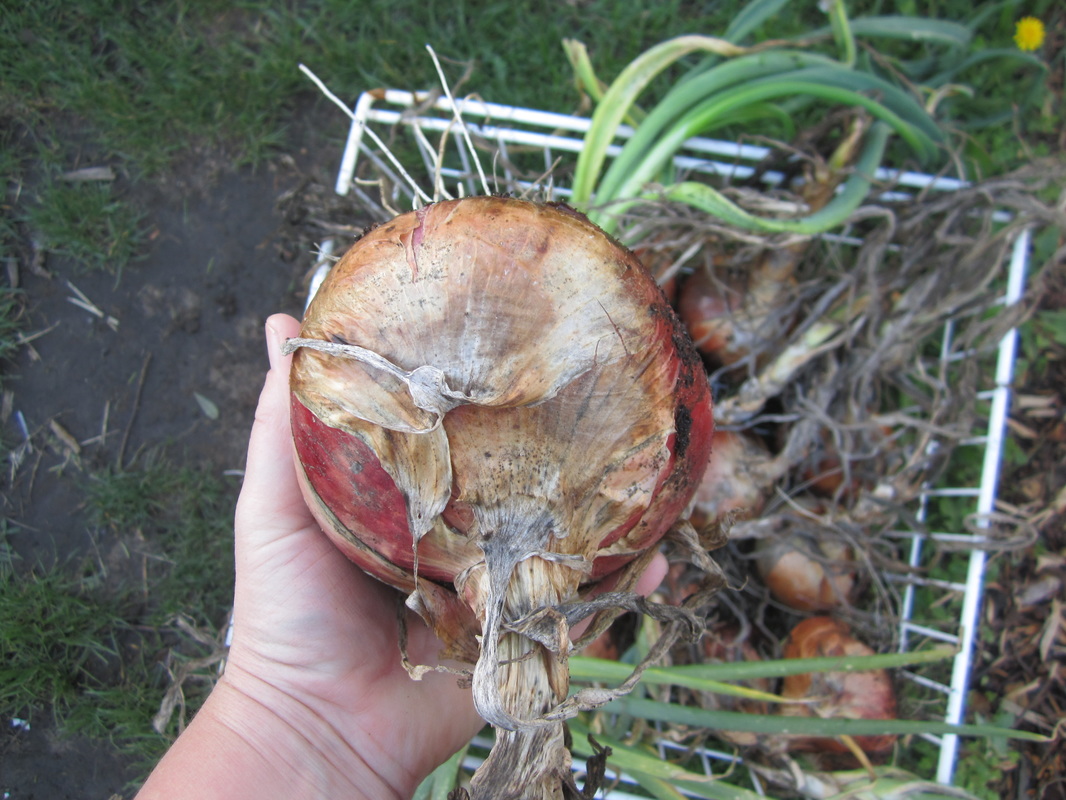
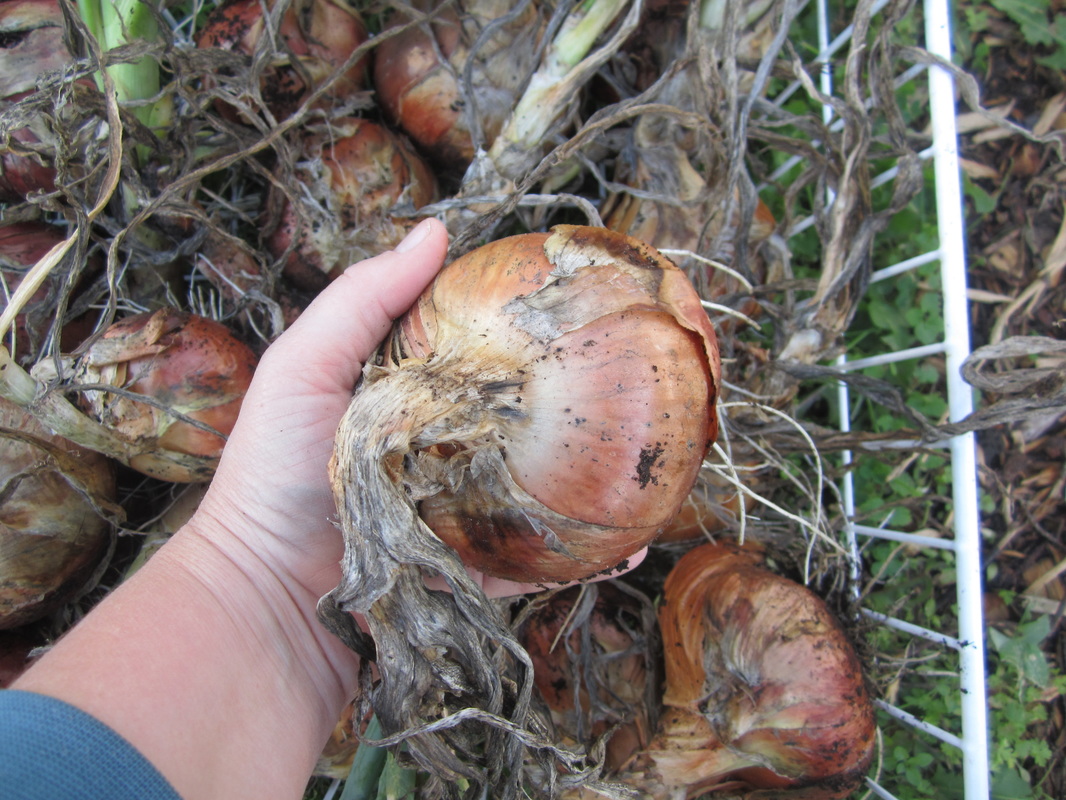
I picked most of the rest of one bed of onions. Look at the size of these beauties! This is my first year growing onions, and I'm very pleased with the results.

I sowed a tray each of Red Amposta and Ailsa Craig (brown) onions back in August last year. In mid September, I planted out half of them in a fairly newly created bed, which had had compost, topsoil and woodchip mulch added to it. Those onions are still in the garden, and are only small-onion size.

I didn't have room to plant out the rest then, so I spread out the remaining seedlings into bigger, deeper trays and plopped them on the floor of the greenhouse, where they were watered fairly regularly but otherwise ignored until I had room for them in an established garden bed which has had regular additions of compost and mulch for a couple of seasons.

By the first of December, when I planted the rest out, their roots had grown down into the floor of the greenhouse. I wrenched them out, and then had to pull each seedling out of the tray before popping them in the garden bed.

Those are these monsters. Was it the higher nutrition in the older bed? The rough handling? The later planting in what was not a nice spring? The mor consistent water as babies? I don't know, but whatever it was, it's worth repeating. :-)

After harvesting, I tie the onions up by their necks to a string which I then hang somewhere airy for them to dry out. For longer storage after that, stacking crates (with holes all around) in a dry shed works well, but mine might not last long enough for that. Must plant more onions!! Fortunately, it's time to sow more seeds.
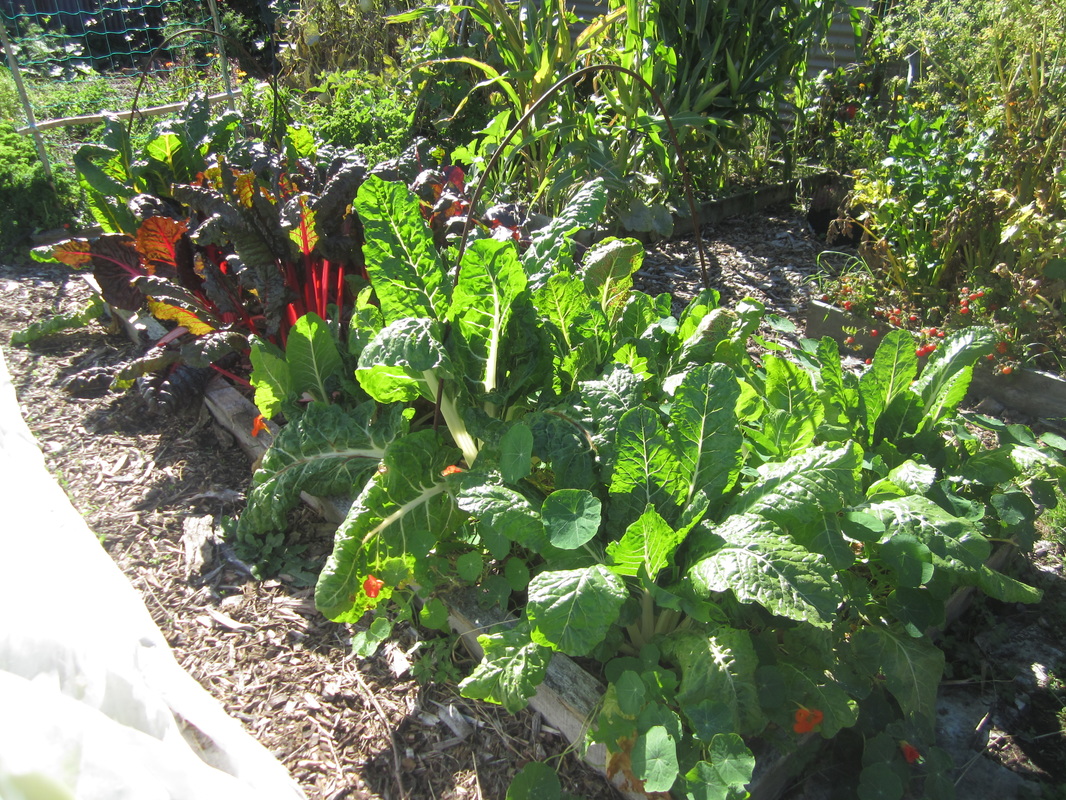
And a crate full of beetroot. In fact, I should have harvested these weeks ago, but I've just been too busy to do anything with them. Now I bagged and froze the best of the leaves to use as a green vege with dinner, and scrubbed and cooked up the roots. When I sliced them, I discarded any woody ones as chook food, and bottled the rest. I could have bottled them all, but the woodier ones make ok but not terrific bottled beetroot. Life is just too short for bad food, and besides, the chickens need to eat too, and love the beetroot, either cooked or raw.

Full instructions on how to prepare and freeze beet greens or bottled beetroot can be found HERE.

I did leave one really large beetroot in the garden, to go too seed. For seed saving purposes I should have multiple plants to ensure genetic diversity and strength, but this is more an observation exercise - how long it takes, how well the plant stands up to the winds when in full seed-bearing mode etc. I don't actually need more beetroot seed right now - if I do save some, I will mix them with all the other seed I have.
Picture
Picture
Picture
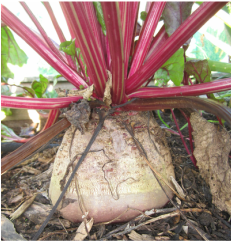
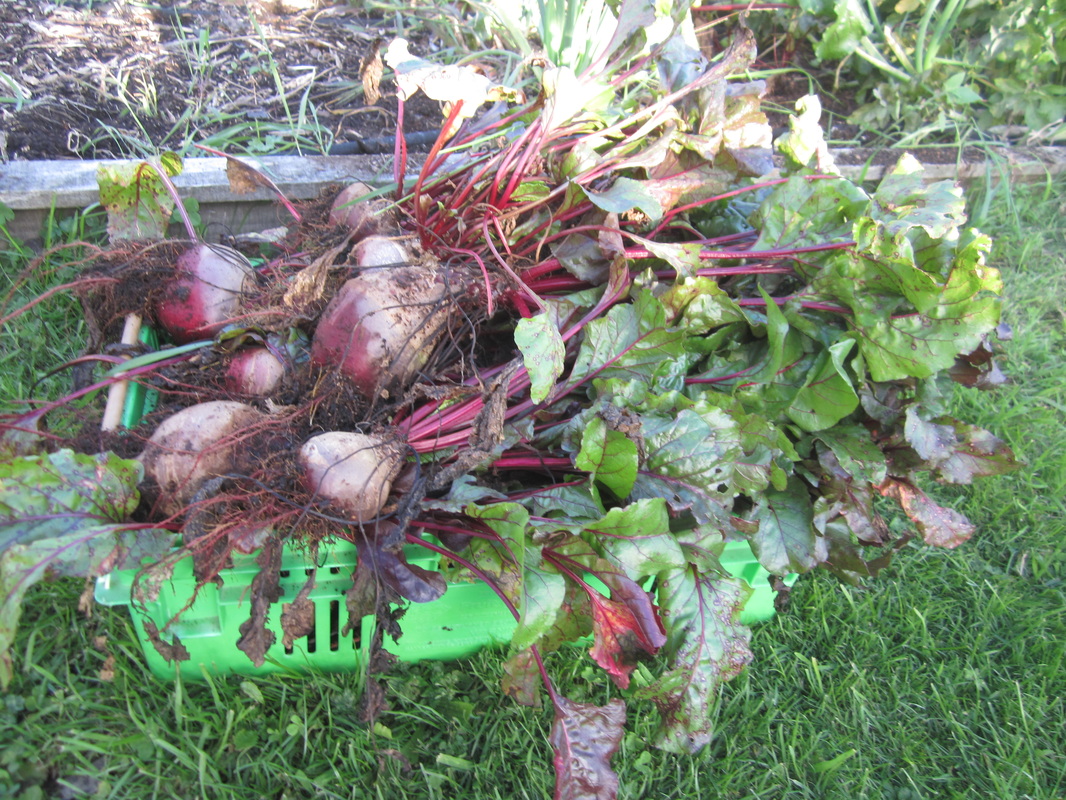
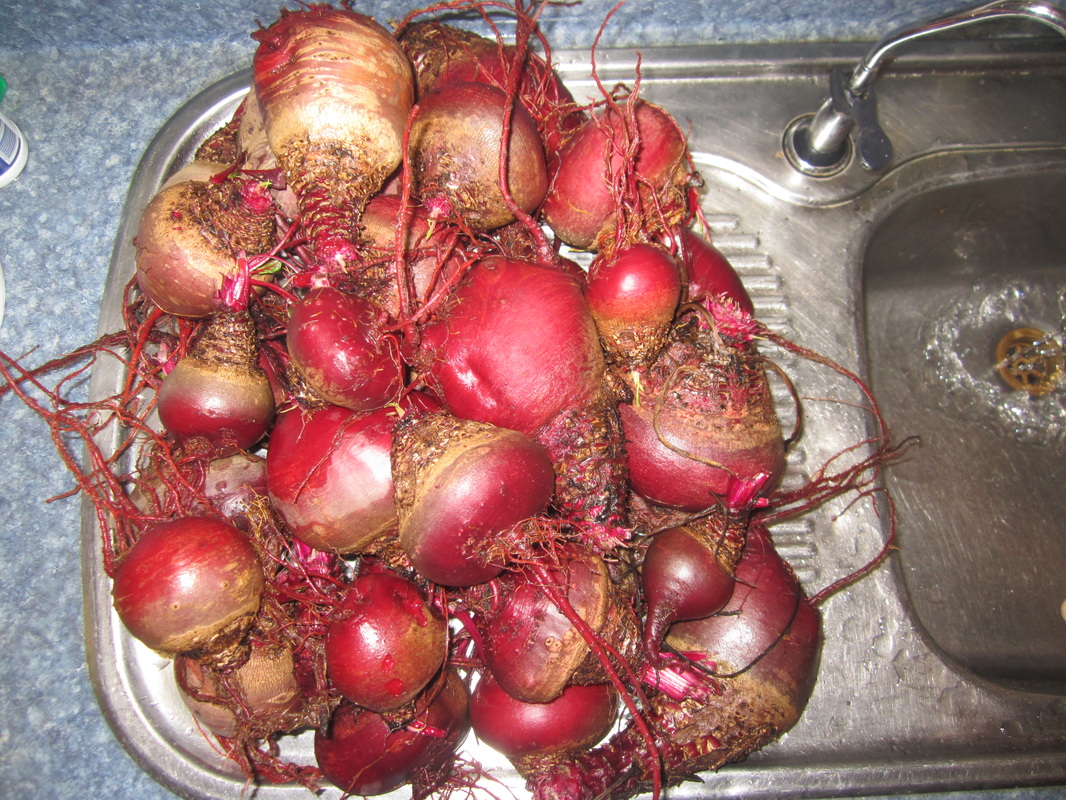
All these beetroot are Detroit Reds from $1 seed packets from the Warehouse, which have done very well for me over the last three years.

I've sown a new bed of beetroot  - Detroit Red, Cylindra, and Red & White Chioggas. Time for some variety. :-)
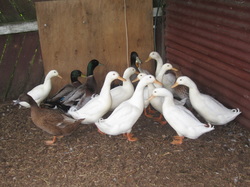
And finally, I picked all the neglected apple & lemon cucumbers which are past their sweetest, telegraph cucumbers which are also over ripe, and overripe melons plus a couple of poorly pollinate corn, and fed the lot to the chickens. They're eating rather well at the moment. I tossed them on the ground then used a spade to roughly cut then open - once the chooks see the seeds and exposed flesh they get very excited!
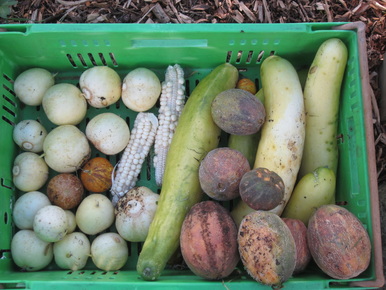
Picture
0 Comments

 Garden Fresh Salads - even in Winter!

18/4/2015

0 Comments

 
A fresh salad, straight from the garden, is so yummy and good for you! The fresher the ingredients, the higher the nutrient levels, and you can't beat just-picked! Last night I made this salad with ingredients from my garden:
Picture
This particular salad is based on mixed baby salad greens, and has parsley, celery, cucumber, chocolate capsicum, tomatoes and nasturtium flowers in it. The ingredients for a salad will of course vary from month to month, depending on what's in the garden, but the good news is that it's possible to have fresh salads all year round, and in fact it's even easier in winter than summer as lettuces and other popular salad greens prefer the cooler weather - lettuce always bolts in summer here.

For easy, instant salad greens, I grow mixed leaf lettuce as "cut and come again" greens, by simply sprinkling mixed lettuce seed thickly over a bed, and letting them grow until they are about 15cm tall, at which point I start harvesting as much as is needed at a time with a pair of scissors, cutting the plants off about an inch from their base. The plants will regrow, giving about 3 harvests before they need replacing. A quick wash, and the salad greens are ready to serve. Here's my current bed, sown on March 10th...
Picture
As it is now well into autumn, and winter is not far away, a number of the items I put in the above salad will no longer be available fresh in my garden. But there are still plenty of things that grow happily in the cooler months that are great in salads. Over winter, what I will find in my garden for fresh salads include:

Leaf lettuces of all kinds
Spinach
NZ spinach
Miner's lettuce
Beet greens (beetroot leaves)
Beetroot (grated raw, or bottled)
Carrots and carrot greens (the latter I use in small quantities, but they pack a nutritious and tasty punch)
Peas
Pea shoots and flowers
Broadbean leaves
Parsley
Cornflowers (edible garnish, though they don't have much flavour of their own)
Pansies
Rose petals
Calendula petals (always remove the petals from the middle section, which tastes bitter)
Spring onions
Onion greens
Celery
Silverbeet
Various other herbs if I wish

I will also be able to add, if I wish, dried, stored or preserved foods I gathered in summer such as:
Garlic
Onions
Dried onion greens or spring onions
Dried or bottled tomatoes
Pickled cucumber
Yacon
Potatoes
Sweetcorn

I might also add some "wild herbs" (aka edible weeds) - the common edible ones in my garden include:
Dock
Dandelion
Purslane
Plantain
Chickweed
Fat hen (aka chickweed)

I will also do some sprouting in my kitchen, and add sprouts to the salads, for extra nutrition. Including such as:
Wheat grass (simply sprouted wheat, with the green part harvested with scissors)
Alfalfa sprouts
Pea sprouts
Mung bean sprouts
and whatever else catches my fancy to try

It's wonderful to be able to go out into the garden with a bowl, and come back with the makings of a fresh salad! We all know we should eat more raw food, and a hearty salad with lots of variety in it is a great way to do so. 

What is in your garden that will provide you with salad over winter? It's not too late to plant most of the above items, or too take a fresh look at the things already growing you maybe had never considered adding to a salad before.  

Another tip to keep in mind - the closer to the kitchen you grow your salad veges and herbs, the more likely it is that you'll actually go out there and pick and use them regularly. So don't put your baby leaf lettuce bed at the far end of the garden - put it as close to the garden as possible! In winter time, leaf lettuce also do very well in tubs, baths or other containers, and in fact most salad ingredients are best picked small and fresh, so can nearly all be grown happily in containers of one sort or another.

So whether you have a large or small garden, or no garden at all, there is no reason why you can't grow your  own winter salads! Start with a bed or container, filled with suitable growing medium, lightly sprinkled with leaf lettuce seed, finger-rake the seed in, water, and wait for your lovely greens to grow!

0 Comments

Green Tomato Quiche

17/4/2015

0 Comments

 
Since my recent final tomato harvest yielded lots of green tomatoes, which I've never used before, I've been having fun experimenting with different recipes. This quiche turned out terrifically yummy - everyone kept asking for more! The pastry is a home-made wholemeal pastry (though you could use others if you like) which I made with freshly ground organic wheat flour. The filling includes ham, mushrooms and of course the green tomatoes, and the taste combination is just wonderful! This recipe comes from More from the Cook's Garden.
Picture
Wholemeal Pastry
Wholemeal pastry doughs can be more difficult to handle than white. They tend to be crumbly and break apart easily. To overcome this problem, add a little extra water to make a softer mixture, more like a scone dough. Knead the ball of dough before attempting to roll it out. Despite the extra handling, wholemeal pastry is deliciously tender and crisp. This quantity will line a large pie plate or quiche dish 20-25cm in diameter (without lid).

1 cup wholemeal flour
1/4 tsp salt
50g butter, chilled
Water to mix

Combine the flour and salt. Chop or grate the butter into small pieces. Rub into the flour until the mixture resembles course breadcrumbs. Add sufficient cold water to make a soft dough. Knead on a floured board until the dough is well mixed, not sticky, and shows no tendency to crumble.

Roll out to fit a well-greased pie plate or dish. I roll the pastry on a board, then roll it up around the rolling pin, and use that to lift it into the dish in one piece, unrolling off the rolling pin across the dish.

Filling
2 TBSP butter
1 small onion, finely chopped
400g green tomatoes, sliced
100g mushrooms, sliced
100g ham, chopped
1 TBSP finely chopped fresh herbs (dill, fennel, tarragon or parsley - I used parsley)
3 eggs
1/2 cup milk
1/2 cup cream
1/4 tsp salt
Optional: freshly ground black pepper

In a large frying pan, melt the butter and sauté the onion until soft. Add the tomato slices and cook gently until tender. Add the mushrooms and cook for a few more minutes. Remove from the heat. Stir in the ham and chopped herbs. Allow to cool a little. Spoon into the pie shell.

In a bowl, beat the eggs, milk, cream and seasonings. Pour over the pie. Bake in a moderate oven (190C) for 30-45 minutes or until the custard is set.

Serves 4-6.

0 Comments

Garden Tomato Sauce

16/4/2015

0 Comments

 
Picture
A yummy sauce to use up extra tomatoes - all ingredients except the carrot and olive oil came from my garden (really must get around to planting more carrots!) Apart from the tomatoes, it's just a little of this and a little of that, so if you have tomatoes to use up but not tons of anything else, this is a great recipe for you. Serve with pasta, chicken or veal, or use on pizza or any other way you like it.

This recipe came from The Big Book of Preserving the Harvest by Carol W. Costenbader. This book has lots of lovely, easy recipes.

Ingredients:
12 cups chopped tomatoes
1 TBSP olive oil
1 medium onion, chopped
2 cloves garlic, crushed
2 TBSP chopped green bell pepper
2 TBSP chopped carrot
2 TBSP chopped celery
2 TBSP chopped fresh parsley
1 tsp chopped fresh oregano

Method:
1. Wash, core, and coarsely chop the tomatoes
2. Puree in the bowl of a food processor
3. Heat the olive oil in a heavy saucepan and saute the onion until soft, about 5 mins
4. Add the garlic, pepper, carrot, celery and herbs.
5. Add the tomato puree to the mixture and simmer, uncovered, for about 2 hours. Be careful not to let it burn. Stir the sauce occasionally as it thickens. (This process can also be completed in an uncovered casserole dish at 180C/350F in the oven)
6. Cool slightly and pour the sauce into 1 cup freezer containers, leaving 1/2 inch of headspace, label and freeze for up to 3 months. OR ladle hot, simmering sauce into hot, sterile jars, leaving 1/4 inch head space, and seal.
Picture
Picture
Everything but the chopped onion and tomatoes is shown on the plate above.
0 Comments

Make Your Own Laundry Detergent - 2 Easy to Find Ingredients!

16/4/2015

3 Comments

 
Picture
Sometimes I'm short on time, and I buy laundry powders. Then I look at prices, and think "I'm not paying that - it's so easy and cheap to make!" There are a lot of reasons to make your own laundry detergents - cheaper, more natural, better for the environment, and they work!

This recipe is for a liquid laundry detergent. I make powdered ones too, but this one works really well, and is versatile - you can also use it as a floor cleaner or all purpose cleaner. All you need are:

1/3 cup finely grated Sunlight soap
1/3 cup Washing Soda
Water

That's it! Before we run through the easy how-to's, let's talk about the first two ingredients a bit:

Sunlight Soap is a yellow bar soap that's been used for laundry, hair care and lots of other things for a very long time. In NZ, it comes in a cardboard box of four bars, usually found in the cleaners aisle of your supermarket. Other similar products may be substituted. The more finely you grate it, the easier it is to dissolve, so use the smaller grater on the side of your regular grater.

Washing Soda is different to baking soda (in actual fact you can produce washing soda by submitting baking soda to heat for a specific period of time, but we'll look at that another day). Washing soda crystals are sold in the supermarket, but I prefer the higher quality powdered version that I buy from Trade Me. Either will work though.

Method:
Fill your kettle with water and put it on to boil. In a 9 litre bucket, place your grated soap and washing soda. Pour the kettle full of boiling water over it, and stir until the soap is dissolved. This will take a few minutes - I often give it a good stir, then let it sit for a bit while I do some other brief task, then go back to stirring. Then, top the bucket up to 7 litres with cold water, and stir. Optional: at this point you can add some drops of essential oil of your choice if you wish. Eucalyptus is a good one.

Decant the detergent into recycled plastic bottles. It will be very runny right now, but thicken upon sitting. I have used other recipes that got so thick they were hard to pour out of the bottles, but this one is just right. Don't forget to label your bottles and store safely.

To use, give the bottle a shake then add one cup of your liquid detergent to each load of washing, and put 1/4 cup white vinegar (I buy a cheap one for about $6 for 5 litres) in the rinse dispenser.

Suitable for both front and top loaders.

To use as a general cleaner, stir 1/2 cup to 1 cup full into a bucket of water, as desired.


3 Comments

Vegetarian Moussaka

14/4/2015

0 Comments

 
I have never in my life eaten eggplant (aka aubergine) and so have never before had Moussaka. To be honest, I wasn't sure I would like the taste of eggplant, but when I came across this recipe in my copy of "More from the Cook's Garden," the 1987 sequel to the wonderful NZ gardening cookbook "The Cook's Garden," I had to try it, because it sounded so good. And better yet, it is a vegetarian version, using lots of ingredients I happen to have growing in or stored from my garden. When it was cooked, my hope was that it would be a pleasant enough dinner and my husband and family would find it edible. But instead - WOW! There are no words to describe how good this tasted - the blend of flavours and textures is just right, but hard to describe as the eggplant has a special taste all it's own!
Picture
Layers of sautéed potatoes, aubergine, freshly made tomato sauce and cheese is covered with a light custard which is prepared from eggs and yoghurt.

The dish is prepared in three parts, then layered together and baked in the oven.

I will list the ingredients and instructions for one part at a time.....

The ingredients which have come from my own garden are marked with an *
 Tomato Sauce
2 TBSP olive oil
1 large onion, finely chopped *
1 clove garlic, finely chopped (I used two - I love garlic!) *
4 medium sized tomatoes, skinned and chopped, plus 1/3 cup water, OR one tin of tomatoes in juice.
(I used a jar of diced tomatoes I had previously bottled) *
1 TBSP tomato paste
2 TBSP red wine (optional - I didn't use it)
Salt to taste (and freshly ground black pepper if you like - I didn't use it as I am allergic)
1 bay leaf
1 TBSP finely chopped fresh herbs, or 1 tsp dried herbs (I used fresh parsley) *

Heat the oil in a saucepan. Sauté the onion and garlic until soft. Add the rest of the sauce ingredients, and simmer gently for 15-20 mins or until the sauce is thick, stirring occasionally.

Vegetable Layers
500g potatoes, peeled and thinly sliced *
2 TBSP cooking oil
1 large aubergine, sliced into 1/2 cm thick slices *
2 TBSP wholemeal flour
2 TBSP extra cooking oil
1 cup grated cheese (recipe says cheddar, I used Colby)

Fry the potato slices in hot oil until they are golden and almost cooked. Transfer to a large, greased baking dish.
Coat the aubergine lightly with the flour. Add the extra oil to the pan if needed. Fry the slices until they are soft and lightly browned. Place in an even layer in the baking dish.

Custard
3 eggs *
200 ml plain yoghurt
1/4 tsp salt
Pepper if desired

In a small bowl, beat the eggs, yoghurt and seasoning until well mixed.

Assembly and cooking:
Cover the potato/aubergine layers with the tomato sauce. Sprinkle the surface with the cheese. Pour the custard evenly over the top. Bake in a moderate oven (180C/350F) for 45 minutes or until the custard is set and golden brown.

Serves 4 as a main meal accompanied by bread rolls, or 6 if you add other sides.
Picture


Picture
Picture
Picture
Picture
Picture
Picture
Picture
0 Comments

An Afternoon's Harvest

14/4/2015

0 Comments

 
With heavy rain forecast for several days, I decided I better get started on harvesting some of the autumn bounty from my garden. Here's what I picked in the couple of hours I had before it got dark one day last week:
Picture
The cucumbers in the roasting dish are from the Marketmore vine in my greenhouse which is still producing merrily. The tomatoes are also from my greenhouse - I decided that I wanted my greenhouse back for other things, so have harvested the last of the tomatoes on the remaining plants from my Tomato Experiment. All of the tomatoes in the roasting dish at the back left are from ONE Moneymaker vine. The other tomatoes were from the other 5 plants together.

Picture
Picture
The squash in the green crate are the first of my Spaghetti Squash. Picked when the fruit is yellow and the stalk is a hard brown, they will keep well if wiped over with a mild vinegar solution (1 TBSP vinegar to 2 litres of water) and air dried and cured before storing. (I do this with all my long keeping pumpkins and squash - the vinegar kills any fungal spores on the skin and prevents rot). I've never had spaghetti squash before, and am looking forward to our first meal with home-grown spaghetti! By the way, I have 6 of these crates, which stack on top of each other well. I acquired them when I had the local supermarket order in 62kg of tomatoes for me last year - they were to be returned or paid for. I decided that the $11 each charge was well worth it, as they're excellent for harvesting and storing a lot of produce items! I often see crates like these stacked up out the back of supermarkets, waiting to be collected by the companies they are returned to. If you would like some, approach the supermarket manager, and see if you can pay the surcharge they would be charged for them, and get a few.
Picture
Picture
Do you like my new harvesting basket? I picked it up at the local Salvation Army family store for $3. :-) Inside it are 3 kinds of watermelons - Sugar Baby (large and dark green), Golden Midget (small and yellow) and Crimson Sweet (the stripey one) - as well as some Sweet Banana Peppers, Eggplants and a stray Telegraph Cucumber I found hiding near the spaghetti squash.

Since I picked these things, I've been busily trying out new recipes and preserving. So far I have made:
Green Tomato Quiche (Sooo good!)
Green Tomato Chutney
Green Tomato Relish
Garden Tomato Sauce
Spaghetti squash with Roasted Tomato Sauce
Harvest Sauce
Vegetarian Moussaka (oh my! - incredible!)
I also cut up one of the Sugar Baby watermelons to serve a gardening group that visited. Delicious! I forgot, though, to keep the rinds to make Pickled Watermelon Rind, something I decided last year I would try this year, but have forgotten until today. Will save the rinds from the next ones and give this a go!

I also plan to make:
Cucumber and Beetroot Salad
Reduced Sugar Pickled Cucumbers
and try out some more spaghetti squash recipes - spaghetti squash pizza perhaps?

Recipes for all of the above coming soon!
There are more of all of the items I picked still in the garden, except for Golden Midget watermelon, and tomatoes (well, there are tomatoes, but not ones I can be bothered picking as they're Tiny Tim's and psyllid infections have made them taste less than terrific). As soon as the weather improves, I better get picking again!
0 Comments

Garden Photo Tour - 1st April 2015

9/4/2015

0 Comments

 
It's been a while since I posted a photo tour of my garden. I used to do them at the beginning of each month, which is when I would take photos so I could use them to look back and see when things were planted, how they grew, how the garden developed etc. Whipping around your garden with a camera on the 1st of each month can be a very useful tool, and is one I recommend, even if you don't show them to anyone else. Let's talk a walk around mine....
Picture
This is the entrance to my vegetable garden area, built just over a year ago to keep the dogs from the garden. The rescued Banksia Rose on the left is starting to fill out the trellis nicely. To the right, my manic pumpkin vine, which is planted a long way from that spot has sent out runner that have now engulfed that fence and the nasturtiums growing there, and several very large crown pumpkins are ripening.

Picture
Here we're looking at a bit of a jungle of popcorn, my manic pumpkin, and there is a choko vine shoot galloping through the popcorn too. The Choko is mostly growing on the fence, but has also spread over the orange trellis structure just out of the left of the photo. The one pumpkin plant I planted was originally tucked in beside the black compost bin and the fence, for wind protection. I watered it by putting the hose into the compost bin, so that it was getting "compost tea" and this plant has gone for world domination as a result. This photo doesn't really show clearly how large this area is. The pumpkin is all over the intended area behind the popcorn patch, under the apple tree, plus all through the popcorn, all over the lemon tree, all over the fence to the right pictured above, as well as a fence to the left behind the orange structure, and from there had sent out runners another 10 metres or so through my herb beds and along another fence. And it's just ONE plant! Can't wait until it dies down and I can see just how many pumpkins there are - in the past I've never got more than 4-6 good pumpkins off one crown plant, but there are definitely more than that on this one!

The popcorn hasn't done tremendously well - I think the soil in this part is just too poor. When winter comes, I'm going to start sheet mulching and dumping lots of things on this area to compost in-situ, and then plant a green manure crop. It needs building up before I can grow anything else. Either that or I'll get my husband to concrete it and build my dream outdoor kitchen. ;-)

The next two photos are my yacon (left) and my newly sown cut-and-come-again lettuce patch - both are rocketing away thanks to the fact we've finally had some rain! January brought only 5mm of rain, and February 52mm. 78mm in March as made a huge difference! There are a couple of zucchini plants tucked in below the yacon. Bird netting over the lettuce will be removed as soon as it's established enough to stop the birds digging it up. When the rest of the seeds sprout, the bed will be completely full, and I'll cut as much as needed at a time with scissors, leaving it to regrow.
Picture
Picture
Picture
My trellis arch still has cucumbers growing on it, but I've had about enough of them - the rest can go to the chickens. You can see the choko starting to cover the top of it. I need to weed this out, and get some peas started on both sides for winter.
Picture
My main vege beds are doing pretty well. I won't post pics of each one here, as you can see what is happening with them in the recent Taming the Jungle posts HERE.
Picture
We will take a look at two of them though - on the left below, my spaghetti squash on the trellis (there are also Golden Midget watermelon, Sweet Banana peppers, Chocolate capsicum, parsley and telegraph cucumbers in the bed). The spaghetti squash is something I've never grown or eaten before, and I'm really pleased with how well they have done. They are ready for harvesting when the fruits are yellow, and the stalks turn brown. The plant is close to finished, but still has some growth on I, and some newer, pale green fruits higher up.

On the right, my rainbow chard are doing well - these will bolt in spring though, since they've been there all season, and are biennial, so I will have to plan to have new seedlings to start in spring, and meanwhile enjoy these.
Picture
Picture
Picture
My three barrels are doing pretty well - from left, fig underplanted with parsley, orange with strawberries, and mandarin with white alpine strawberries.

Picture
Another fairly jungle-y area is the bed along the back fence. The blackcurrants hidden in there are all starting to head towards winter dormancy. They're mostly hidden by leeks and a shoot from a pumpkin, rainbow chard I left to go to seed - interestingly now the seed has been produced, they're all sprouting new leaves all over the seed head stems. Along from that we have lots of nasturtium, some scallopini, rampant NZ spinach, miner's lettuce, celery and some seeding lettuce. I'll give this all a good tidy up after the frost kills off some of the plants.

Picture
My boysenberry and raspberry patch, which is also full of strawberries, lemon verbena, fennel and cape gooseberries. I won't go into too much detail on this, as more can be found in my recent post HERE.

Picture
My blueberry and strawberry patch is under the nets, and in front a young pear tree and a buttercup pumpkin plant. There are about 4 nice size squash on there nearly ready to pick.
Picture
Below, the feijoa patch alongside the path that runs from the house, down one side of the garden, past the compost bins, and then either through a gate to the paddock where the chickens are, or left to the greenhouse, and the swing seat with Chilean Guavas in front, and a soon to be planted kiwifruit vine over the trellis, with Stauntonia on the other side.
Picture
Picture
Below is a dwarf peach tree. We've lived in this house for 8 years, and it's always been two little sticks. Two years ago I was advised to toss it away. Last year it started to grow a little - the photo on the right was taken in June 2014 when the greenhouse was being constructed. Notice the difference in just this season's growth! I think we'll keep it after all! (And yes, it has yummy peaches now it's actually bearing!)
Picture
Picture
Speaking of greenhouses, mine is currently full of the last of the tomato experiment plants, as well as an eggplant that has bounced back from really bad aphid problems and is producing well, some peppers, and I've started moving vulnerable plants inside for winter - a mandarin, pot full of kumara and a lime are in there, along with some small kiwifruit plants. The cucumber vine on one wall is still producing lots of cucumbers too. The Chocolate Beauty capsicum are just starting to colour up - can't wait to try them!
Picture
Picture
Picture
Picture
Picture
Picture
Well, that concludes this wee photo tour. There's more to see of course, but one has to stop somewhere! I'll finish with a photo of the quince tree - due for harvesting. I suspect there is couple hundred kilos of quince on there again this year!
Picture
0 Comments

Homesteading DIY

8/4/2015

0 Comments

 
Last weekend was the four day Easter weekend, and the perfect time to get some major jobs taken care of before winter. Fortunately the weather was fine. My husband took the days prior off work, so he could take care of some other things, and get some prep work done. And then it was into the first major job:
Picture
Re-roofing 1/3 of the house! The roof over our kitchen, office, foyer, laundry, bathroom and toilet has been needing replacing for a while. Naturally, these things are  never as simple as you hope - once the iron came off it turned out a lot of timber needed replacing too (the house IS more than 100 years old after all!), and more wire needed to be laid to support builder's paper under the new iron. Fortunately my husband is a great DIYer, and so is my eldest daughter. In this pic they are removing the old iron. Now the new iron is on. It needs to age a while before it gets painted.

Picture
Next up, splitting all the firewood. We were blessed to be able to cut up felled pine trees that had been thinned from a forestry block, and the huge pile of them has been waiting on splitting. A borrowed log splitter, a couple of strong lads and my husband got it all done. Enough wood to keep us nice and warm over the coming cold months. Well done guys! Half of it is stacked under cover, and the rest is piled waiting for us to decide where to stack it.

Picture
Of course, what would a busy weekend be without an unplanned plumbing emergency? We woke Saturday morning to find a joint in the main plumbing under the house was spraying water violently. We had the plumber out for a similar problem a couple of months ago when my husband was at work - he said if it went again, the kitchen wall would have to be taken off and the kitchen re-plumbed as there wasn't enough pipe left to recut and thread it. SO glad this happened Saturday morning, not any other day of the long weekend, as the local building supply company was open Saturday morning only. So, my husband cut out a section of the outside wall with the sabre saw, and put in new pipes and joints for both the hot and cold systems, replacing the old copper pieces you can see in the photo. It was the cold one that needed doing, but since the wall was open, we may as well do both, so we can seal it up again and not have to worry about it.

Picture
And while the others were busy with these things, what was I up to apart from running to the hardware store, providing meals and normal chores? Well, it was time to slaughter the first of our ducks. The guys helped me with the killing, but the butchering was up to me. In the end, as I had 7 to do and limited time, I opted to skin them, remove breast meat and legs plus wing meat and put some of the rest of the carcasses aside to make stock or soup bases. Click HERE for the You Tube clip that shows the method I used. From the 7 ducks, I got enough meat to make 2 meals from breasts for the 7 of us, and enough leg and wing meat to make a yummy casserole, as well as the frames for stock.

Picture
I also cleaned out one of the sheds, so the partition wall my husband removed from one of the kid's rooms could be moved out there - when he first built it, he made it so it could come out mostly in one piece once the kids were no longer sharing a room, and we decided to set it up in the shed to create a better space for storage, and block the view of the shed contents (it's open at the front). I also got my husband to lay some carpet in a hallway extension, and I moved furniture from the shed to create the set up there I've been wanting. A local second hand store was closing down, so we went to have a look and came away with some great useful bargains - including a new dryer for free (the current one makes the most awful racket and the timer doesn't work), a brand new garden edging tool ($20), a sturdy long handled brush that connects to a hose for washing the outside of the house and windows ($2), a case for holding my current-use seed packets ($1), and a small decorative wooden chest ($10) - ok that one was just because I really liked it. :-)
The aim of homesteading is to live more self-reliantly, and doing so involves many different skills. You don't need to have all those skills before you start out - all you need is a willingness to give things a go and learn along the way. As my husband repeatedly says, he's not an expert at any of these things, but he can figure them out as he goes along. When we got married, I never expected to do much DIY - I left that kind of thing to my husband. But these days I mow the lawns, build fences or garden structures, butcher animals, repair tools and a myriad other things. I'm by no means an expert, and often I need some pointers or extra muscle from my husband or others, but I can do so much more than I thought!

Teamwork is important too - and never waste an available pair of hands! A local young man who was accidentally locked out of his home for a couple of hours came over and helped my husband lay the iron on the roof. The son of our neighbours came over to return a tool he had borrowed, and went back for his tool belt when he saw what we were doing, and helped with some of the prep work. Two brothers, sons of friends, helped with the firewood on two different days. And of course, our own kids pitched in too, when they weren't working. Many hands make light work. Besides, it's fun to work together and chat while a task gets done, as well as learn from each other. My husband started most of this work not expecting anyone would be available to help, but helpers seem to turn up when things are underway.
0 Comments

Onion Soup

7/4/2015

0 Comments

 
Yesterday was wet and cold, and with lots of onions hanging to dry in the shed, what better time for delicious onion soup? The recipe freezes well too - in fact it comes originally from one of my oldest cookbooks, entitled "Food for the Freezer."

Delicious, warming and filling!
Picture

Onion Soup

Ingredients for 8 servings:
Picture
1 kg brown onions
25 g butter
2 TBSP flour
2 litres beef stock
Salt/pepper to taste
Grated cheese

Method:
Peel and slice onions (I cut them in half then slice thinly). Melt butter in large pot, then saute onions over medium heat until golden and starting to caramelize a bit (original recipe says "golden brown" but mine never brown). Sprinkle over flour, stir in and cook 1 minute. Add beef stock slowly, stirring. Bring to the boil, season if desired, cover and simmer for 20 mins. (Hint - if using commercial beef stock, be careful about adding extra salt or the result may be far too salty). Ladle into bowls, top with grated cheese and stir in.

Toasted and buttered home made bread makes the perfect accompaniment!

To freeze: Cool after simmering (without adding cheese) and pour into suitable containers to freeze. To use, thaw and reheat, then serve as above.

0 Comments
<<Previous

    Author

    This page is my blog formerly known as Kiwi Urban Homestead.

    I'm a Kiwi homeschooling mother of 5 living in a small town. After growing 1000 kg of produce in my back yard in 2013, I'm now expanding my edible gardens even further.

    Archives

    February 2016
    December 2015
    October 2015
    September 2015
    June 2015
    May 2015
    April 2015
    March 2015
    February 2015
    January 2015
    December 2014
    November 2014
    October 2014
    September 2014
    August 2014
    April 2014
    February 2014
    December 2013
    November 2013
    October 2013
    September 2013
    August 2013
    July 2013
    June 2013
    May 2013
    April 2013
    March 2013
    February 2013
    January 2013
    December 2012

    Categories

    All
    Bees
    Butchering
    Chickens
    Compost
    Corn
    Diy Projects
    Events
    Everything Else
    Firewood
    Freebies
    Frugal Fortnight
    Garden Diary
    Getting Started
    Greenhouse
    Harvest
    Harvest Totals
    Health
    Herbs
    Home Made Cleaners
    Homesteading Skills
    Jungle Taming
    Livestock
    Media
    Monthly Garden Pics
    Moon Planting
    Musings
    Pests And Diseases
    Planting
    Preserving The Harvest
    Recipes
    Salads
    Soil Improvement
    Specific Crops
    Tomatoes
    Weekly Round Up
    Worms
    Yates Vegie Challenge
    Zucchini

    RSS Feed

Powered by Create your own unique website with customizable templates.