Last year I grew tomatoes. I thought I knew what I was doing, but actually I was clueless! My vines reached gigantic proportions, which shocked me. But upon reflection I realised that previously I'd only grown a couple of tomatoes, in pots. Well, technically they were my son's tomato plants, given to him by a generous friend. When he neglected them, I gave them a little attention. Turns out, two tomatoes in pots does not a tomato expert make!
But, I did learn a lot last year! I planted 38 plants in January (late, but I planted them anyway because a friend gave them to me). Another friend, viewing my baby plants all prettily tied to far-too-short stakes innocently asked "So, are you going to pinch out the laterals?" Ummmmmm.......laterals?? A little reading later, yes, pinching out laterals is a good idea. So I did. Sort of. Haphazardly. Those things grow inches every time you turn your back! One day they're so tiny they're barely there - so you figure you'll wait until next week when they're big enough to actually pinch. Next week they're the size of a small tree.....
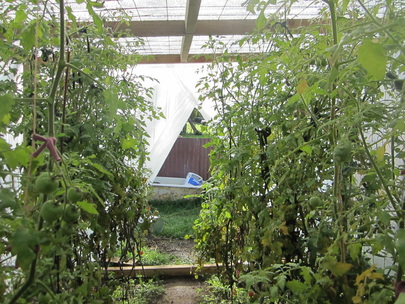
We ended up building a plastic-house over the top of the tomato patch (that midnight adventure described HERE), and I did end up with tomatoes - I was still picking them in July. I didn't really know how to train them, so they ended up with a complex array of tying-up attempts as I struggled to keep them tidy and off the floor.
So, this year, I'm going to grow lots of tomatoes. And I'm going to diligently train them, and make them follow all the rules of good tomato plants. My tomatoes are going to be terrific. And tidy. Because I said so! LOL <Insert manically grinning emoticon>
But, I did learn a lot last year! I planted 38 plants in January (late, but I planted them anyway because a friend gave them to me). Another friend, viewing my baby plants all prettily tied to far-too-short stakes innocently asked "So, are you going to pinch out the laterals?" Ummmmmm.......laterals?? A little reading later, yes, pinching out laterals is a good idea. So I did. Sort of. Haphazardly. Those things grow inches every time you turn your back! One day they're so tiny they're barely there - so you figure you'll wait until next week when they're big enough to actually pinch. Next week they're the size of a small tree.....
We ended up building a plastic-house over the top of the tomato patch (that midnight adventure described HERE), and I did end up with tomatoes - I was still picking them in July. I didn't really know how to train them, so they ended up with a complex array of tying-up attempts as I struggled to keep them tidy and off the floor.
So, this year, I'm going to grow lots of tomatoes. And I'm going to diligently train them, and make them follow all the rules of good tomato plants. My tomatoes are going to be terrific. And tidy. Because I said so! LOL <Insert manically grinning emoticon>
Ok, being more serious now. Ahem. <Clears throat and assumes school-marmish demeanor>
I'm sure by this far into this blog article you're all aware I'm totally an expert tomato grower, and therefore are waiting with baited breath for me to impart all the wisdom of the great tomato oracles so you can grow terrific tomatoes too.
Well, an expert I may not be, but truth is, doing things wrong is often a great way to learn - it tends to send one to the books and real experts so you can figure out what to do better, and having that practical experience under your belt (even the messy, untidy, of dubious success type experiences) makes you better prepared to understand what they're really saying and apply it next time! (Which is why my 2013 gardening motto is "Just do it!")
So, I shall lay out for you what tomatoes I'm growing this season, how and where. And what the "rules" are.
But first, the why:
We eat a lot of tomatoes and tomato-based foods in our house. We like 'em fresh in season, and we like 'em any other way all year long. I have in the past bought a lot of tomato sauce, canned tomatoes etc, but have come to realise more and more that store-bought tomato sauces contain a lot of not-so-nice ingredients, plus they're packaged in plastic bottles. Plastic should not be in contact with food, especially acid food like tomatoes. And tin cans are lined with a plastic coating (because otherwise the food would react with the tin) which is high in BPA (one of the serious nasties of the plastic world - just look it up!). Unfortunately, non-BPA alternatives are not actually better for us. And acid foods like tomatoes cause BPA to leech into the food at a much higher rate. Fredrick Vom Saal, an expert endocrinologist at the University of Missouri, who studies the effects of BPA, will not personally eat canned tomatoes. Ever.
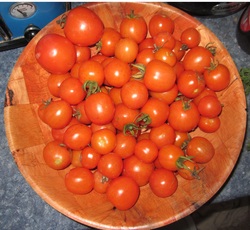
Besides, it's always much better, cheaper and tastier to grow your own! Despite my own ineptitude last year, I managed to harvest 35kg of tomatoes at a time of the year when they cost $10-$12/kg in the shops. Even after spending almost $300 to build the plastic house (which has since given me even more returns as a propagation house), I came out ahead. And they tasted soooooo good!
Besides, it's always much better, cheaper and tastier to grow your own! Despite my own ineptitude last year, I managed to harvest 35kg of tomatoes at a time of the year when they cost $10-$12/kg in the shops. Even after spending almost $300 to build the plastic house (which has since given me even more returns as a propagation house), I came out ahead. And they tasted soooooo good!
Tomatoes I'm growing this year...
Call me boring, but I like my tomatoes red. Of course there are some gorgeous looking heirloom tomatoes of many colours out there, but I'm not quite ready to try them just yet. The varieties I'm growing this year are:
*Money-maker (8 plants) - a nice all-rounder, good in sandwiches etc
*Cocktail (10 plants) - small and tasty - great for the kids and salads
*Silvery Fir Tree - a Russian heirloom (4 plants) - I've had this pack of seeds in my seed box for a while so figured out I may as well give them a go. What are they like? Red. Beyond that, I'm pretty clueless.
*Roma (48 ish plants) - a good bottling tomato, and I plan to do lots of that!
*Sweet 100 (1 plant) - because I got it cheap at a market
*Russian Red (1 plant) - because I got it cheap at the same market
*Tiny Tim (15 plants I think) - it sounded cute. And turns out it's a true dwarf, only growing about 30-40 cm high with lots of tiny wee tomatoes. Perfect to snack on in the garden or for the kids to help themselves to, so hopefully I can (mostly) keep them away from my main tomato crop.
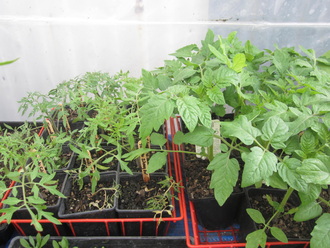
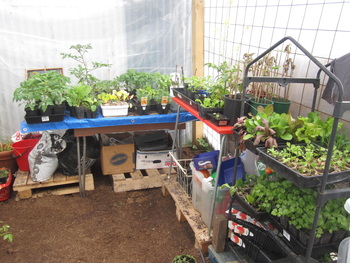
Apart from the two market buys, all my tomatoes have been raised from seed in my plastic house. I wasn't too impressed with the silvery fir - the seedlings are a lot weaker, and I ended up discarding a number of them. All seeds were sown in accordance with the moon calendar.
*Money-maker (8 plants) - a nice all-rounder, good in sandwiches etc
*Cocktail (10 plants) - small and tasty - great for the kids and salads
*Silvery Fir Tree - a Russian heirloom (4 plants) - I've had this pack of seeds in my seed box for a while so figured out I may as well give them a go. What are they like? Red. Beyond that, I'm pretty clueless.
*Roma (48 ish plants) - a good bottling tomato, and I plan to do lots of that!
*Sweet 100 (1 plant) - because I got it cheap at a market
*Russian Red (1 plant) - because I got it cheap at the same market
*Tiny Tim (15 plants I think) - it sounded cute. And turns out it's a true dwarf, only growing about 30-40 cm high with lots of tiny wee tomatoes. Perfect to snack on in the garden or for the kids to help themselves to, so hopefully I can (mostly) keep them away from my main tomato crop.
Apart from the two market buys, all my tomatoes have been raised from seed in my plastic house. I wasn't too impressed with the silvery fir - the seedlings are a lot weaker, and I ended up discarding a number of them. All seeds were sown in accordance with the moon calendar.
The set-up
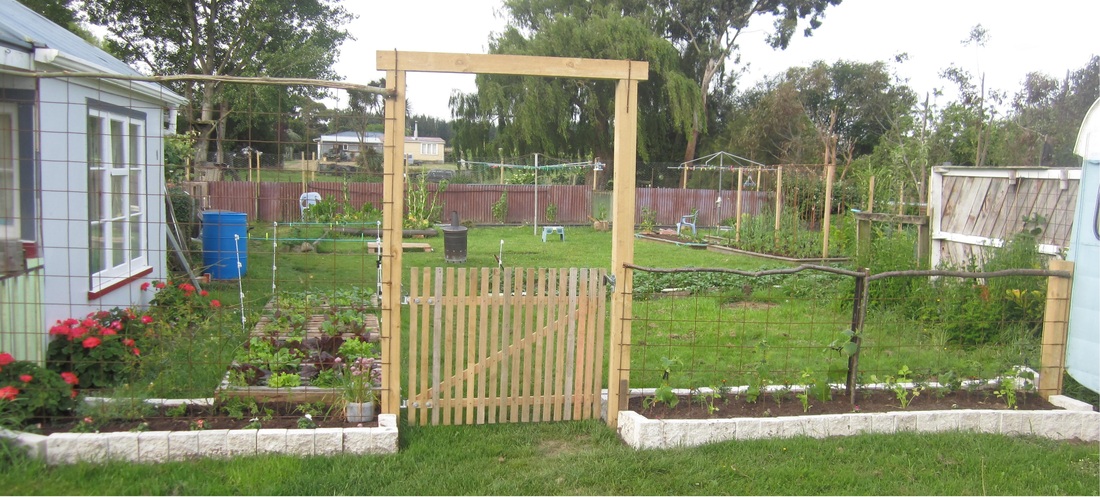
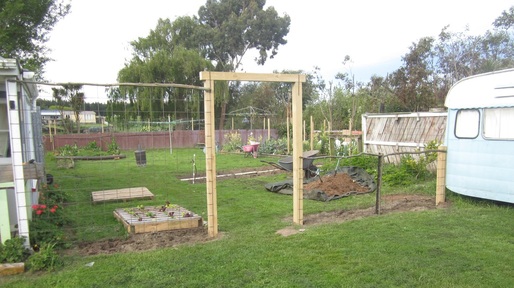
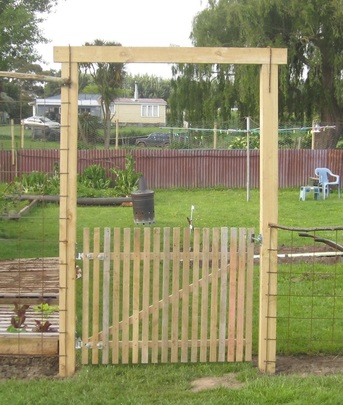
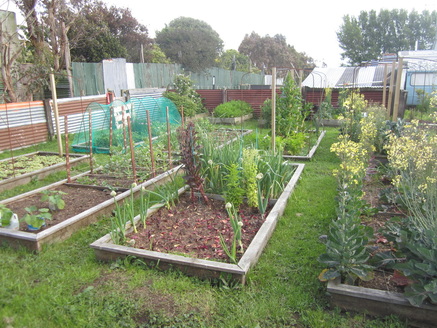
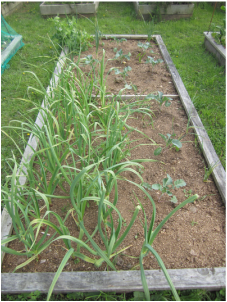
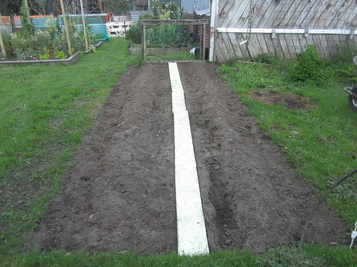
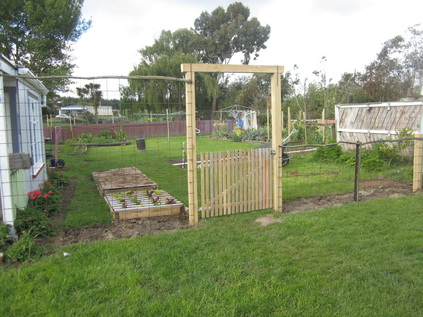
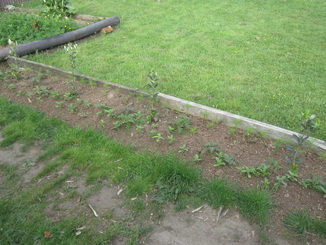
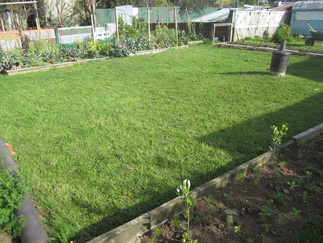
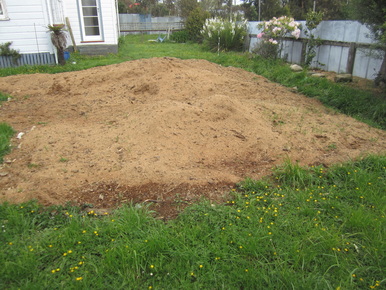
My tomatoes are being grown outdoors this year, in the main garden beds of my vege garden. I have 3 beds I'm setting aside specifically for tomatoes, and one that will be half planted in tomatoes.
To stake or not to stake - the vital tomato growing question which engenders endless debate and opinions! I spend some time thinking about that this year. I liked the idea of tomato cages, but the cost is prohibitive. You don't HAVE to stake tomatoes - you can just let them sprawl, and they reputedly produce more tomatoes that way. But it's messy, difficult to harvest, and creates a bit of a harbour for slugs and snails, which are a big problem in my garden. Using a permanent fence or trellis system to train the vines along is another option, one which I'm seriously considering for the future, but not possible in my existing beds for this year.
The other thing one needs to know about tomatoes: they come in two sorts - determinate and indeterminate. Determinate tomatoes only grow to a certain height, and then more or less stop. Roma and Tiny Tim are both determinate types. Indeterminates (most modern tomatoes) are also called "vining tomatoes" - they send out long shoots and keep growing and growing. The determinates are the ones often not staked by growers, but after some thought and research I decided that I would stake my Romas. The Tiny Tims will be the only tomatoes I don't stake this year.
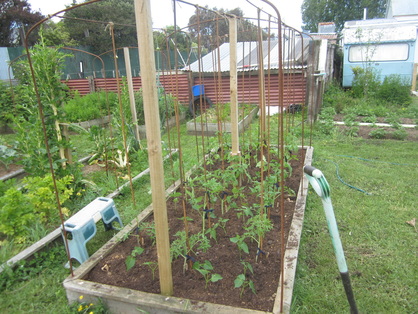
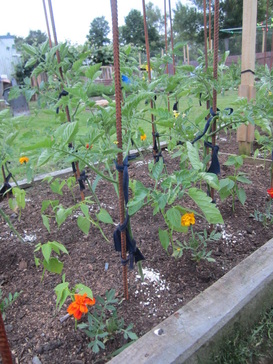
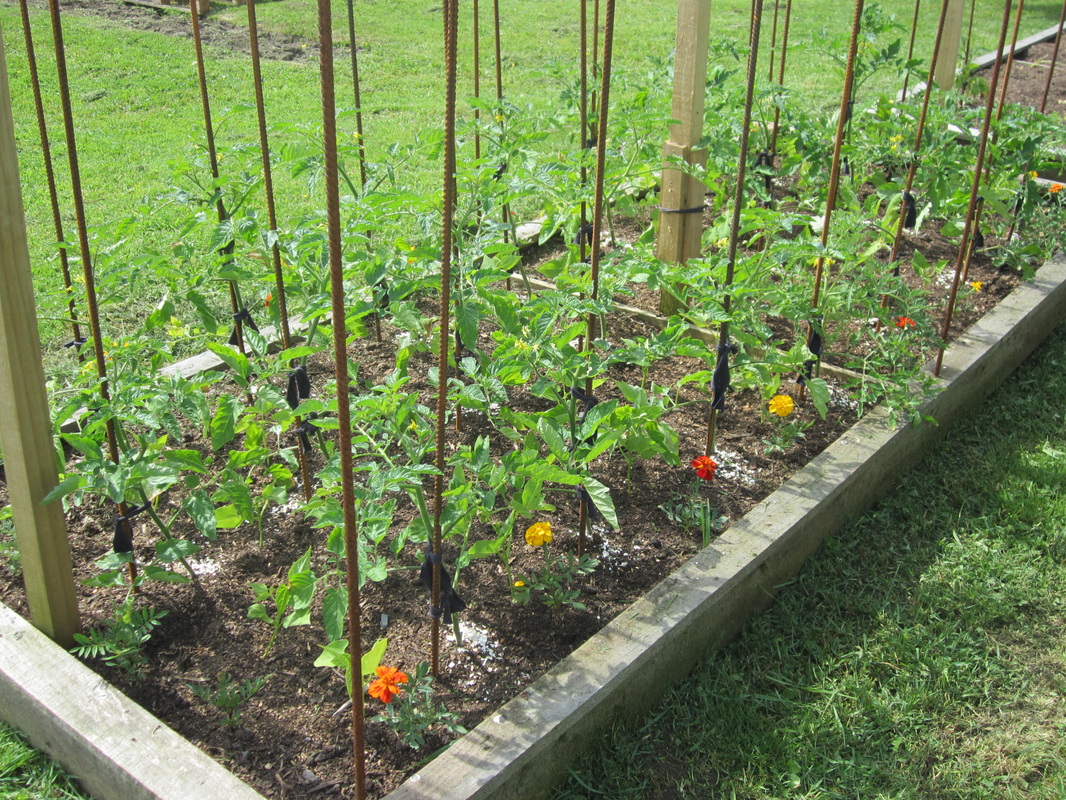
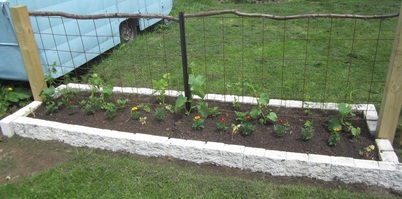
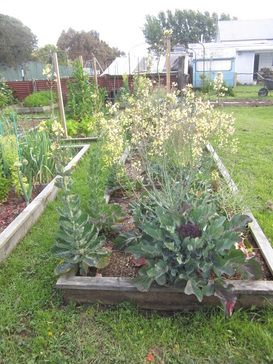
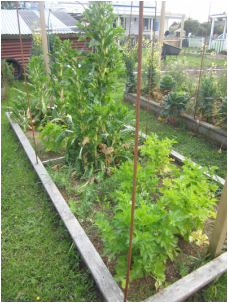
I have planted one bed of tomatoes so far - in setting it up for my Moneymaker, Cocktail and Silvery Fir tomatoes, I first set up a frame-work of metal re-bar stakes, pushed quite deeply into the ground, and tied to a horizontal frame 1.5-2m above the bed. This is a good, solid set up. But it's not without price. Of course, I can re-use those stakes for a number of years (and will) and rebar is useful for so many things in the garden! But I can't afford to set up 3 beds that way this year, so for my two beds of Romas I will be creating the top horizontal framing, and then using a system of growing them up strings instead of stakes. This should work well for the Romas, especially as they are not as heavy as some of the other varieties.
Growing up strings is done by waiting until the tomatoes are about 30cm high, then pinching off the bottom two leaves. A length of twine is tied with a reef knot where the leaves were removed, and the other end is tied to an overhead support. Some sag is left in the twine. As the plant grows, the twine is twisted around the stems for support. I'll be using natural jute twine - I think it looks better, plus it can be composted at the end of the season.
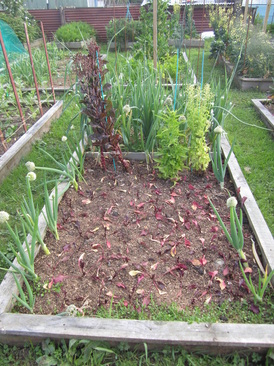
My two market-whim tomatoes are each staked at the end of the extra bed, and the Tiny Tims will be planted out between them next month. These are running down the length of one half of the bed - the rest of the bed is planted in parsley and silverbeet.
To stake or not to stake - the vital tomato growing question which engenders endless debate and opinions! I spend some time thinking about that this year. I liked the idea of tomato cages, but the cost is prohibitive. You don't HAVE to stake tomatoes - you can just let them sprawl, and they reputedly produce more tomatoes that way. But it's messy, difficult to harvest, and creates a bit of a harbour for slugs and snails, which are a big problem in my garden. Using a permanent fence or trellis system to train the vines along is another option, one which I'm seriously considering for the future, but not possible in my existing beds for this year.
The other thing one needs to know about tomatoes: they come in two sorts - determinate and indeterminate. Determinate tomatoes only grow to a certain height, and then more or less stop. Roma and Tiny Tim are both determinate types. Indeterminates (most modern tomatoes) are also called "vining tomatoes" - they send out long shoots and keep growing and growing. The determinates are the ones often not staked by growers, but after some thought and research I decided that I would stake my Romas. The Tiny Tims will be the only tomatoes I don't stake this year.
I have planted one bed of tomatoes so far - in setting it up for my Moneymaker, Cocktail and Silvery Fir tomatoes, I first set up a frame-work of metal re-bar stakes, pushed quite deeply into the ground, and tied to a horizontal frame 1.5-2m above the bed. This is a good, solid set up. But it's not without price. Of course, I can re-use those stakes for a number of years (and will) and rebar is useful for so many things in the garden! But I can't afford to set up 3 beds that way this year, so for my two beds of Romas I will be creating the top horizontal framing, and then using a system of growing them up strings instead of stakes. This should work well for the Romas, especially as they are not as heavy as some of the other varieties.
Growing up strings is done by waiting until the tomatoes are about 30cm high, then pinching off the bottom two leaves. A length of twine is tied with a reef knot where the leaves were removed, and the other end is tied to an overhead support. Some sag is left in the twine. As the plant grows, the twine is twisted around the stems for support. I'll be using natural jute twine - I think it looks better, plus it can be composted at the end of the season.
My two market-whim tomatoes are each staked at the end of the extra bed, and the Tiny Tims will be planted out between them next month. These are running down the length of one half of the bed - the rest of the bed is planted in parsley and silverbeet.
Thou shalt... 10 "commandments" for growing terrific tomatoes
1. Thou shalt remove laterals. Most tomatoes do best when grown up a single main stem, which is staked or supported. A tomato plant will naturally send out many lateral shoots (one from each of the points were a leaf grows off the main stem). Pinching out the laterals keeps the plant tidier and more manageable, and keeps it's energy focussed where you want it - on forming flowers and then fruit. I won't be pinching laterals on my Tiny Tims, but will on all the others. My experience last year made me realise how essential it is to be diligent about this, so I plan to be attending to it once or twice a week without fail!
2. Thou shalt support the tomato plant. As discussed above, I'm using stakes and suspended twine to train my plants up. Regularly tying them to the stakes, or twisting the twine about them, is essential. I'll do this when I check for laterals.
3. Thou shalt remove lower leaves. Early in the process, I take off the lower leaves. You don't want any leaves drooping down and touching the ground as that can increase the chances of pests and disease. Also, keeping good airflow around the plants is important to reduce the likelihood of fungal disease. Later, as the fruits are maturing, it's also common practice to remove more leaves so that the sun reaches and ripens the tomatoes.
4. Thou shalt limit the number of trusses on each plant. A truss is a cluster of fruit (tomatoes) that grows where the set of flowers was. Many experts advise that if you limit the plant to 4 or 5 trusses, it will produce better, bigger tomatoes. If you allow it to keep setting trusses after that, they will diminish in quality and size.
5. Thou shalt pinch out the top of the plant. When the plant has set 4-5 good trusses, I will remove the top shoot to stop it growing further. That way the plant can concentrate it's energy on developing those trusses. Plus it means I'm not going to be tangled in endless lengthy vines I would need a huge scaffolding to continue training up!
6. Thou shalt feed the plants. Tomatoes are very hungry plants, and need lots of good sustenance if they are to remain healthy and produce good fruit. Feeding begins by good soil preparation, incorporating lots of compost or aged manure. Then at planting time, I place a mixture of dolomite, gypsum, blood and bone, Neem and sheep pellets under each plant. Last year I used fish heads, chopped bananas and crushed egg shells. Tomatoes need lots of calcium - so not only did I put dolomite under the roots, I've also sprinkled crushed eggshells around the plants on top of the soil. Side dressings during the growing season of such things as blood and bone, tomato food, compost, manure teas and sulphate of potash help to keep plants strong and healthy.
7. Thou shalt supply plenty of water. Tomatoes need a lot of water, and a plant that wilts due to lack of water becomes weaker and more prone to problems. If rainfall is low, water regularly, as well as doing all you can to conserve moisture in the soil.
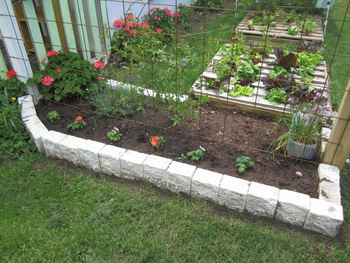
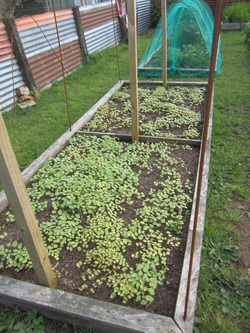
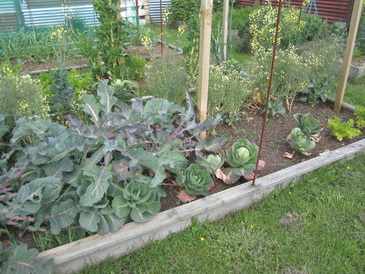
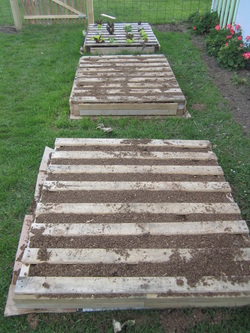
8. Thou shalt protect the soil. Bare soil is bad! It loses moisture and nutrients and leads to all sorts of problems. This year I'm under-planting my tomatoes to create a "living mulch" - the bed planted so far is under-planted with dwarf beans. Being a legume, they will also fix nitrogen into the soil, feeding the tomatoes. Look up tomato companion plants and select something low-growing and suitable, preferably something you can also eat as a bonus crop. I will be trying summer savory in another bed. Mulching with straw or similar is also a good way to protect the soil. One of the beds that is being prepared for my tomatoes is currently sown in buckwheat as a cover crop - shortly I will pull the buckwheat and lay it on the soil where it will serve as a mulch and soil improver. And the perfect mulch? An inch or two of good compost!
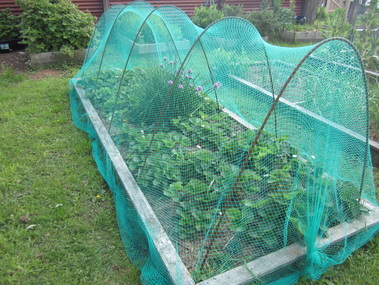
9. Thou shalt be diligent to prevent or deal with pests and diseases. I grow everything organically, so don't use any chemical sprays etc. But there are plenty of organic ways to protect your tomato crop. I'm growing marigolds around the outside of the beds, as they deter many pests. Feeding your plants and keeping good airflow helps to keep them healthy - a healthy plant is naturally disease resistant. Removing and destroying any diseased plants or plant leaves is sound practice. Encouraging beneficial insects such as parasitic wasps and ladybirds is a very good idea - providing plenty of suitable flowers and habitat in your garden is the way to do that. They will control a variety of pests such as aphids. Home-made sprays can be used. Spraying with a "compost tea" can be extremely beneficial. (For excellent info on the making and using of compost, read Mike McGrath's Book of Compost). Some growers swear by Liquid Copper painted on when laterals are removed to prevent disease. Others insert a piece of copper wire through the stem of the plant to provide protection. I shall try one or the other, or both. Last year I had a huge problem with leaf-roller caterpillars. Regularly checking for and squashing any caterpillars helps. Neem sprays are useful for this and a variety of pests (as is neem granules in the soil). Encouraging natural predators is helpful too. Slugs and snails love tomato plants - removing their habitats (hiding places) is a main weapon against them. Night-time slug/snail hunts are very helpful. I do occasionally resort to the use of a less-harmful (to pets) snail pellet such as Quash. And lastly, covering the crop with bird netting to keep the birds from eating all your hard-earned fruit is a must in my book!
10. Thou shalt encourage pollination. Good pollination means a nice full truss of tomatoes. Poor pollination means much fewer tomatoes. Tomatoes are self-fertile; they are able to pollinate themselves in the right conditions. The flowers face downwards, and pollination occurs when the pollen falls upon the stamen. Wind is what generally causes pollination in the open field, though bees are helpful. In fact, apparently the buzz of a passing bumblebee's wings is just the right frequency to cause pollen to drop and pollinate the flower. In a greenhouse situation, where there are no wind or bees, it is common practice to use an electric toothbrush to stimulate pollination. The toothbrush apparently vibrates at just the right frequency too - the vibrating shaft (brush head removed) touched to the stems of the plant on or near the flower sets does the job. I did this last year in my greenhouse, and saw an obvious increase in pollination. But in the outdoors, your main focus will be on ensuring good air flow and encouraging bees to buzz around - again, providing plenty of flowers will do the trick. If you are noticing poor pollination (eg only one or two tomatoes setting in a truss) it might be time to pull out an old electric toothbrush!
2. Thou shalt support the tomato plant. As discussed above, I'm using stakes and suspended twine to train my plants up. Regularly tying them to the stakes, or twisting the twine about them, is essential. I'll do this when I check for laterals.
3. Thou shalt remove lower leaves. Early in the process, I take off the lower leaves. You don't want any leaves drooping down and touching the ground as that can increase the chances of pests and disease. Also, keeping good airflow around the plants is important to reduce the likelihood of fungal disease. Later, as the fruits are maturing, it's also common practice to remove more leaves so that the sun reaches and ripens the tomatoes.
4. Thou shalt limit the number of trusses on each plant. A truss is a cluster of fruit (tomatoes) that grows where the set of flowers was. Many experts advise that if you limit the plant to 4 or 5 trusses, it will produce better, bigger tomatoes. If you allow it to keep setting trusses after that, they will diminish in quality and size.
5. Thou shalt pinch out the top of the plant. When the plant has set 4-5 good trusses, I will remove the top shoot to stop it growing further. That way the plant can concentrate it's energy on developing those trusses. Plus it means I'm not going to be tangled in endless lengthy vines I would need a huge scaffolding to continue training up!
6. Thou shalt feed the plants. Tomatoes are very hungry plants, and need lots of good sustenance if they are to remain healthy and produce good fruit. Feeding begins by good soil preparation, incorporating lots of compost or aged manure. Then at planting time, I place a mixture of dolomite, gypsum, blood and bone, Neem and sheep pellets under each plant. Last year I used fish heads, chopped bananas and crushed egg shells. Tomatoes need lots of calcium - so not only did I put dolomite under the roots, I've also sprinkled crushed eggshells around the plants on top of the soil. Side dressings during the growing season of such things as blood and bone, tomato food, compost, manure teas and sulphate of potash help to keep plants strong and healthy.
7. Thou shalt supply plenty of water. Tomatoes need a lot of water, and a plant that wilts due to lack of water becomes weaker and more prone to problems. If rainfall is low, water regularly, as well as doing all you can to conserve moisture in the soil.
8. Thou shalt protect the soil. Bare soil is bad! It loses moisture and nutrients and leads to all sorts of problems. This year I'm under-planting my tomatoes to create a "living mulch" - the bed planted so far is under-planted with dwarf beans. Being a legume, they will also fix nitrogen into the soil, feeding the tomatoes. Look up tomato companion plants and select something low-growing and suitable, preferably something you can also eat as a bonus crop. I will be trying summer savory in another bed. Mulching with straw or similar is also a good way to protect the soil. One of the beds that is being prepared for my tomatoes is currently sown in buckwheat as a cover crop - shortly I will pull the buckwheat and lay it on the soil where it will serve as a mulch and soil improver. And the perfect mulch? An inch or two of good compost!
9. Thou shalt be diligent to prevent or deal with pests and diseases. I grow everything organically, so don't use any chemical sprays etc. But there are plenty of organic ways to protect your tomato crop. I'm growing marigolds around the outside of the beds, as they deter many pests. Feeding your plants and keeping good airflow helps to keep them healthy - a healthy plant is naturally disease resistant. Removing and destroying any diseased plants or plant leaves is sound practice. Encouraging beneficial insects such as parasitic wasps and ladybirds is a very good idea - providing plenty of suitable flowers and habitat in your garden is the way to do that. They will control a variety of pests such as aphids. Home-made sprays can be used. Spraying with a "compost tea" can be extremely beneficial. (For excellent info on the making and using of compost, read Mike McGrath's Book of Compost). Some growers swear by Liquid Copper painted on when laterals are removed to prevent disease. Others insert a piece of copper wire through the stem of the plant to provide protection. I shall try one or the other, or both. Last year I had a huge problem with leaf-roller caterpillars. Regularly checking for and squashing any caterpillars helps. Neem sprays are useful for this and a variety of pests (as is neem granules in the soil). Encouraging natural predators is helpful too. Slugs and snails love tomato plants - removing their habitats (hiding places) is a main weapon against them. Night-time slug/snail hunts are very helpful. I do occasionally resort to the use of a less-harmful (to pets) snail pellet such as Quash. And lastly, covering the crop with bird netting to keep the birds from eating all your hard-earned fruit is a must in my book!
10. Thou shalt encourage pollination. Good pollination means a nice full truss of tomatoes. Poor pollination means much fewer tomatoes. Tomatoes are self-fertile; they are able to pollinate themselves in the right conditions. The flowers face downwards, and pollination occurs when the pollen falls upon the stamen. Wind is what generally causes pollination in the open field, though bees are helpful. In fact, apparently the buzz of a passing bumblebee's wings is just the right frequency to cause pollen to drop and pollinate the flower. In a greenhouse situation, where there are no wind or bees, it is common practice to use an electric toothbrush to stimulate pollination. The toothbrush apparently vibrates at just the right frequency too - the vibrating shaft (brush head removed) touched to the stems of the plant on or near the flower sets does the job. I did this last year in my greenhouse, and saw an obvious increase in pollination. But in the outdoors, your main focus will be on ensuring good air flow and encouraging bees to buzz around - again, providing plenty of flowers will do the trick. If you are noticing poor pollination (eg only one or two tomatoes setting in a truss) it might be time to pull out an old electric toothbrush!
So, that's the theory. As with most food growing, time will tell! I'll keep you posted on my (hopefully) terrific tomatoes! Of course, no matter how diligent or expert one is as a gardener, some things are simply beyond our control. As any gardener knows, some years certain plants just don't do well. So in the end, all I can do is do my best, and leave the rest in the hands of God. God willing, I hope to grow terrific tomatoes this year!


 RSS Feed
