| Thrifty Kiwi |
Like our Facebook page
|
|
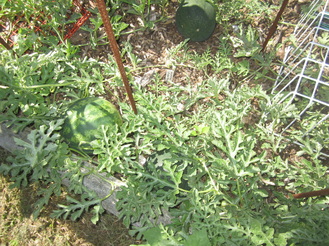
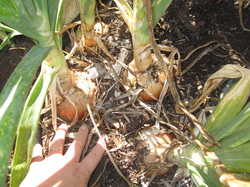
Those who have been reading my blog for a while will know that I refer the the eight 3.25 x 1.25m wooden edged raised beds I rotate vegetable crops in as my "main vege beds." Well, actually it's 9 beds now - one of those 8 got replace by two 1x2m beds. Anyway, like the rest of the garden, they have gotten somewhat overgrown and neglected over the last couple of months. So, time to pull out weeds and spent plants, and start prepping them for winter crops. The following three "before" photos show first off all the whole area, then a photo of each set of 4 or 5 beds, taken from one end. I've got some work to do! I decided to tackle the beds two at a time, with breaks between, over two days.  First, I weeded the watermelon bed, which has some nice watermelons of two varieties (Sugar Baby and Crimson Sweet) ripening in it, and green and purple beans growing up the corner posts. Shortly after I planted the seedlings, I was having so many problems with birds digging in the bark and around the roots of the plants, that I inverted freezer baskets around each to protect them until thy were established. Well, the vines grew right through them, and I left it too late to remove them. This made weeding a bit more challenging, but I did it. Then I began clearing the massively overgrown bed next to it. This one had dwarf beans growing in it, which where now dry, so I pulled up a large bin of those, and put them in the shed to dry some more before I shell them for seed. After clearing all the weeds, I added a large load of home made compost to the bed, sprinkled with some soft lime, and topped it with well-rotted wood chip. I decided to put some winter brassicas in the bed; to prevent white butterfly from decimating them, I am covering the bed in micromesh, and to prevent the steel hoops from damaging the micromesh when we get our usual gales, I first slid some aqua noodles over the steel rods for protection. I've out the punnets of broccoli, celery and cabbage under the net to harden off, but won't plant them out for a while yet. Next, I removed the bird netting from the silverbeet patch and weeded it, removing gone-to-seed radish plants, and not-so-good outer leaves from the silverbeet. Another bed is full of celery, with some Tiny Tim tomatoes at one end. Some of the celery is going to seed; I removed a few plants, and staked up the biggest one so it can produce seed for next season. The bed was weeded and tidied up. Next to it is a bed of white sweetcorn, underplanted with a couple of buttercup squash. I pulled out the dried seed stalks of the Corn Cockle flowers that were there, and put aside to save seed from (they sound really cool when you shake them, as they rattle, and look good enough for an artistic indoor arrangement). I weeded that bed too, and the barked area between them that had gotten really weedy. I also weeded the narrow bed against the fence behind them, which has beans growing up a trellis.  The following day, I started by weeding the bed containing onions, beetroot, spring onions and parsnips. One of the parsnips right at the end is going to seed - I will let it do so and collect the seeds, as it's a big, strong plant and parsnip seed must be very fresh for successful germination. I also started harvesting some of the onions. This is my first proper attempt to grow onions, and I'm pleasantly surprised by the results. Some of them are going to be bigger than the palm of my hand! I need to harvest and bottle all the beetroot - on my to-do list for next week! The next bed over formerly contained garlic and shallots. It was rough-weeded recently, so now it got a fine weeding, added compost and aged wood-chip, and was sown in 3 varieties of beetroot, three rows each, and a couple of rows of parsnips. I've planted some Detroit Red beetroot, which always do well for me, some Easy-slice long style beetroot, and some multi-coloured red and white ones, just for fun. I covered the bed in bird netting, to prevent the blackbirds digging up the seeds, as they are always attracted to newly mulched beds. Next up was the tomato bed, also planted with parsley, basil and marigolds. The tomatoes have been devastated by psyllid. I picked a roasting dish full of ripe tomatoes off them, but when I tried them they tasted pretty awful, so they went to the chickens. I pull the tomato plants and removed their cages, and weeded the bed. The cinnamon basil smells SO good! Here is a photo from before I pulled the tomato plants: The final bed contains spaghetti squash, Golden Midget water melons, peppers, eggplant and a couple of cucumbers. It just needed a bit of weeding. Harder work was the path between the beds - it had completely overgrown with couch and other stubborn weeds. I ended up digging out the lot, removing all runners etc, then laying cardboard and fresh bark. Here's the before photo for that section: And below is the after shot of the two beds and path. :-) I think I'm going to use the tomato cages in a different configuration and sow broad beans in the middle of what was the tomato bed. But no hurry on that - if I sow them too soon they'll get enormously tall by spring and suffer wind damage. I'll probably wait until June. The spaghetti squash are at the end of their life span and will be ready to harvest soon, and the watermelon are close to picking too, as well as the peppers. Phew! It feels like I'm making some progress taming this jungle!
0 Comments
A few months ago, in early November, I created a "Herb Tree" and entered it in a competition for garden structures, winning a prize and ending up in the newspaper. This is the photo taken when it was completed, and entered into the competition: I call it a “herb tree” but basically it’s a fancy structure to hold multiple hanging baskets, most of which I’ve planted with herbs. I was inspired by a post and hanging baskets I found at an op shop for a bargain $30 price. The base of the stand was completely rotten, so I began by dismantling it, having my husband cut some new base pieces (which needed some fancy work with the bench saw to make them interlocking), as well as cut some new blocks for the holders. I then rebuilt it myself, and also nailed it to a pallet for extra stability. I painted the pallet and the pole with free paint from the dump – first with a light green, then with a top coat of glossy enamel forest green. 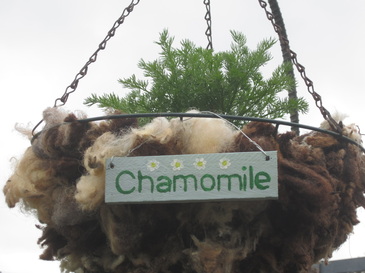 Not all the baskets came with liners, so for the ones that did not, I used some wool from the last time we crutched our sheep to line the insides. Wool makes a great basket liner – it holds water but drains freely, and holds in the soil. Any dags in the wool are a bonus fertiliser! I planted up 14 hanging baskets. They contained:
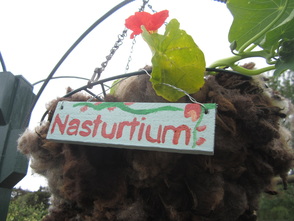 I also created labels for each plant. I used some battens from a piece of trellis that fell apart, and cut them into 10 and 15cm lengths with the dropsaw. I drilled holes in each end, and I then painted them all with more free pale green paint. After they dried, I used a stencil from my kid's art supplies to pencil on the lettering, then painted with acrylic art paints and a fine art paint brush. I added some decorative touches to some of them. And then I sealed them with a coat of varnish. Lacing wire is threaded through the holes and over the edge of the baskets before being twisted to hold in place. The labels will make it easy for my children to identify which herb is which when they need them for cooking. Plus they look pretty cool. My plan is to have everything on this stand be edible, and to make it easy to come along and snip a bit of this and a bit of that to add to salads or cooking. There is room to add a few more baskets onto my herb tree stand as I am able. The whole set up has been placed onto a barked area I created between several other garden beds, where there is just the right amount of space for it. I would prefer to put it closer to the kitchen door, but that area is very exposed and windy, while this spot is a wee bit more sheltered. 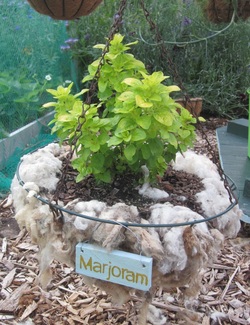 The downside of hanging baskets in summer is that they dry out very fast, and have to be watered every day without fail. Some plants have done particularly well:
It was a fun project! I enjoy using free or very cheap items creatively in my garden!
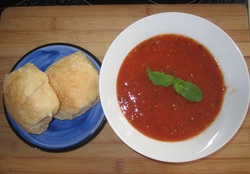 It's the time of year when tomatoes are plentiful and cheap - the ideal time for putting up jars of soup, sauce, diced tomatoes and relishes to enjoy throughout the year. Last week I had a bowl of tomatoes from my greenhouse and a couple of boxes of slightly damaged tomatoes I purchased at a good price locally in need of processing - close to 35 kg in total. I was short on time that week, as I had a lot of other commitments, so decided to turn this batch into our favourite tomato soup. I first learned this recipe last year - the kids complained I didn't make enough of it to last longer than a couple of months. 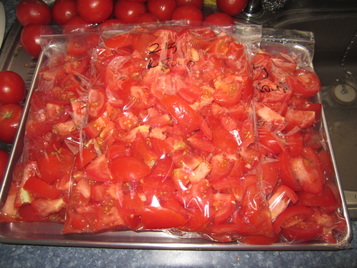 Each batch of soup takes 6kg of tomatoes. I got the first batch cooking away on the stove, and then since my time was so limited, I washed and chopped up another 12 kg of tomatoes, filling ziplock bags with 2kg each, and then laying the bags on trays of 6kg each before popping them in the freezer. 12 kg frozen - ready to make up more soup another day. There was no more space available in my freezer, so I had to get on with processing the rest. This is a simple and delicious recipe; I particularly like it because it uses lots of fresh herbs from the garden. This recipe comes from Lynda Hallinan's lovely book Back to the Land. 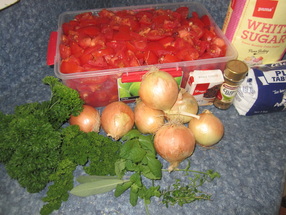 Ingredients: 6kg tomatoes, roughly chopped 6-8 onions, roughly chopped 1 cup sugar 3 TBSP non-iodised salt 2 TBSP celery salt 14 sprigs parsely, chopped 7 sprigs thyme, chopped 7 sprigs mint, chopped 7 whole cloves 3-4 sage leaves, chopped (don't use more as its flavour is strong) 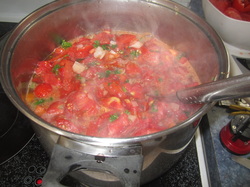 Method: 1) Place all ingredients in a large stock pot. Yes, even the cloves - they don't need to be in a muslin bag. Bring to the boil, stirring from time to time. Simmer with the lid off for 1 hour, stirring occasionally. 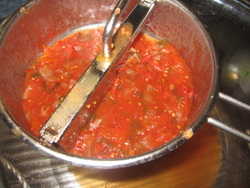 2) Process soup through a food mill, or blend in batches then force through a sieve, to remove most of skins and seeds. 3) Return soup to pot, bring back to the boil, and then bottle in prepared hot, sterilized jars and seal. Exact details for how to prepare jars and lids or seals, and how to bottle effectively can be found HERE. Note, I leave about a 1/2 inch of head space.
That's all there is to it! In this particular case, again due to time constraints, on day one I cooked and bottled one batch of soup, cut up and froze enough tomatoes for two more batches, and cut up and put another 2 batches worth in the fridge overnight. On day two, I cooked up those two batches of soup, and put it through the food mill, but didn't have time for bottling. So I put it back in the fridge for another night. Day three, I returned the soup to the boil, simmered it for a few minutes, and then bottled it. Three batches produced 15 quart jars of soup. To use the soup, simply open a jar, reheat in a pot, and serve. Delicious with home made bread! Expecting a P.R press release in the local papers about the Herb Tree I created that won a prize in the Yates Vegie Challenge, I just about fell off my chair when I read this headline....... "Supermum does it again!"The "again" part references an award I won in 2013 as "Vege Gardener of the Year." Despite a couple of inaccuracies (the website given for example, or crediting me with expanding the online group of vege gardeners I'm part of), the article was mostly all true. Except maybe the "supermum" part. Believe me, I'm just an ordinary gal, with too much too do, and not enough time, like most everyone else! Neither my house nor my garden are perfect, despite my desire that they were, and probably never will be.
It's kind of fun to be in the papers, and if it encourages or motivates someone else to give gardening a go, then I'm all for it. Just remember, you don't have to be a "super" anything - you don't have to have a large garden, much money or a lot of time or expertise to have a go at gardening! Gardening is fun and rewarding, but very much a learn-as-you-go adventure! So, if you ever invite me over, please don't feel intimidated by me; don't polish the furniture or hide the ironing, or apologize for the weeds! And if you ever come and visit me one day, I'll try not to let that "supermum" image push me into doing those things either! I'd rather we could all just relax and be "real" with each other. And real people aren't perfect! My garden has plenty of weeds, tasks undone, things I meant to get to urgently but haven't for one reason or another, piles of materials for projects I might get to one day, plants I should have trained or pruned but haven't yet, and food I meant to harvest but haven't and it's now past it's best. I frequently feel "behind" in what I intended to do. But you know what? Despite all that, my garden is pretty cool! There are things growing, there is food waiting there for me to pick and eat. There are bees and butterflies and other amazing critters darting about. There are flowers looking pretty, herbs waiting to heal, and hidden things to discover every day. Gardening is a great form of therapy - and you get tomatoes too! And strawberries...and beans.....and watermelons.....and beetroot.....and new potatoes......and chokos.....and sweetcorn......and yacon.......and cucumbers.....and - well you get the point! So, I will hereby forgive myself for all the things I was going to do and plant in January but haven't, go ahead and toss out the seedlings that are never going to do well if I plant them now, and start fresh in this new month. And I will take time every day to enjoy what IS doing well out there. I'm not supermum, and that's ok! How about you? |
AuthorThis page is my blog formerly known as Kiwi Urban Homestead. Archives
February 2016
Categories
All
|