Thrifty Kiwi
Like our Facebook page
  • Home
  • Blog
  • Homesteading
  • Gardening
    • 2021 Garden Blog
    • 2019-2020 Garden Blog
    • 2017-2018 Garden Blog
    • 2016-2017 Garden Blog
    • Kiwi Urban Homestead 2013-2015 Garden Blog
    • Pest & Diseases
  • Recipes
    • Autoimmune Protocol
    • Meals and Snacks
    • Preserving
    • Household Cleaners
    • Health & Beauty
  • Skills
    • Menu Planning & Grocery Shopping
    • Money & Budgeting
    • Preserving How-Tos
    • Housekeeping
    • DIY
    • How to Find Stuff Free or Cheap
  • Animals
    • Critter Blog
  • About
  • Contact

Lamb Shanks & Salmi Sauce, Roast Vege Mush & Mixed Salad

24/10/2015

1 Comment

 
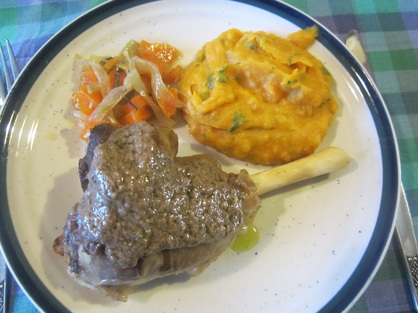
I made this delicious meal a little while ago with our home grown lamb. Some of the mush and salad ingredients were home grown too; more could have been if it was a little later in the season.

I was once again instructed and inspired by Italian chef Cesare Stella!
Picture
Picture

Lamb Shanks with Salmi Sauce

1) Make Salmi Paste: toss the following into a food processor, then process and set aside: a handful of walnuts, 2 anchovies fillets, a handful of Kalamata (pitted) olives, half a handful of capers, 6 garlic cloves and a handful of parsley.
2) Brown lamb shanks: Place lamb shanks in an oven tray, sprinkle with salt and lightly coat with olive oil. Brown them in oven at a high temperature on all sides. Turn oven to medium.
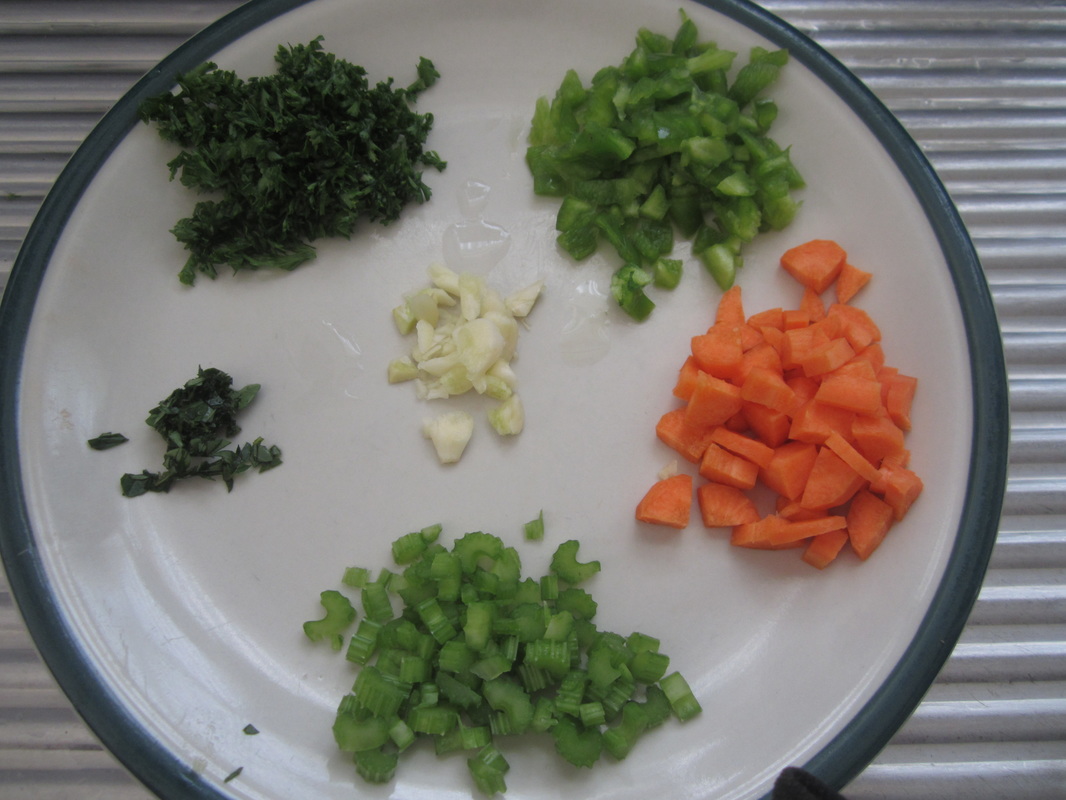
3) Add to the lamb shanks: a sprig of rosemary, and chopped carrots, garlic, celery and onions. Drizzle with a little more oil if needed, and toss with the shanks. Return to the oven for 10 mins, turning frequently to prevent burning.
4) Add liquids: Remove tray from the oven, add a splash of white white and a ladle each of vege and chicken stock. Cover and braise for at least 2 hours, check and turn the shanks every 30 mins, ensuring they do not dry out.
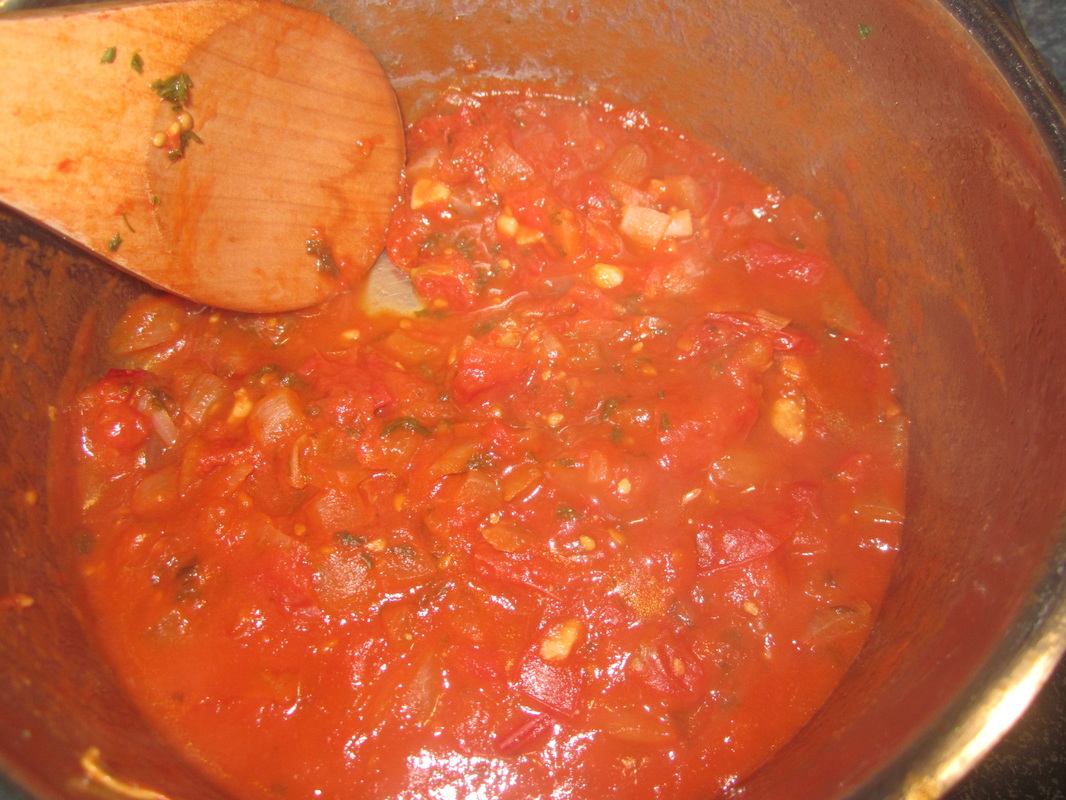
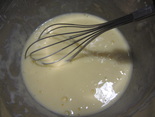
5) Make Salmi Sauce: when the shanks are done (meat is falling off the bones), place the shanks on plates. Scoop out the vegetable with a slotted spoon, then put the remaining liquid into a pot. Mix in 2-3 TBSP of the prepared salmi paste, and bring to the boil. It should thicken up, but if needed add a little cornflour paste (this does tend to cause the mixture to separate rather than remain smooth though - still tastes great).
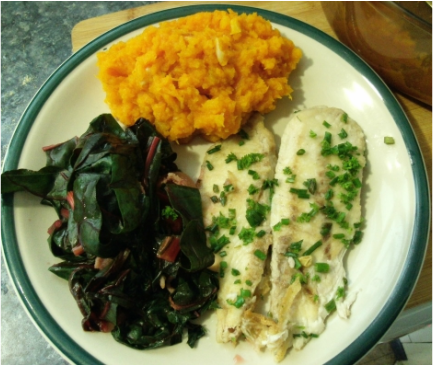
6) Drizzle the sauce over the shanks, and serve with mushed roast veges and a fresh salad.

Roast Vege Mush

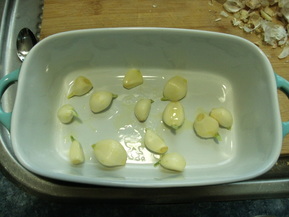
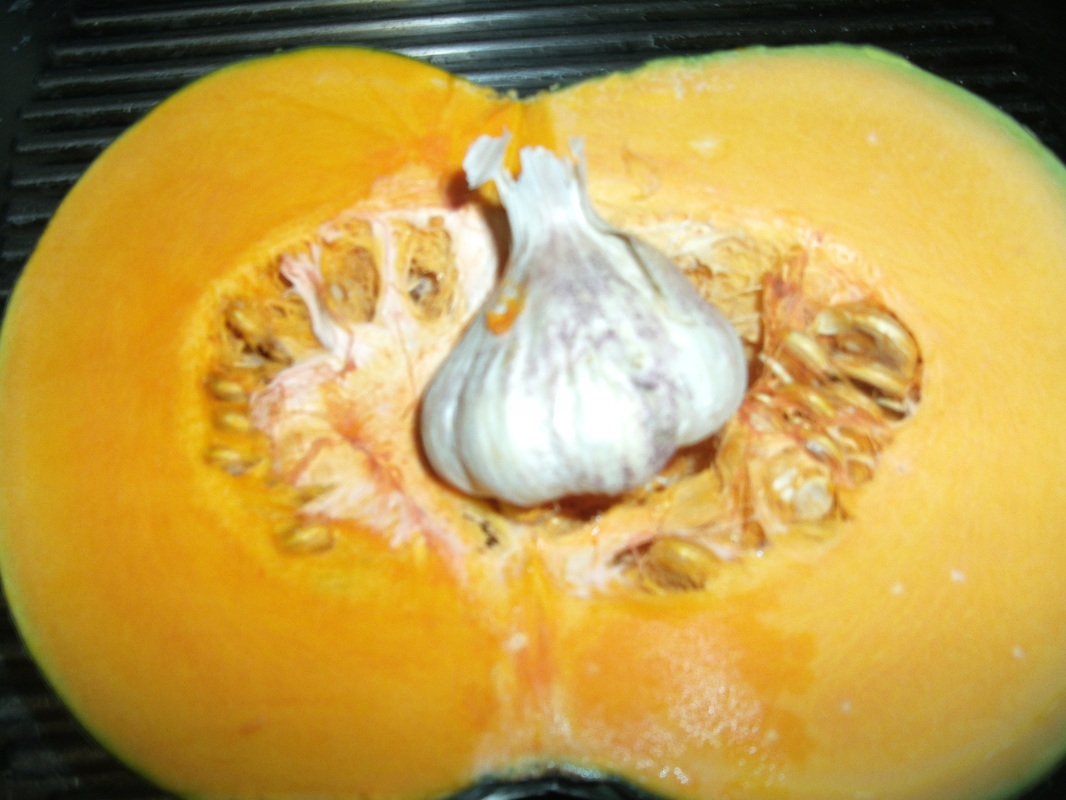
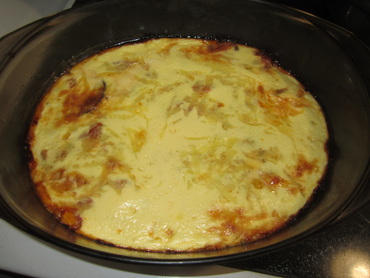
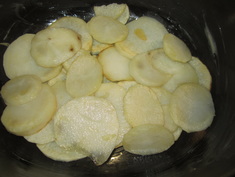
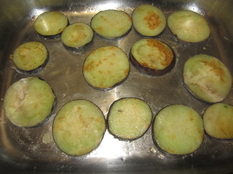
I prepared the roast veges ahead and set aside. When they were cool I pureed them, and when the lamb shanks were almost ready, I created the final dish.

In a large roasting tray, toss a selection of prepared veges in a little olive oil. I used potatoes, pumpkin, kumera, onions - the more variety the better. Roast at 180C until tender.

Place veges in a food processor, and process until smooth.

Shortly before serving, saute in a pot some chopped garlic, chopped parsley and ginger. Add the vege puree, a bit of olive oil, and a bit of rice milk if too dry. Bring to a simmer and taste for seasoning.
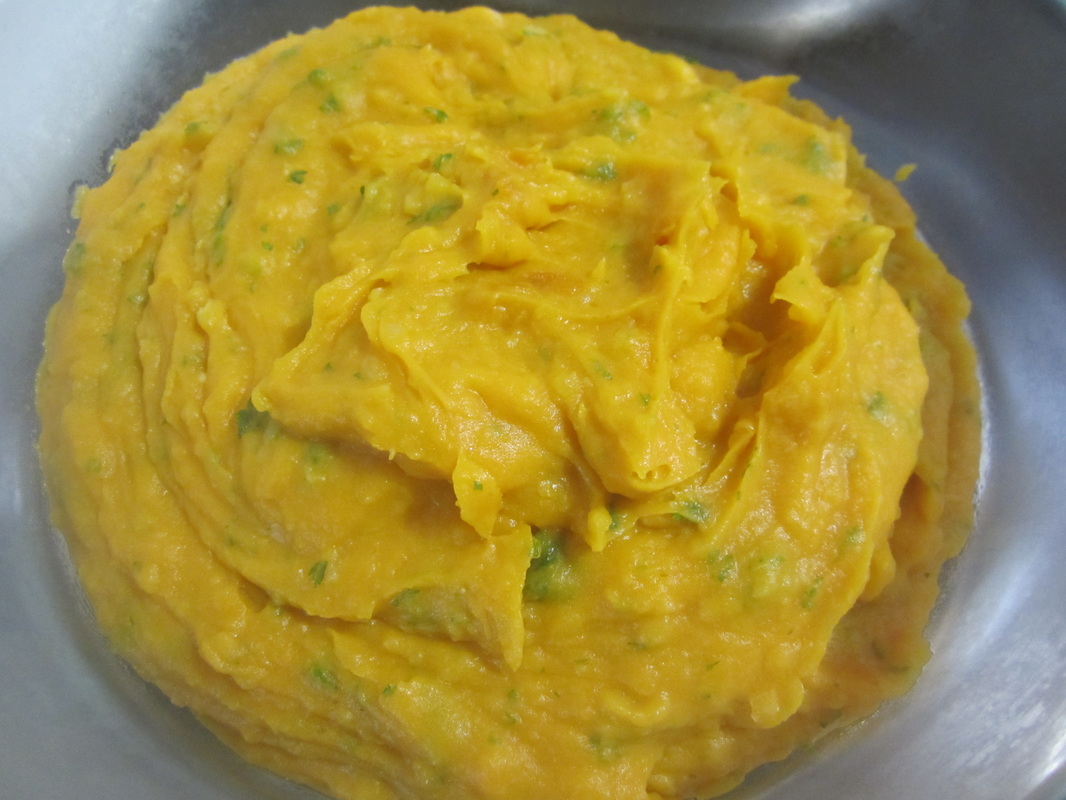
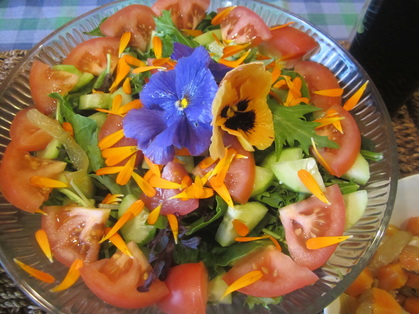
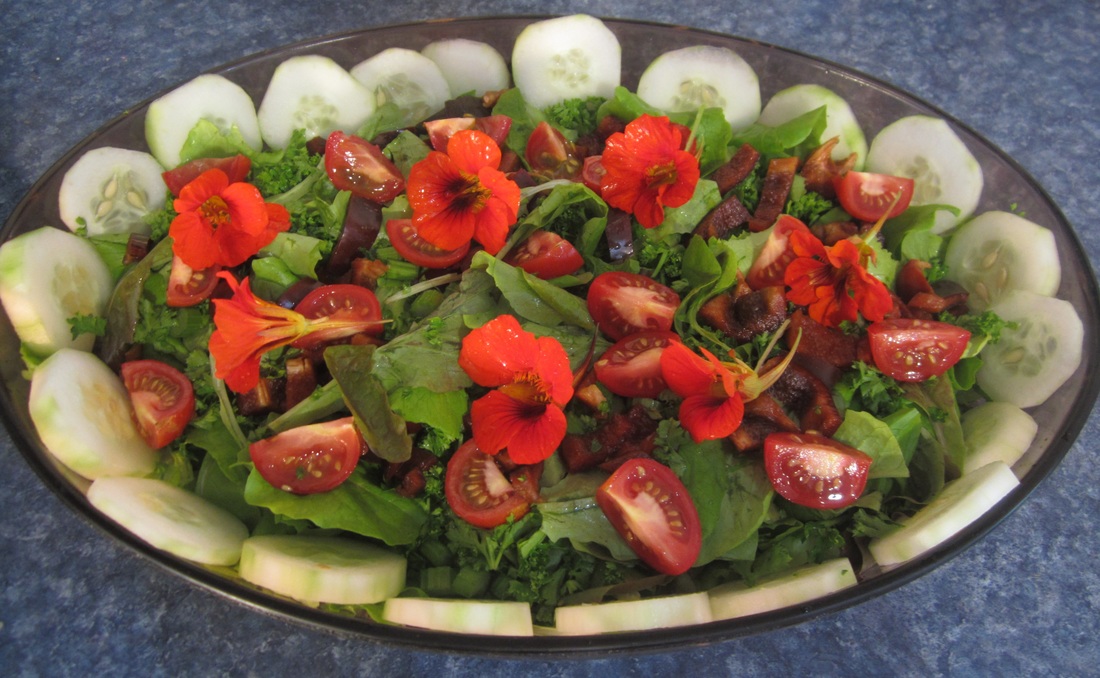
Picture

Fresh Salad

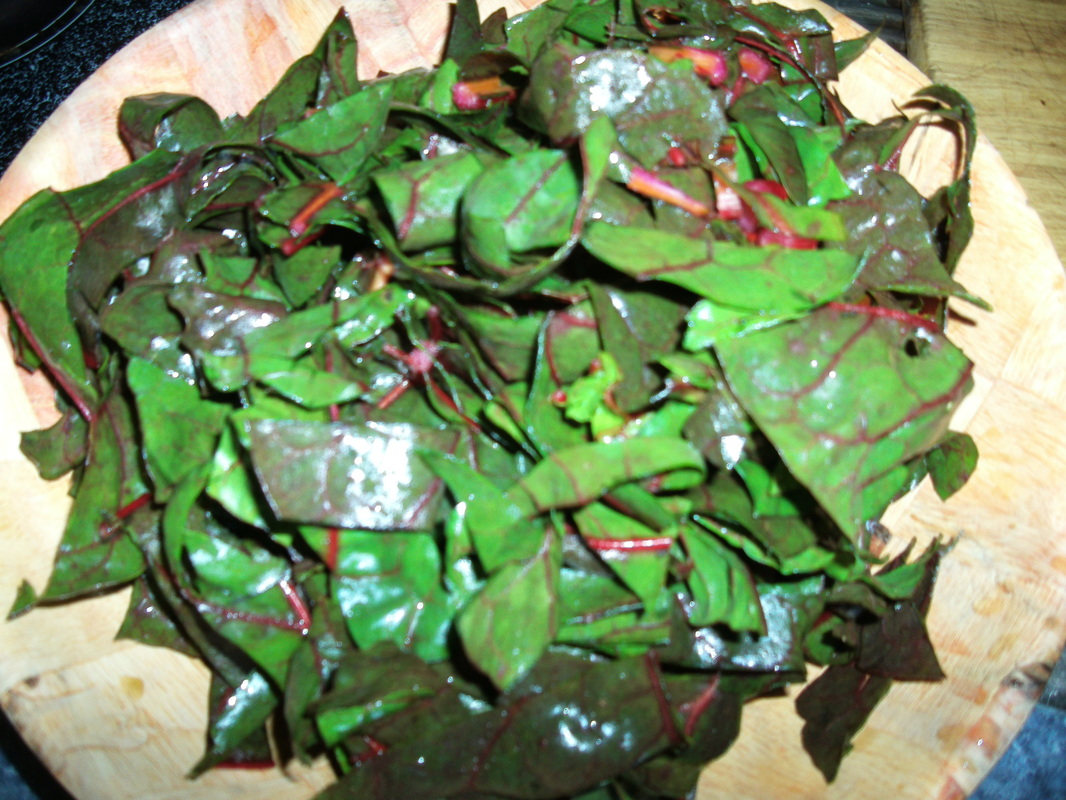
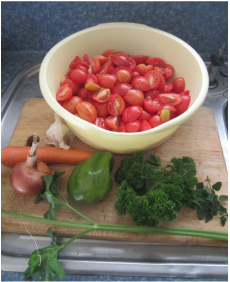
Make up a fresh salad with ingredients of your choice. I placed a selection of salad greens in a bowl, added a layer of chopped cucumber and a ring of tomato segments. I sprinkled it with calendula petals and garnished with pansies. Both types of flowers are edible.
Picture
1 Comment

A Delicious Dinner from My Garden: Pumpkin Mash with Roasted Garlic, Tarakihi Fillets with Fennel, Chives & Parsley, and Ruby Chard & Bacon

30/9/2015

1 Comment

 
Yesterday, an Italian chef with a restaurant in Northland kindly offered on the NZ Vege Gardeners Facebook page to share his knowledge with anyone wanting ideas of what to cook with ingredients from their garden. Inspired by his suggestions when I posted a list of homegrown ingredients I have to hand right now, I just made this delicious dinner! Thanks Cesare Stella! All ingredients except fish, bacon, coconut & olive oils, nutmeg and salt were from my garden.
Picture
This meal is gluten & dairy free. Ingredients are: fish fillets, 1 slice bacon, olive oil, coconut oil, quality salt, nutmeg, plus from my garden:
Fennel
Parsley
Chives
Lemon
Ruby Chard
Garlic
Pumpkin

Below is step-by-step how I made the whole meal. If you would prefer individual recipes, then you can find them on my food blog HERE
So here's how I did it:
1) Turn on the oven to 180C then make a quick trip out into the garden with a basket to pick some Ruby Chard leaves, sweet-leaf fennel, parsley and chives.
2) Grab some pumpkin from the shelf and a garlic bulb from the plait on my wall
3) Chop pumpkin into chunks, removing the skin. Place it into a lidded casserole dish, sprinkle with Himalayan mineral salt, and add 1/2 cup water to steam it. Cover and place in oven.
4) Peel all the garlic cloves, then toss in a little olive oil to coat. Place cloves in a small oven proof dish and set aside.
Picture
Picture
Picture
5) Wash the chard. Cut off the ends of the stems, then cut the stems from the leaves just below the base of the leaf. Bag the stems and refrigerate to be used in a soup another day. Taking leaves 2 at a time, cut them down the centre in the direction of the stem, then slice in the other direction into segments about 1.5cm wide. Place in a large bowl and set aside.
6) Wash fennel and shake off water. Remove fronds from stems. We're just going to use the stems. This is sweet-leaf fennel which doesn't form a bulb. If you have bulbing fennel, slice some bulb up instead. Chop the stems into small rounds and set aside.
7) It's now time to pop the garlic into the oven beside the baking pumpkin. Be sure and shake the dish every few minutes to cook evenly without burning. When golden and tender, remove the dish from the oven and set on stovetop for now.
8) Wash the parsley. Decide you've picked too much, so eat one head. Finely chop the rest of the parsley, discarding stems. Realising you've got too much for this one dish, spoon the extra into an ice cube tray, tamp down lightly and cover with olive oil. Freeze. These parsley and oil cubes can be added to future dishes. Meanwhile, set aside the remaining chopped parsley in a small bowl.
9) Wash and finely chop chives. Add to bowl with parsley.
Picture
Picture
Picture
Picture
Picture
10) Remove one piece of bacon from the fridge.
11) Remove packaging from Tarakihi fillets, and coat in brown rice flour.
12) Check on the pumpkin. If it's tender, remove from oven, set aside, and turn oven off, leaving door ajar to cool a bit.
13) Pause in cooking to feed the dogs and cats and get them out of my way. Wash hands.
Now we're about to start the real cooking - and you've got to move fairly quickly - this is why all the chopping and prep is already done, so you can simultaneously cook two fast dishes! First, pop the pumpkin and garlic back in the oven to keep warm, and put some dinner plates in there to warm too.
14) In a large pot on the stove, melt some coconut oil. Add the slice of bacon, turning as needed until cooked. Remove bacon to a plate, and chop it up.
15) At the same time, in a large non-stick frying pan, saute the fennel in some melted coconut oil until tender, then remove from pan and set aside.
16) Place the fish fillets in the frying pan to begin cooking.
17) Now add your bowl of prepared chard to the large pot - the moisture clinging to the leaves from washing it will be all you need to steam it. Sprinkle over a little quality salt, toss in the chopped bacon, give it a mix up and put the lid on. Steam over low-ish heat until tender then remove from heat.
18) Meanwhile, the fish will need carefully turning over. Once just tender, add fennel, parsley and chives to the pan, squeeze over the juice of half a lemon fresh, and drizzle with olive oil. Remove from heat.
19) Roughly chop the roasted garlic, add to the cooked, drained pumpkin with a sprinkling of nutmeg and mash.
20) Carefully lift a fish fillet onto each plate, add a serving of chard & bacon, and mashed pumpkin & garlic. Enjoy!

SOOO delicious!
Picture
Picture
Picture
1 Comment

 Garden Fresh Salads - even in Winter!

18/4/2015

0 Comments

 
A fresh salad, straight from the garden, is so yummy and good for you! The fresher the ingredients, the higher the nutrient levels, and you can't beat just-picked! Last night I made this salad with ingredients from my garden:
Picture
This particular salad is based on mixed baby salad greens, and has parsley, celery, cucumber, chocolate capsicum, tomatoes and nasturtium flowers in it. The ingredients for a salad will of course vary from month to month, depending on what's in the garden, but the good news is that it's possible to have fresh salads all year round, and in fact it's even easier in winter than summer as lettuces and other popular salad greens prefer the cooler weather - lettuce always bolts in summer here.

For easy, instant salad greens, I grow mixed leaf lettuce as "cut and come again" greens, by simply sprinkling mixed lettuce seed thickly over a bed, and letting them grow until they are about 15cm tall, at which point I start harvesting as much as is needed at a time with a pair of scissors, cutting the plants off about an inch from their base. The plants will regrow, giving about 3 harvests before they need replacing. A quick wash, and the salad greens are ready to serve. Here's my current bed, sown on March 10th...
Picture
As it is now well into autumn, and winter is not far away, a number of the items I put in the above salad will no longer be available fresh in my garden. But there are still plenty of things that grow happily in the cooler months that are great in salads. Over winter, what I will find in my garden for fresh salads include:

Leaf lettuces of all kinds
Spinach
NZ spinach
Miner's lettuce
Beet greens (beetroot leaves)
Beetroot (grated raw, or bottled)
Carrots and carrot greens (the latter I use in small quantities, but they pack a nutritious and tasty punch)
Peas
Pea shoots and flowers
Broadbean leaves
Parsley
Cornflowers (edible garnish, though they don't have much flavour of their own)
Pansies
Rose petals
Calendula petals (always remove the petals from the middle section, which tastes bitter)
Spring onions
Onion greens
Celery
Silverbeet
Various other herbs if I wish

I will also be able to add, if I wish, dried, stored or preserved foods I gathered in summer such as:
Garlic
Onions
Dried onion greens or spring onions
Dried or bottled tomatoes
Pickled cucumber
Yacon
Potatoes
Sweetcorn

I might also add some "wild herbs" (aka edible weeds) - the common edible ones in my garden include:
Dock
Dandelion
Purslane
Plantain
Chickweed
Fat hen (aka chickweed)

I will also do some sprouting in my kitchen, and add sprouts to the salads, for extra nutrition. Including such as:
Wheat grass (simply sprouted wheat, with the green part harvested with scissors)
Alfalfa sprouts
Pea sprouts
Mung bean sprouts
and whatever else catches my fancy to try

It's wonderful to be able to go out into the garden with a bowl, and come back with the makings of a fresh salad! We all know we should eat more raw food, and a hearty salad with lots of variety in it is a great way to do so. 

What is in your garden that will provide you with salad over winter? It's not too late to plant most of the above items, or too take a fresh look at the things already growing you maybe had never considered adding to a salad before.  

Another tip to keep in mind - the closer to the kitchen you grow your salad veges and herbs, the more likely it is that you'll actually go out there and pick and use them regularly. So don't put your baby leaf lettuce bed at the far end of the garden - put it as close to the garden as possible! In winter time, leaf lettuce also do very well in tubs, baths or other containers, and in fact most salad ingredients are best picked small and fresh, so can nearly all be grown happily in containers of one sort or another.

So whether you have a large or small garden, or no garden at all, there is no reason why you can't grow your  own winter salads! Start with a bed or container, filled with suitable growing medium, lightly sprinkled with leaf lettuce seed, finger-rake the seed in, water, and wait for your lovely greens to grow!

0 Comments

Green Tomato Quiche

17/4/2015

0 Comments

 
Since my recent final tomato harvest yielded lots of green tomatoes, which I've never used before, I've been having fun experimenting with different recipes. This quiche turned out terrifically yummy - everyone kept asking for more! The pastry is a home-made wholemeal pastry (though you could use others if you like) which I made with freshly ground organic wheat flour. The filling includes ham, mushrooms and of course the green tomatoes, and the taste combination is just wonderful! This recipe comes from More from the Cook's Garden.
Picture
Wholemeal Pastry
Wholemeal pastry doughs can be more difficult to handle than white. They tend to be crumbly and break apart easily. To overcome this problem, add a little extra water to make a softer mixture, more like a scone dough. Knead the ball of dough before attempting to roll it out. Despite the extra handling, wholemeal pastry is deliciously tender and crisp. This quantity will line a large pie plate or quiche dish 20-25cm in diameter (without lid).

1 cup wholemeal flour
1/4 tsp salt
50g butter, chilled
Water to mix

Combine the flour and salt. Chop or grate the butter into small pieces. Rub into the flour until the mixture resembles course breadcrumbs. Add sufficient cold water to make a soft dough. Knead on a floured board until the dough is well mixed, not sticky, and shows no tendency to crumble.

Roll out to fit a well-greased pie plate or dish. I roll the pastry on a board, then roll it up around the rolling pin, and use that to lift it into the dish in one piece, unrolling off the rolling pin across the dish.

Filling
2 TBSP butter
1 small onion, finely chopped
400g green tomatoes, sliced
100g mushrooms, sliced
100g ham, chopped
1 TBSP finely chopped fresh herbs (dill, fennel, tarragon or parsley - I used parsley)
3 eggs
1/2 cup milk
1/2 cup cream
1/4 tsp salt
Optional: freshly ground black pepper

In a large frying pan, melt the butter and sauté the onion until soft. Add the tomato slices and cook gently until tender. Add the mushrooms and cook for a few more minutes. Remove from the heat. Stir in the ham and chopped herbs. Allow to cool a little. Spoon into the pie shell.

In a bowl, beat the eggs, milk, cream and seasonings. Pour over the pie. Bake in a moderate oven (190C) for 30-45 minutes or until the custard is set.

Serves 4-6.

0 Comments

Garden Tomato Sauce

16/4/2015

0 Comments

 
Picture
A yummy sauce to use up extra tomatoes - all ingredients except the carrot and olive oil came from my garden (really must get around to planting more carrots!) Apart from the tomatoes, it's just a little of this and a little of that, so if you have tomatoes to use up but not tons of anything else, this is a great recipe for you. Serve with pasta, chicken or veal, or use on pizza or any other way you like it.

This recipe came from The Big Book of Preserving the Harvest by Carol W. Costenbader. This book has lots of lovely, easy recipes.

Ingredients:
12 cups chopped tomatoes
1 TBSP olive oil
1 medium onion, chopped
2 cloves garlic, crushed
2 TBSP chopped green bell pepper
2 TBSP chopped carrot
2 TBSP chopped celery
2 TBSP chopped fresh parsley
1 tsp chopped fresh oregano

Method:
1. Wash, core, and coarsely chop the tomatoes
2. Puree in the bowl of a food processor
3. Heat the olive oil in a heavy saucepan and saute the onion until soft, about 5 mins
4. Add the garlic, pepper, carrot, celery and herbs.
5. Add the tomato puree to the mixture and simmer, uncovered, for about 2 hours. Be careful not to let it burn. Stir the sauce occasionally as it thickens. (This process can also be completed in an uncovered casserole dish at 180C/350F in the oven)
6. Cool slightly and pour the sauce into 1 cup freezer containers, leaving 1/2 inch of headspace, label and freeze for up to 3 months. OR ladle hot, simmering sauce into hot, sterile jars, leaving 1/4 inch head space, and seal.
Picture
Picture
Everything but the chopped onion and tomatoes is shown on the plate above.
0 Comments

Vegetarian Moussaka

14/4/2015

0 Comments

 
I have never in my life eaten eggplant (aka aubergine) and so have never before had Moussaka. To be honest, I wasn't sure I would like the taste of eggplant, but when I came across this recipe in my copy of "More from the Cook's Garden," the 1987 sequel to the wonderful NZ gardening cookbook "The Cook's Garden," I had to try it, because it sounded so good. And better yet, it is a vegetarian version, using lots of ingredients I happen to have growing in or stored from my garden. When it was cooked, my hope was that it would be a pleasant enough dinner and my husband and family would find it edible. But instead - WOW! There are no words to describe how good this tasted - the blend of flavours and textures is just right, but hard to describe as the eggplant has a special taste all it's own!
Picture
Layers of sautéed potatoes, aubergine, freshly made tomato sauce and cheese is covered with a light custard which is prepared from eggs and yoghurt.

The dish is prepared in three parts, then layered together and baked in the oven.

I will list the ingredients and instructions for one part at a time.....

The ingredients which have come from my own garden are marked with an *
 Tomato Sauce
2 TBSP olive oil
1 large onion, finely chopped *
1 clove garlic, finely chopped (I used two - I love garlic!) *
4 medium sized tomatoes, skinned and chopped, plus 1/3 cup water, OR one tin of tomatoes in juice.
(I used a jar of diced tomatoes I had previously bottled) *
1 TBSP tomato paste
2 TBSP red wine (optional - I didn't use it)
Salt to taste (and freshly ground black pepper if you like - I didn't use it as I am allergic)
1 bay leaf
1 TBSP finely chopped fresh herbs, or 1 tsp dried herbs (I used fresh parsley) *

Heat the oil in a saucepan. Sauté the onion and garlic until soft. Add the rest of the sauce ingredients, and simmer gently for 15-20 mins or until the sauce is thick, stirring occasionally.

Vegetable Layers
500g potatoes, peeled and thinly sliced *
2 TBSP cooking oil
1 large aubergine, sliced into 1/2 cm thick slices *
2 TBSP wholemeal flour
2 TBSP extra cooking oil
1 cup grated cheese (recipe says cheddar, I used Colby)

Fry the potato slices in hot oil until they are golden and almost cooked. Transfer to a large, greased baking dish.
Coat the aubergine lightly with the flour. Add the extra oil to the pan if needed. Fry the slices until they are soft and lightly browned. Place in an even layer in the baking dish.

Custard
3 eggs *
200 ml plain yoghurt
1/4 tsp salt
Pepper if desired

In a small bowl, beat the eggs, yoghurt and seasoning until well mixed.

Assembly and cooking:
Cover the potato/aubergine layers with the tomato sauce. Sprinkle the surface with the cheese. Pour the custard evenly over the top. Bake in a moderate oven (180C/350F) for 45 minutes or until the custard is set and golden brown.

Serves 4 as a main meal accompanied by bread rolls, or 6 if you add other sides.
Picture


Picture
Picture
Picture
Picture
Picture
Picture
Picture
0 Comments

Onion Soup

7/4/2015

0 Comments

 
Yesterday was wet and cold, and with lots of onions hanging to dry in the shed, what better time for delicious onion soup? The recipe freezes well too - in fact it comes originally from one of my oldest cookbooks, entitled "Food for the Freezer."

Delicious, warming and filling!
Picture

Onion Soup

Ingredients for 8 servings:
Picture
1 kg brown onions
25 g butter
2 TBSP flour
2 litres beef stock
Salt/pepper to taste
Grated cheese

Method:
Peel and slice onions (I cut them in half then slice thinly). Melt butter in large pot, then saute onions over medium heat until golden and starting to caramelize a bit (original recipe says "golden brown" but mine never brown). Sprinkle over flour, stir in and cook 1 minute. Add beef stock slowly, stirring. Bring to the boil, season if desired, cover and simmer for 20 mins. (Hint - if using commercial beef stock, be careful about adding extra salt or the result may be far too salty). Ladle into bowls, top with grated cheese and stir in.

Toasted and buttered home made bread makes the perfect accompaniment!

To freeze: Cool after simmering (without adding cheese) and pour into suitable containers to freeze. To use, thaw and reheat, then serve as above.

0 Comments

Garlic Green Beans - So Simple; SOOO Good!

25/3/2015

0 Comments

 
This quick and simple way to prepare green beans will have everyone asking for more. At this time of year, there are usually lots of beans needing picking in the garden, and this recipe is great with fresh beans. I've also used it in winter with frozen ones. Good too.
Picture
Method:
Simply prepare your beans for cooking in the usual way - top and tail then chop fresh beans, or dump frozen ones in the pot. Add enough water to just cover. Add in 2-3 cloves of garlic, crushed and finely chopped, a good spoonful of butter, 1 tsp soy sauce, and salt to taste. Cover pot, bring to the boil, and simmer until tender. Drain pot, and serve as a side dish with dinner. Easy!

(Purple beans turn green when cooked.)
Picture
0 Comments

Delicious Applesauce (with Cinnamon, Honey & Lemon)

23/3/2015

0 Comments

 
When apples are in season and cheap, I love to make and preserve lots of our favourite applesauce. It contains no sugar, but is sweetened instead with honey, and the cinnamon and lemon in it give it a delicious flavour! During winter, my kids would have a couple of spoons full on their breakfast porridge instead of sugar. We also like it on top of cereal, added to plain yoghurt, served with pork on the rare occasion we have that, or if I Iet them, the kids (and my husband!) will just eat it straight!

I'm going to walk you through how I make it, then the concise version of the recipe is at the bottom of this post.

I can't wait for the day our baby apple trees produce enough to supply our own apples for this recipe, but in the meantime I'm grateful for our own honey and lemons from our tree or a friend's.
Recently, some nice apples were on sale for 99c/kilo, so I purchased several bags full. Pictured are just over half the apples I used this time. All together, the apples made just over 11 litres of applesauce.

The first step is to wash, core and cut up the apples. There is generally NO need to peel them for this recipe - in fact I prefer not to, as it gives the sauce a richer flavour and retains maximum nutrients. However, when using apples that are not spray-free, I do peel them as even after washing, a lot of spray residue is on and in the skin. So I peeled these ones. 
Picture
Picture
I have a nifty gizmo for coring and cutting up the apples in one fell downward push - this makes the job very fast, especially when peeling isn't needed, and ensures the pieces are of an even size, so cook at the same rate. But it doesn't really matter too much - just chop them up and dump them in a large pot with some water in it as you go.

The gizmo has a metal circle in the middle, and metal blades radiating out from it, within a plastic holder with two handles. Various models are available, such as THIS ONE at Fishpond.
As I was short of time, I chose to make this applesauce in stages. First, I cut up and cooked the apples; I had to do this in two batches as I could only fit half in my largest stock pot. Actually, when doing the second half (pictured above) there were too many for the pot, so I put the rest in a smaller pot too cook. Once they were cooked, I pureed the cooked apples in the food processor, only adding just enough of the liquid to enable it to whiz them smoothly. I measured the amount of applesauce, and placed it in a large bowl, covered, in the fridge overnight - I had just on 11 litres. The next day, I poured half the applesauce back into the pot at a time, adding the other ingredients and bottling it. Now, here's the recipe:
Ingredients:
Apples
Note: the quantity of the rest of the ingredients depends on how much apple puree you have. I will give the amount for 6 cups of puree and 6 litres of puree (the amount I get after filling my biggest pot with apples)

Cinnamon & Honey Applesauce

To each 6 cups of puree:
3 TBSP lemon juice
1/3 cup honey
1/3 tsp finely grated lemon rind (zest)
3/4 tsp cinnamon
Dash salt (optional)
For 6 litres of puree:
180ml lemon juice
1 1/3 cup honey
Finely grated rind from 1 1/2 large lemons
3 tsp cinnamon
Dash or so of salt (optional)

Method
Wash, peel if desired, core and cut up apples. Cook in a large non-aluminum pot with sufficient water until soft. Use a slotted spoon to scoop apples into blender. Puree in blender or food processor until smooth, adding minimal fluid for a thick sauce, or a bit more for a thinner sauce. Measure total volume of puree.

Return puree to washed pot and add rest of ingredients. Bring to boil, stirring regularly, and simmer 5 minutes. Ladle into hot, sterile jars, leaving 3/4 inch head space, and seal.

For details on how to prepare and sterilize jars and seals, see THIS POST.

After the jars have cooled overnight, wipe outside with cloth to remove any spill residue, check seals, and store. If any have not sealed properly, put in fridge and use up, or pour into containers and freeze.
Picture
0 Comments

Making and Preserving Tomato Soup

17/2/2015

2 Comments

 
Picture
Picture
It's the time of year when tomatoes are plentiful and cheap - the ideal time for putting up jars of soup, sauce, diced tomatoes and relishes to enjoy throughout the year. Last week I had a bowl of tomatoes from my greenhouse and a couple of boxes of slightly damaged tomatoes I purchased at a good price locally in need of processing - close to 35 kg in total. I was short on time that week, as I had a lot of other commitments, so decided to turn this batch into our favourite tomato soup. I first learned this recipe last year - the kids complained I didn't make enough of it to last longer than a couple of months.

Picture
Each batch of soup takes 6kg of tomatoes. I got the first batch cooking away on the stove, and then since my time was so limited, I washed and chopped up another 12 kg of tomatoes, filling ziplock bags with 2kg each, and then laying the bags on trays of 6kg each before popping them in the freezer. 12 kg frozen -  ready to make up more soup another day. There was no more space available in my freezer, so I had to get on with processing the rest.

This is a simple and delicious recipe; I particularly like it because it uses lots of fresh herbs from the garden. This recipe comes from Lynda Hallinan's lovely book Back to the Land.
Picture
Ingredients:
6kg tomatoes, roughly chopped
6-8 onions, roughly chopped
1 cup sugar
3 TBSP non-iodised salt
2 TBSP celery salt
14 sprigs parsely, chopped
7 sprigs thyme, chopped
7 sprigs mint, chopped
7 whole cloves
3-4 sage leaves, chopped (don't use more as its flavour is strong)

Picture
Method:
1) Place all ingredients in a large stock pot. Yes, even the cloves - they don't need to be in a muslin bag. Bring to the boil, stirring from time to time. Simmer with the lid off for 1 hour, stirring occasionally.


Picture
2) Process soup through a food mill, or blend in batches then force through a sieve, to remove most of skins and seeds.

3) Return soup to pot, bring back to the boil, and then bottle in prepared hot, sterilized jars and seal. Exact details for how to prepare jars and lids or seals, and how to bottle effectively can be found HERE. Note, I leave about a 1/2 inch of head space.

That's all there is to it!

In this particular case, again due to time constraints, on day one I cooked and bottled one batch of soup, cut up and froze enough tomatoes for two more batches, and cut up and put another 2 batches worth in the fridge overnight. On day two, I cooked up those two batches of soup, and put it through the food mill, but didn't have time for bottling. So I put it back in the fridge for another night. Day three, I returned the soup to the boil, simmered it for a few minutes, and then bottled it. Three batches produced 15 quart jars of soup. To use the soup, simply open a jar, reheat in a pot, and serve. Delicious with home made bread!
Picture
2 Comments
<<Previous

    Author

    This page is my blog formerly known as Kiwi Urban Homestead.

    I'm a Kiwi homeschooling mother of 5 living in a small town. After growing 1000 kg of produce in my back yard in 2013, I'm now expanding my edible gardens even further.

    Archives

    February 2016
    December 2015
    October 2015
    September 2015
    June 2015
    May 2015
    April 2015
    March 2015
    February 2015
    January 2015
    December 2014
    November 2014
    October 2014
    September 2014
    August 2014
    April 2014
    February 2014
    December 2013
    November 2013
    October 2013
    September 2013
    August 2013
    July 2013
    June 2013
    May 2013
    April 2013
    March 2013
    February 2013
    January 2013
    December 2012

    Categories

    All
    Bees
    Butchering
    Chickens
    Compost
    Corn
    Diy Projects
    Events
    Everything Else
    Firewood
    Freebies
    Frugal Fortnight
    Garden Diary
    Gardener Of The Year
    Getting Started
    Greenhouse
    Harvest
    Harvest Totals
    Health
    Herbs
    Home Made Cleaners
    Homesteading Skills
    Jungle Taming
    Livestock
    Media
    Monthly Garden Pics
    Moon Planting
    Musings
    Pests And Diseases
    Planting
    Preserving The Harvest
    Recipes
    Salads
    Soil Improvement
    Specific Crops
    Tomatoes
    Weekly Round Up
    Worms
    Yates Vegie Challenge
    Zucchini

    RSS Feed

Powered by Create your own unique website with customizable templates.