|
Home-grown potatoes are very yummy and much better for you than commercially grown ones, which are loaded with nasty chemicals, as well as having less flavour and nutrition due to long storage. But, which of the available varieties grow best for home gardeners in New Zealand? And what is the best way to grow them? Which ones do well in containers? All these questions and more made me decide to set up some experiments, and invite other gardeners to do the same, then share and combine data at the end of the season. So, I decided that for my part of the experiment, which I called the 2014 Spud Challenge, I would grow 5 varieties of potatoes - Rocket, Swift, Jersey Benne, Agria and Ilam Hardy - in half-drums and potato planter bags, as well as some in planter pot and some in a garden bed, and see what happens. I came up with my own concoction of goodies to add to the drums and beds for nutrients and vigour too. To see how I've set this up, and how I prepared and planted the potatoes, check out these two short videos: Updates coming soon!
0 Comments
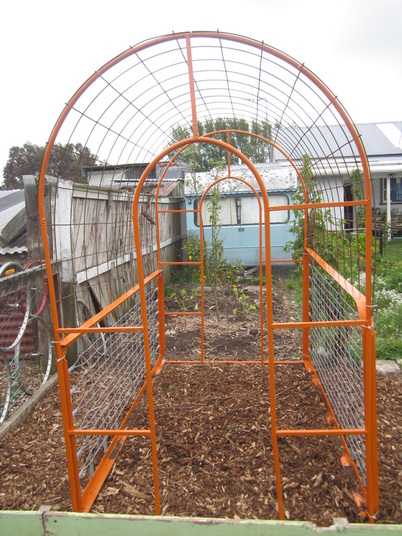
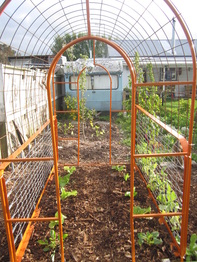 It's fun to create useful and attractive structures in the garden out of free stuff! Here's how I built a climbing frame and arbor for next to nothing this week. 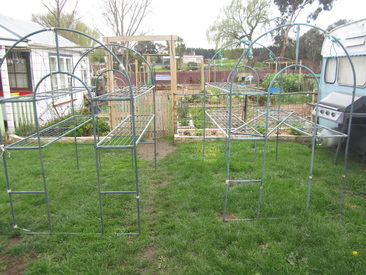 Living on a tight budget, I've learned to keep my eyes open for free stuff I can use in the garden. Not long ago, I discovered some old greenhouse frames & shelves in a metal recycling bin (and was given permission to take them home) - the sort meant to have a plastic cover, but without the cover. One set are now in my greenhouse, holding the trays and pots of seedlings. The other set was in worse condition, with some of the horizontal supports that should hold shelves rusted off. Knowing it won't last more than a year, maybe, outside, I figured I could use it to create some sort of cool growing frame for my cucumbers this season. I also found two old wire-mesh single bed frames in the metal bin on different occasions, and scored some free orange paint from the free paint swap at the local dump. Hmmmm......I'm starting to get an idea! 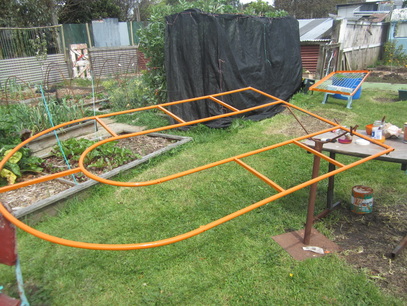 First, I set up the end pieces and bed frames on top of various objects on the lawn, and painted them with two coats of the orange paint. That took a few days, as the enamel paint took some time to dry, and I had to turn each piece over and do the other sides too, plus could only set up one bed and one frame at a time, and the weather wasn’t entirely co-operative! Painting them hid the rust on all the metal parts, and gave them a more uniform look. I also discovered it's a great way to kill lots of flying insects - every time I came back to check a coat of paint, it would be covered in aphids and other bugs - wiping them off killed them, but left lots of little legs stuck to the paint. Ah well, masterpieces of painting perfection, these are not! In between coats of paint, I prepared the bed where my trellis was to go – after harvesting the previous crops, I forked over the soil, then added 3 bags of compost, a wheelbarrow load of manure, and a couple of catchers full of grass clippings and stirred it all in. I raked it level, and then added wood chip mulch, and created paths for walking down both sides by digging out the soil forming a trench, which was filled with more woodchip and stomped gently down. Once the paint was dry, I moved each piece to the garden bed, and assembled it on-site. The pieces are held together with cable ties – that proved to make it relatively easy to put together, and it will be easy to take apart in the future if I need or want to, yet the whole structure is very rigid and sturdy. Cable ties were first put loosely in each corner, top and bottom, and then everything was leveled out and adjusted before tightening them up. Next came the fun part – adding the reinforcing mesh for the upper curved trellis. Fortunately, a single bed is the same length as the width of a sheet of mesh, but the sheets are 4.6m long. I managed to get one home from the building supply store by tying it down to the roof of my van. :-) Now, I measured the length of the curve, cut the 2.8m of mesh needed, and got ready to lift it into position. Knowing it would involve a bit of sliding the mesh around, and not wanting to damage the new paint on the frames, I first found a couple of long cardboard tubes from inside rolls of weed mat, and cut a slit down the length of each, and then used them to slide onto the top arch of the frame for protection. These were removed after I had the mesh secured in place. The mesh was lifted up (this part was the only time where I required help from a second person, to lift one side, then hold it while I bent the mesh into position). I used cable ties along both sides to hold the mesh to the top of the bed frames (which have convenient holes where the springs go through the frames) and then at the top and sides of the arch. Voila! A climbing frame/trellis/archway! 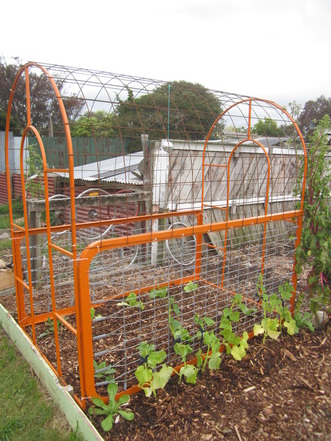 Along one side I planted 3 each of Lemon Cucumbers and Apple Cucumbers, which have been hardening off outside after I raised them from seed in my greenhouse. I added a self-sown calendula seedling from elsewhere in my garden to each end of the row, as it’s good to have orange or yellow flowers close to the cucumbers to attract bees close enough to spot the fairly inconspicuous cucumber flowers. This is also why I chose orange for the paint – hopefully it will be like a signpost to the bees – “Hey bees, good stuff over here! Come check it out!” A couple of handfulls of sheep pellets were put in the bottom of each cucumber planting hole. 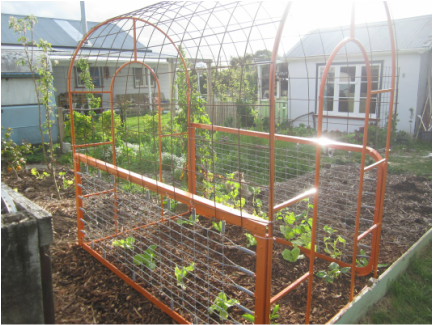 On the other side of my trellis, I have sown Sugar Snap Peas, which will grow tall and will appreciate a bit of shade provided by the cucumbers as summer gets under way. 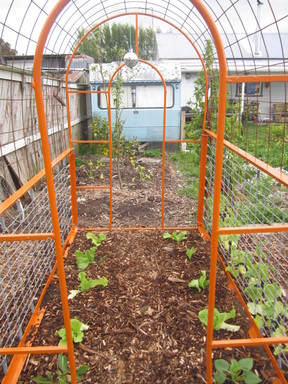 Inside the arch/arbor, I have planted a dahlia seedling on each side at the sunny end, and a row of four hearting lettuce seedlings along each side. When these are harvested, I will replace them with leaf lettuces. In summer, it should be fairly shady in there once the other plants have grown over the trellis, and hopefully this will keep the lettuce from bolting in the summer heat. I also added a ball covered in mirror squares, dangling on a string from the top, as a bird scarer. After watering the seedlings, I sprinkled slug pellets around to keep the slugs and snails from devouring my lovely wee plants! This was a really fun project to make – and it only cost a total of $23 – $20 for half a sheet of mesh, $1 for my bird scarer/disco ball, and $2 for the cable ties. The beds, frames and paint were free, and the only tools needed were a paintbrush plus measuring tape and bolt cutters to cut the mesh. I can’t wait to see all the plants grown up over it! |
AuthorThis page is my blog formerly known as Kiwi Urban Homestead. Archives
February 2016
Categories
All
|
 RSS Feed
