Thrifty Kiwi
Like our Facebook page
  • Home
  • Blog
  • Homesteading
  • Gardening
    • 2021 Garden Blog
    • 2019-2020 Garden Blog
    • 2017-2018 Garden Blog
    • 2016-2017 Garden Blog
    • Kiwi Urban Homestead 2013-2015 Garden Blog
    • Pest & Diseases
  • Recipes
    • Autoimmune Protocol
    • Meals and Snacks
    • Preserving
    • Household Cleaners
    • Health & Beauty
  • Skills
    • Menu Planning & Grocery Shopping
    • Money & Budgeting
    • Preserving How-Tos
    • Housekeeping
    • DIY
    • How to Find Stuff Free or Cheap
  • Animals
    • Critter Blog
  • About
  • Contact

Zucchini Beds with Ladder Trellis and Compost Tea Watering

19/12/2015

0 Comments

 
It's entirely possible that I should not be allowed to drive any distance on my own. Because that's when I start thinking.....and getting ideas......

So there I was, driving along in my automobile, no baby beside me at the wheel.....pondering:
Where to plant my zucchinis this year - they didn't do well last year and I wanted to make sure I had a good crop this year...

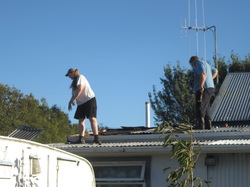
And I thought of this patch of ground I hadn't decided what to do with yet.....and these rubbish bins I've got doing nothing....and that old ladder on the roof of the shed awaiting a creative project.....and that half bale of pea straw that needs using up......and that half finished compost in that pile......and I dreamed up this.......(details below):

Picture
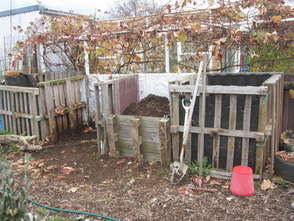
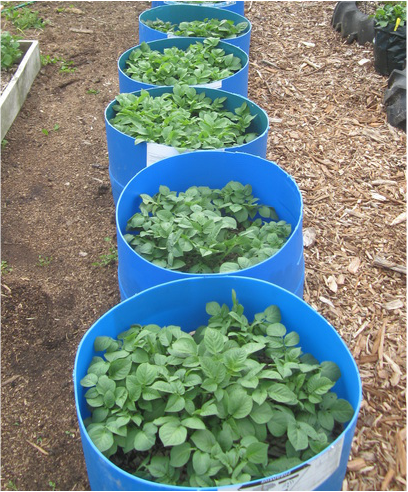
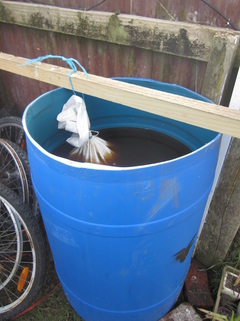
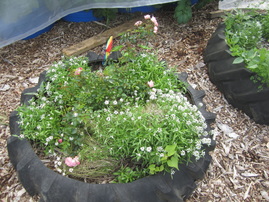
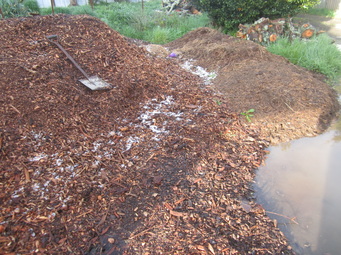
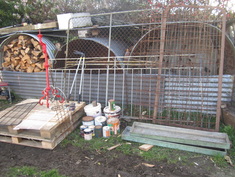
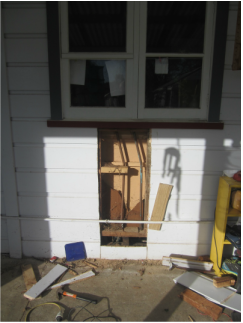
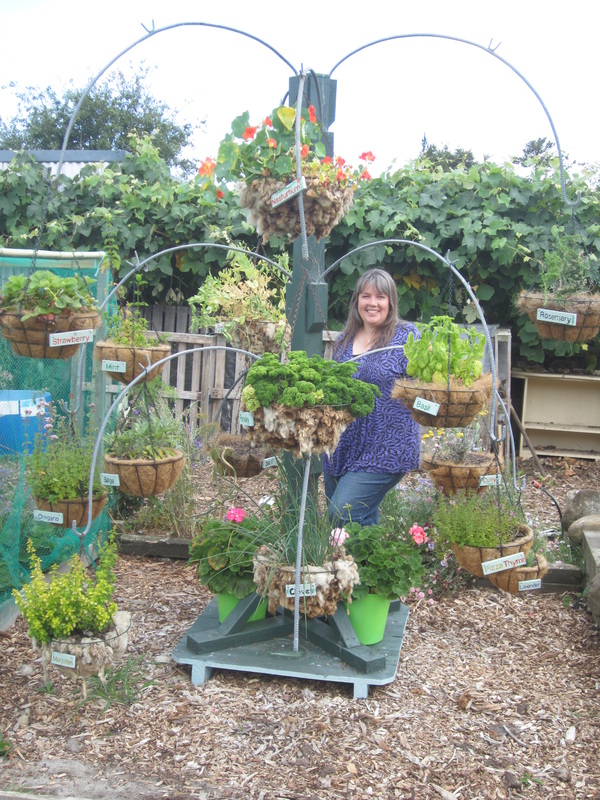
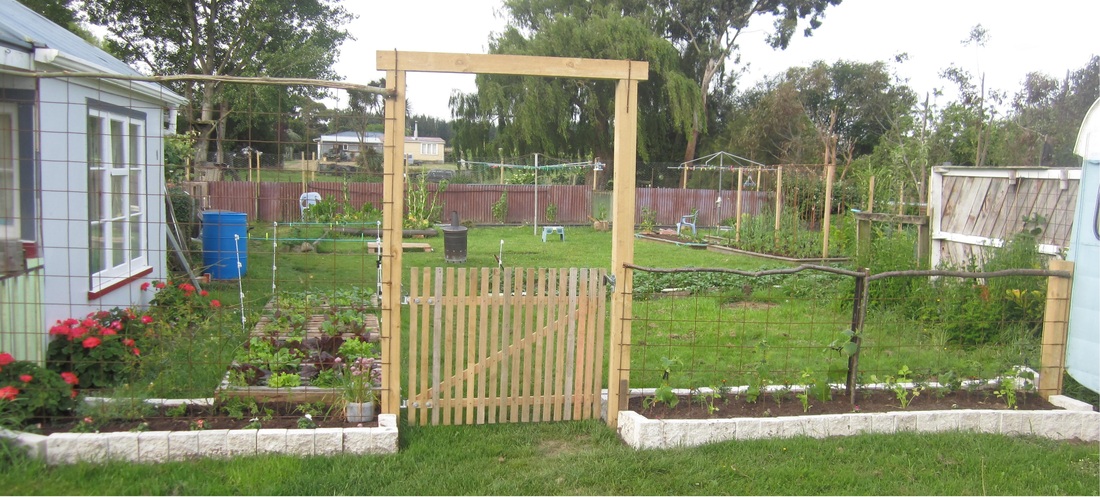
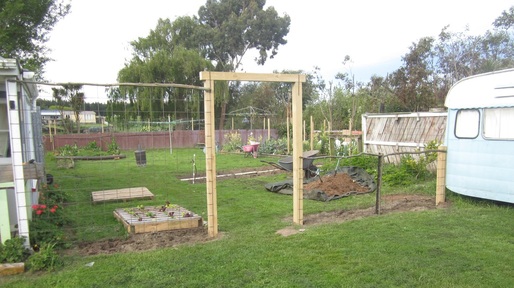
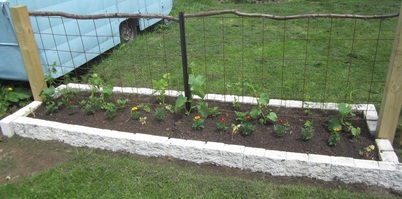
It started with this patch of clover - originally lawn 2 years ago, it had been turfed and dug over, and planted in yacon two seasons ago, and popcorn last year. It had been mulched with sawdust/horse manure from a local racing stables, which resulted in a lush growth of clover, which likes to grow where nitrogen boosting is needed. But I hadn't decided what to do there this year.....I had had a few ideas but discarded them for one reason or another.
Now with this new scheme in my brain, I first mowed the clover, dropping it to compost in place. Then I started laying out cardboard, salvaged from the bins at the local supermarket, with all tape etc stripped off. First I laid out one of the rectangles that would become a raised bed, wet down the cardboard, and spread some used compost from last year's potato bins on top.


Then I continued to lay out cardboard until the whole area was covered, with spent compost where the two beds would be, and bark mulch around the outside and through the middle for paths.
Next, I went and mowed some lawns, and spread the clippings over each bed.

I took two 60 litre rubbish bins, and drilled 10mm holes in the sides just above the base all round, then positioned them opposite each other each side of the path, on the beds. I temporarily placed a large brick in the bottom of each to stop the wind knocking them about. 
Picture
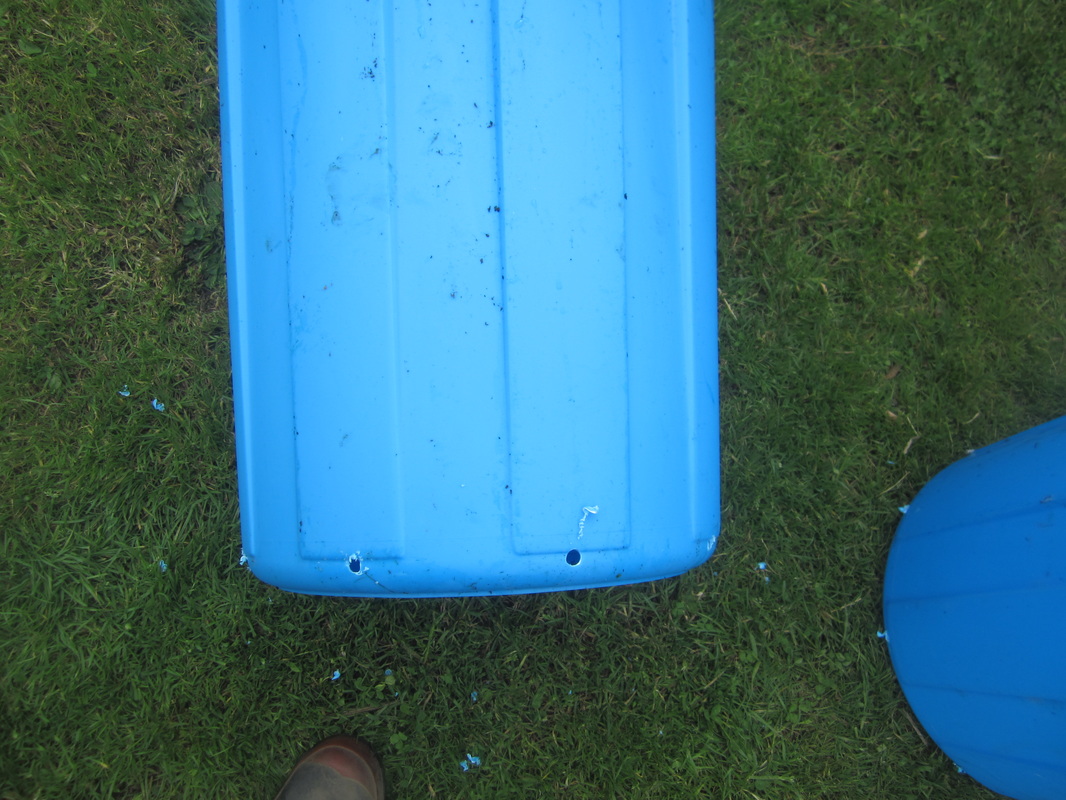
I added more layers to the beds with some fresh home-made compost, and a sprinkling of various goodies I had in the shed - sheep pellets, rock dust, quick and slow release vege foods.


Next a layer of almost completely composted woodchip. And then I covered both beds with some left over pea straw.
I had a old 4m wooden ladder a neighbour had given me. My husband and I cut it in half and evened it out so each half had a rung the same distance from the top. We placed each half upright in a bin, and secured them across the top with two pieces of scrap wood. I filled each bin 3/4 full with incompletely digested compost.
Picture
Picture
Picture
Picture
Picture
Picture
Picture
Picture
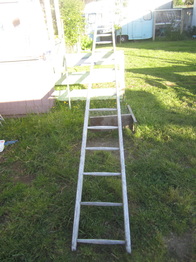
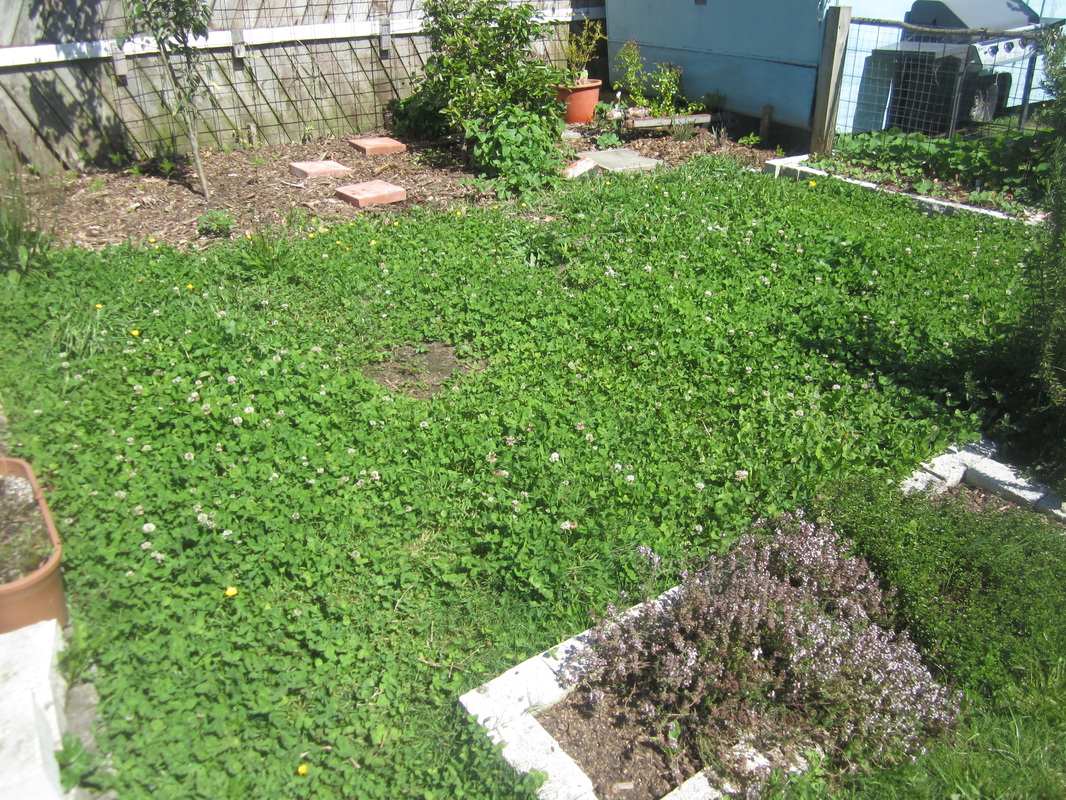
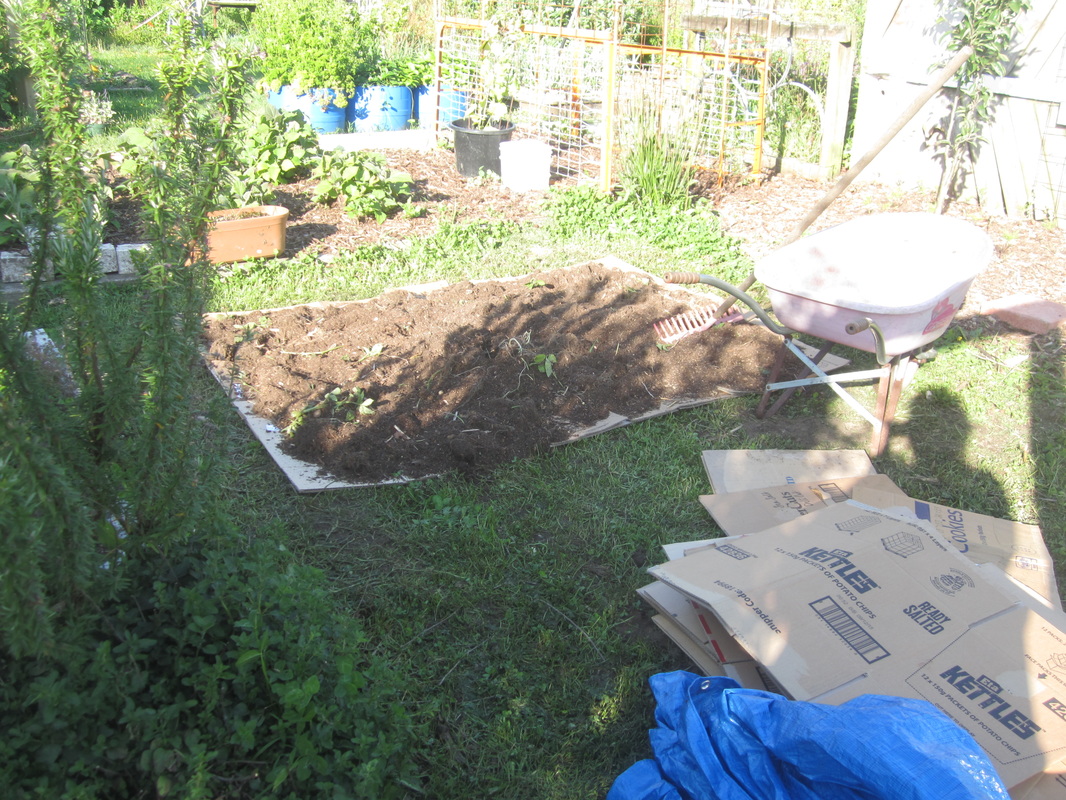
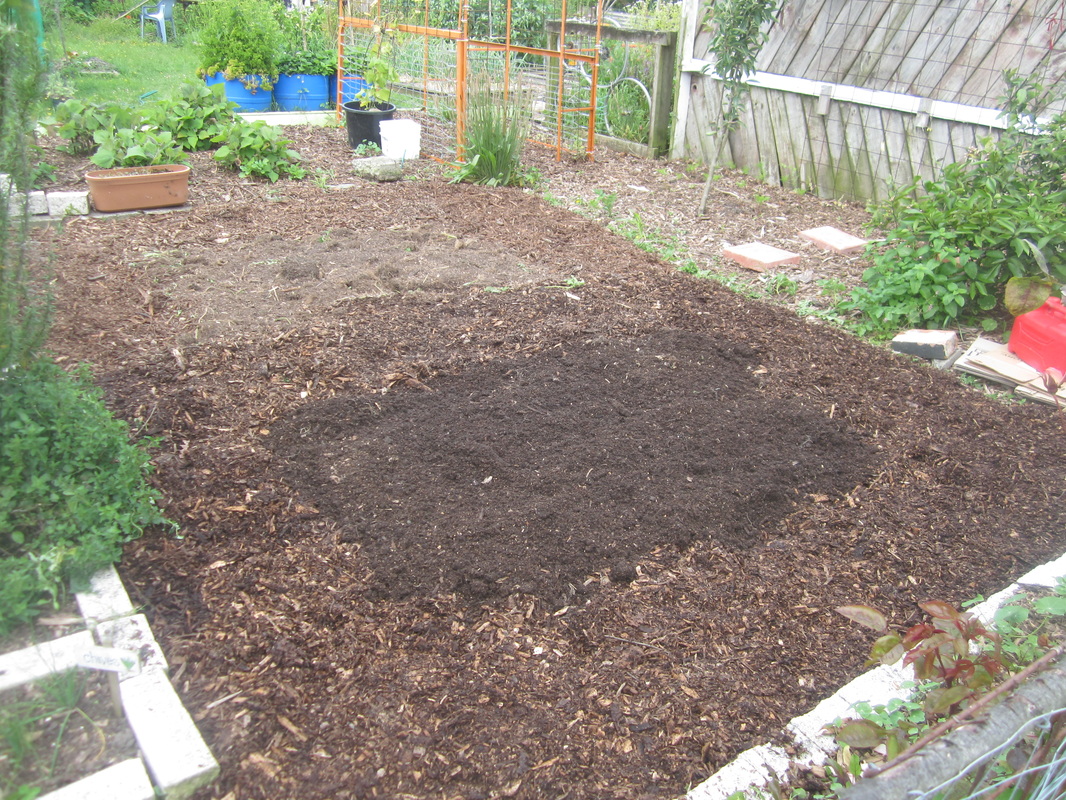
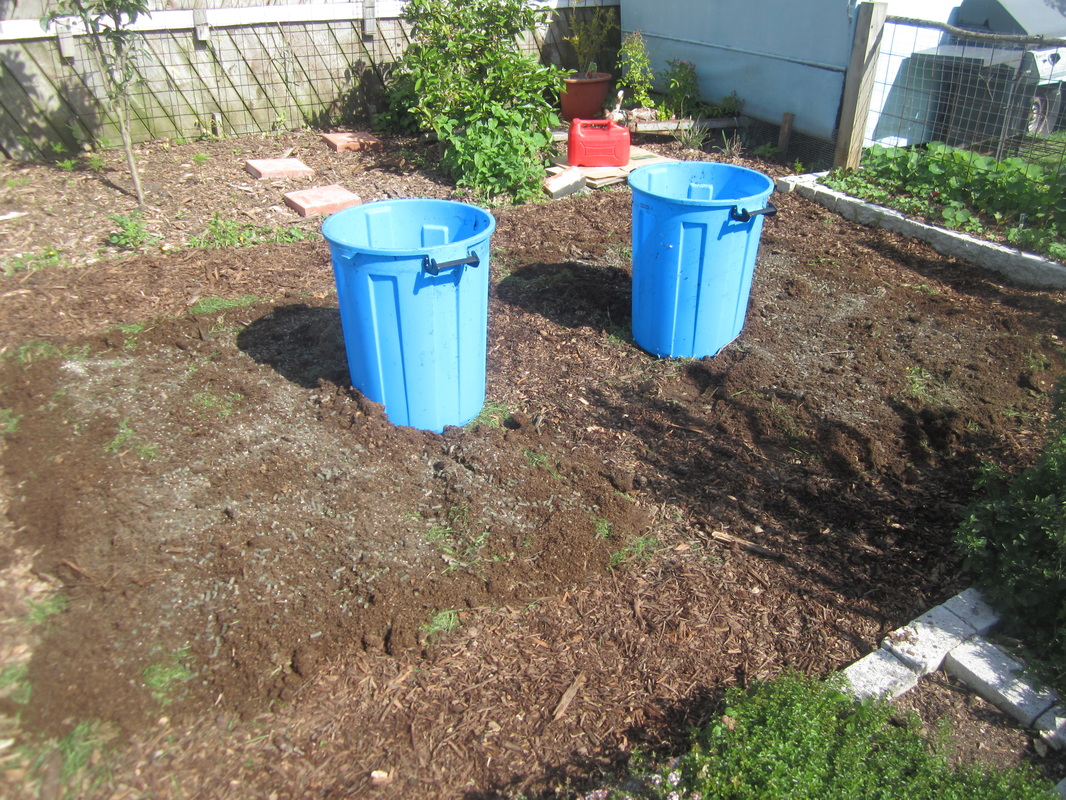
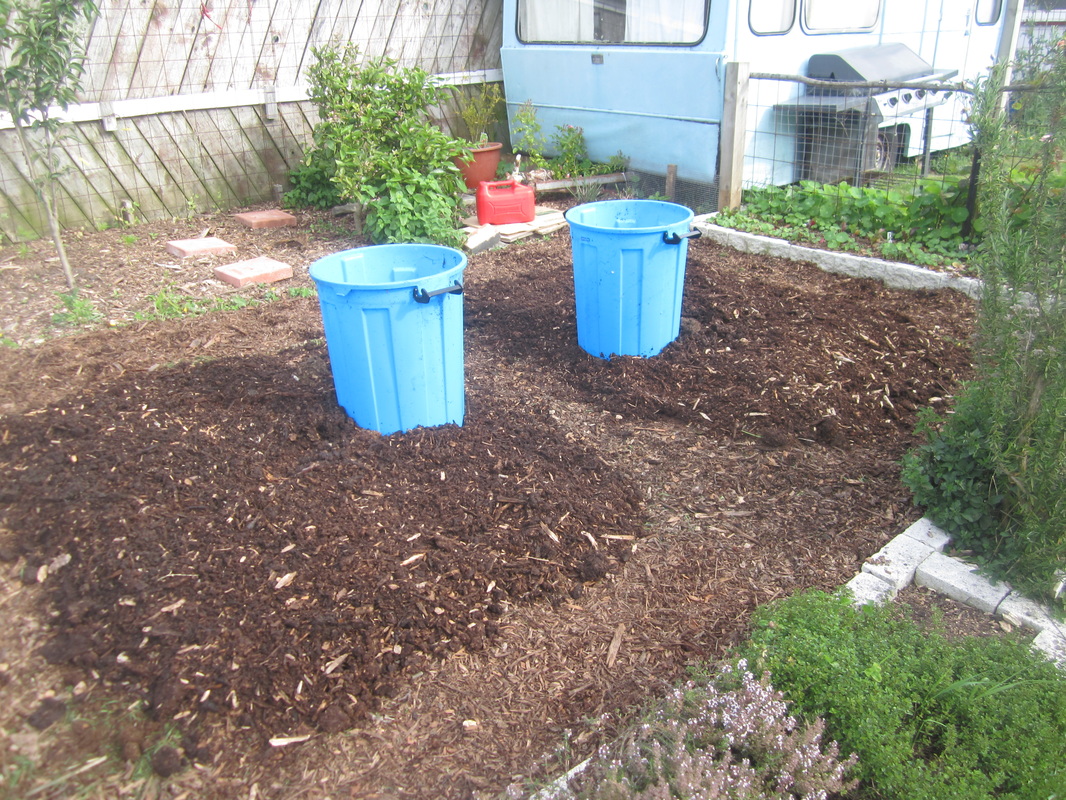
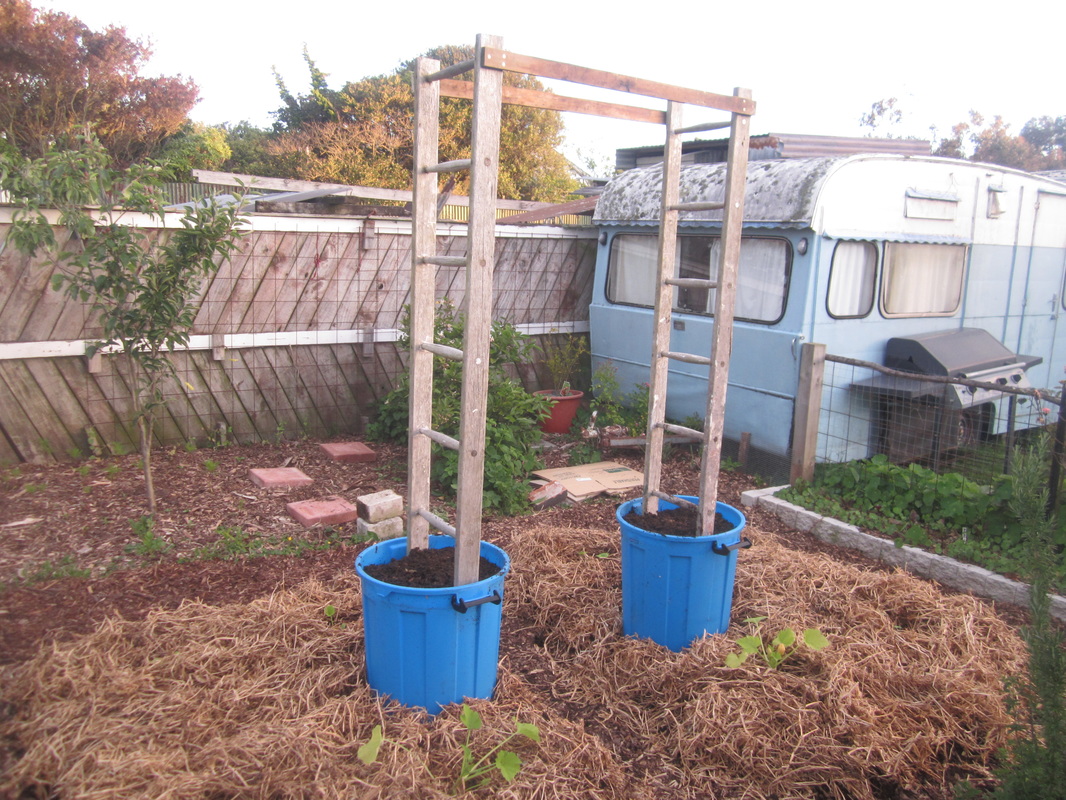
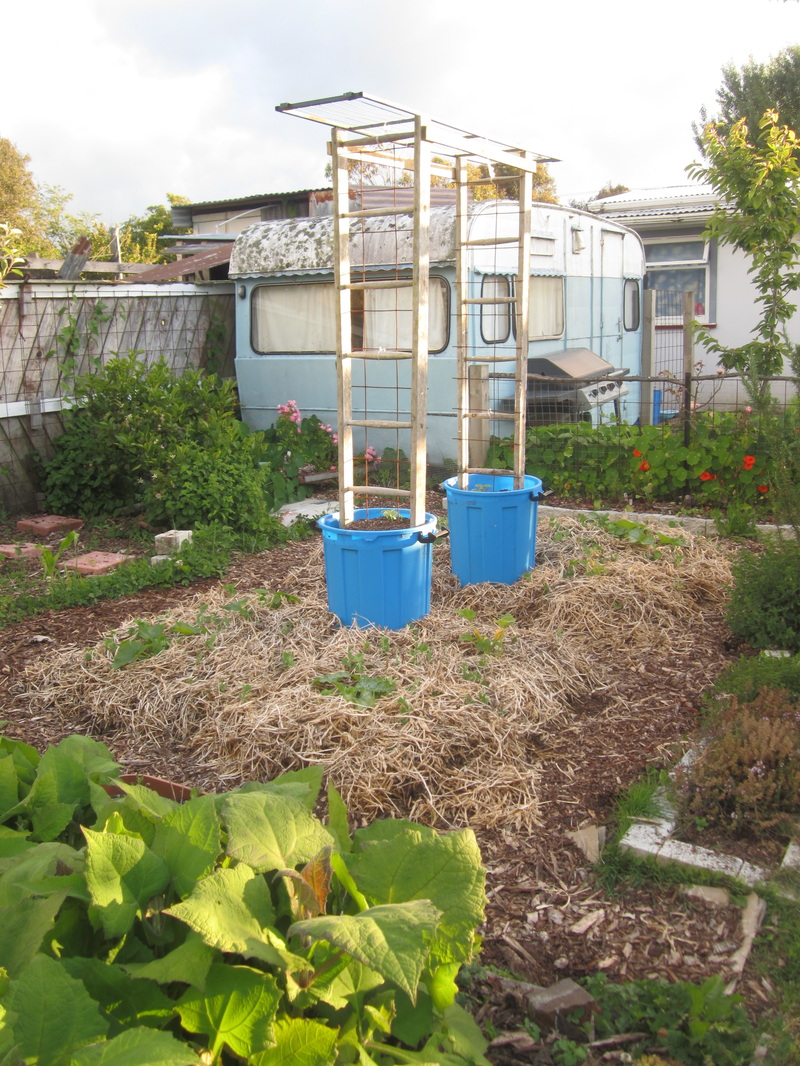
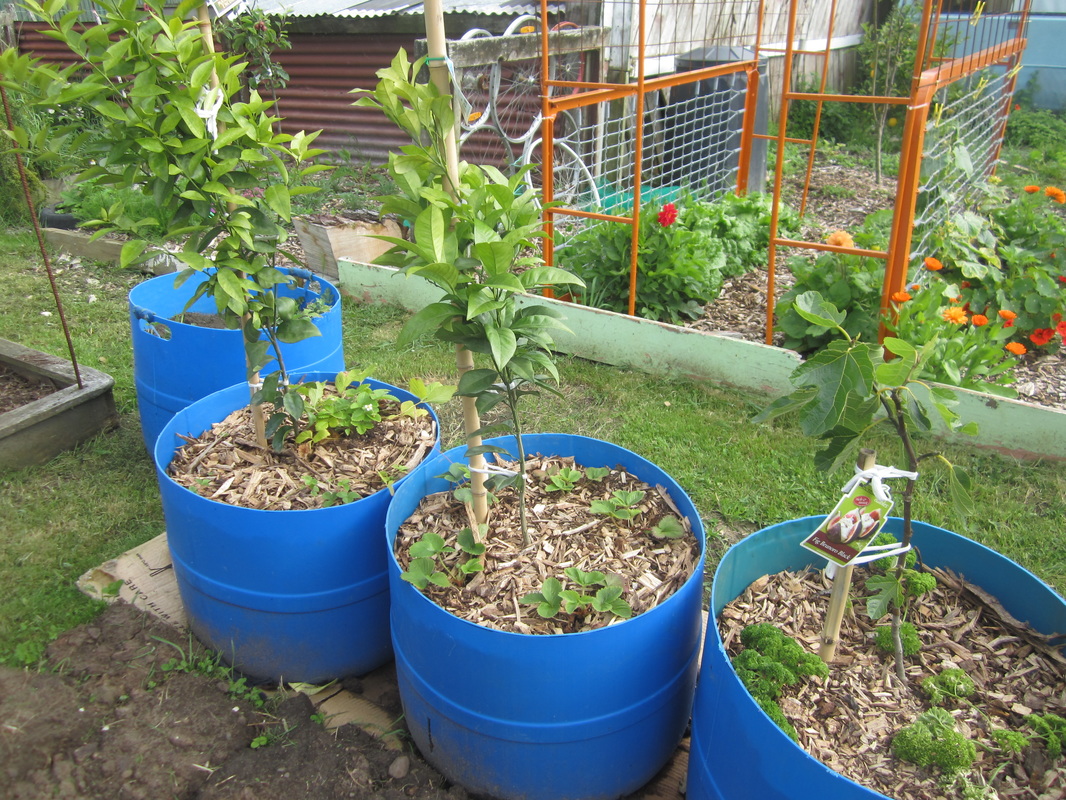
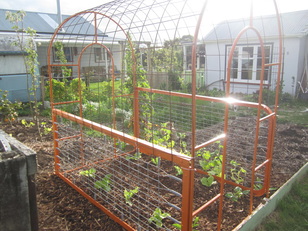
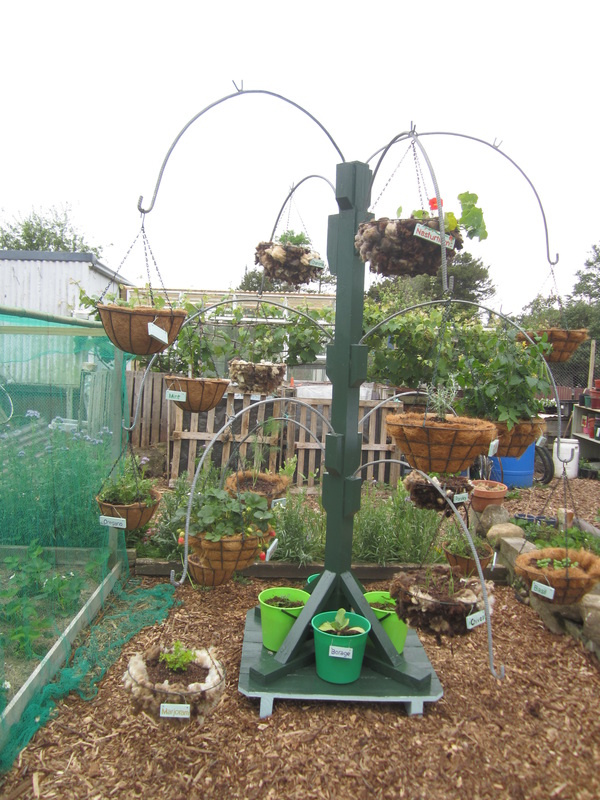
I planted four zucchini plants in each bed. The idea of the bin with the compost and the holes is that I can water the zucchini by putting a hose into the bins, which will dissolve compost and water it out through the holes, watering the zucchini with compost tea (feeding them at the same time) as well as avoiding wetting the leaves (reducing risk of fungal infections).
Picture
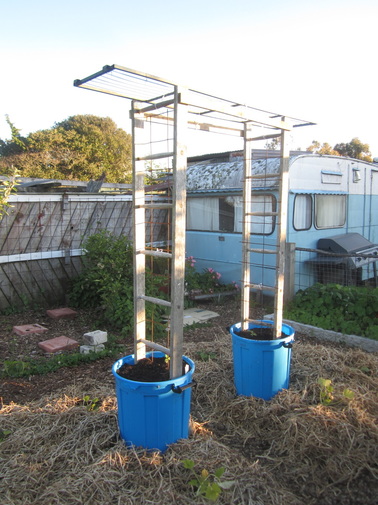
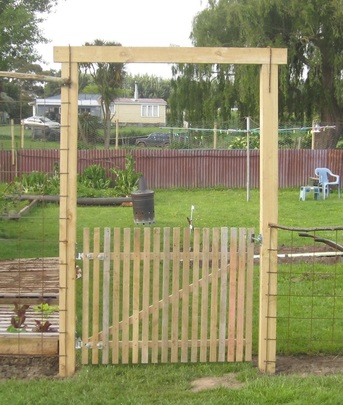
I used some offcuts of steel mesh and cable tied them to the ladder halves to give more of a mesh for something to climb, and topped up the bins with some spare potting mix before planting a cucumber in each bin, and some Petunia seeds as well. I found a spare greenhouse shelf, and cable tied it across the top to form the top of the arch. Hopefully the cucumbers will climb the ladders and cover the arch, the petunias will spill out over the sides, and zucchini will flourish! :-)

0 Comments

Homesteading When You're Flat Broke....

28/5/2015

1 Comment

 
Picture
I just read this really good blog post on how you can get started (or continue) homesteading even if you don't have a spare cent to your name. So many of the things suggested reflect what we have done or are doing here. Kendra does a great job of telling you the four (free) things you need to homestead without financial resources.  Hop on over to her blog and read her inspiring article HERE, and then come back and check out my own list of some of the ways I've been able to find free resources or create garden structures for free, or with very little expense, below.

Kiwi Urban Homestead - How to get Good Stuff for Free (or nearly free)

Free Punnets, Seed trays & Plant Pots: When you're starting a garden, seed trays, punnets and plant pots are really useful, but if you're gardening on any kind of real food growing scale, they can add up to a lot of money. Sure, there are a lot of things you can sow direct into the garden, but many crops do better if started in trays or pots then planted out later. Fortunately, many, many people buy seedlings and plants from garden centres (they must do, or they wouldn't still be in business!) and then after they've planted out the plants, they're left with all those plastic punnets and pots. What happens to most of them? They end up in the landfill! I have collected used free pots, trays and punnets from the local dump, from the free bin at local garden centres, and by letting other local gardeners know I'm happy to take pots off their hands. Once, I scored a van-load of pots when my son happened to be at the dump and spot someone about to unload them into the pit! I was able to share them with other new gardeners. Some of those pots and punnets are pictured below in this pic from our new greenhouse, which was built with recycled windows.
Picture
Freezer baskets - so many uses!
I've scored quite a number of old freezer baskets from the dump, and they have a lot of uses. In the greenhouse, I mounted two on slides made from pieces of corner moulding to create drawers which hold my smaller pots under the bench, and used a couple on the floor to stack a selection of punnets and small pots in. I also use more baskets to hold small to medium sized pots of plant varieties - this makes it easy to move a group of them in one go by simply lifting the basket. I have also used freezer baskets in the garden upside-down over young plants to protect them from birds who like to dig them up until they get established. This was especially useful for my watermelon plants this past summer.

Picture
Freecycle finds: In the past year, I have scored from Freecycle the stainless steel bench/sinks unit used as a potting bench in my greenhouse, a load of brand new bricks used to create garden edging, and a kennel for our dog.

Freecycle has regional groups throughout NZ - you sign up to receive emails of things listed by members, and you can list items wanted or to give away. A great way to keep good stuff out of landfills, and to share unneeded items with others.

Picture
Wooden Pallets Untreated wooden pallets have so many uses on the homestead! I have used them to build a fence and gate to keep the critters from the garden, make pallet beds for growing salad ingredients, and to build compost bins. They can also be carefully dismantled and the timber used to make other things. There are tons of cool ideas on the internet for things made with wooden pallets, from garden seats to sheds and houses!

To find wooden pallets, ask companies that ship lots of stock on pallets. They will likely have some that have to be returned or they get charged money, but also often have unmarked ones they're happy to give away. You want unpainted, untreated pallets for food growing uses.

Picture
Picture
Plastic drums 200 ltr plastic drums, which diary farmers have a constant surplus of, also have multiple uses around the homestead. The farmers can return them to source for recycling, but they don't get any money for doing so, so are usually happy to give them away if you ask nicely. I prefer the ones that have only had iodine teat-wash in them. Cut in half and washed out thoroughly they make excellent planters for small or frost tender trees (as they can be moved to shelter in winter) or for growing potatoes and other crops. Whole drums can be turned into rainwater storage, and a drum minus it's lid is great for brewing up liquid manures and teas, or laid down and stabilised makes a great shelter for small animals such as ducks and dogs.
Picture
Picture
Tyres Tyres are expensive to dispose of, so easy to get for free, but for this reason I advise caution against acquiring very many of them. There is a lot of dispute about toxins leaching from tyres; my own conclusion after much reading is that there is unlikely to be any significant leaching from tyres that have done high mileage, and that are whole (rather than shredded such as for recycling). However, I do prefer not to grow food crops in them. It is also important to be aware that tyres will heat up and dry out soil contained in them in summer weather, and that the shape of the tyre can cause plants to grow a circling root system that stunts the plant. Therefore, I have my husband cut off the lower wall of the tyre when I am using small ones to plant things like wormwood or small bushes within, giving the roots more freedom, or the upper wall when I want to use a large tyre as a planter. I've used a row of tractor tyres to create a visual and physical barrier between the parking area of our driveway, and my front garden. Planted with carpet roses and alyssum they look pretty and attract bees and other beneficial insects. Tyres are free for the asking at tyre shops.

Picture
Garage Sales and Thrift Stores are a great source of free or very cheap items that can be used in the garden. I've collect lots of goodies by keeping my eyes open, including a wire mesh harvesting basket that cost me $3, lots of preserving jars for very little (I don't like to pay more than 50c each), a free swing seat (we painted it and sewed a new seat), various baskets I've used for planting with lettuce or for picking and harvesting, inexpensive garden tools, cheap pots, watering cans and more.
Picture
Picture
Free compost, mulch or soil building materials: the best way to improve your garden is to build the soil, using lots of home made compost, manures, mulches and organic materials. I regularly source the following free and locally:
Sawdust mixed with horse manure and urine - local stables clean it out of the stalls and pile it up, and let me bring home as much as I want. I've used it as a mulch, a compost ingredient, or just piled it on top of cardboard to create a new garden area from lawn. It breaks down into really nice soil.
Pine peelings mixed with calf manure - the local dairy farmers clean out their sheds once a year, and are happy to give it away. I haven't found this to be the best source or materials though - I mostly use it for extra carbon in compost piles, or on pathways.
Dead leaves - these are the most fantastic compost ingredient or mulch. I visit local streets where thick layers of leaves fall in autumn and bag up and bring home as much as I can. I reuse animal feed sacks or plastic bags, and then use the stockpile as I build compost piles. My worm bins enjoys a generous covering of leaves too.
Cardboard and newspaper - local supermarkets and stores have and endless supply of cardboard and newspapers. I use thick layers to suppress weeds when building new beds, or to start lasagne beds, or on pathways before covering with woodchip or other materials. Shredded paper is also a use compost ingredient, though I also use office paper that has gone through my shredded inside - avoiding glossy papers and inks.
Pine needles - local forestry plantings have thick layers of pine needles just lying around - I collect these and use them to mulch my berry beds, which thrive as a result. They can also be used to mulch pathways, in compost etc.
Wood chip - wood chip is to me THE premiere garden mulch and material - it's whole shredded trees, including leaves, bark, timber etc. It improves garden soil like nothing else. For the real low-down on woodchip, watch the free movie at www.backtoedenfilm.com. Local contractors who prune or clear trees from roadsides etc, and then shred them are the best source. Some will drop a load off for free. Others have wised up to the value of this great material, and will deliver it for a donation of beer for their social club.

If you want to collect materials from private land, farms, forests, etc, do be sure and find out who owns it, and ask nicely first! Keep some spare bags and gloves in your vehicle too - you never know when you're find materials. I had to wait for my daughter to complete a competition in a rural town one day, and notice leaves lying under the trees by the edge of the park. I took home two sacks full. :-)

Picture
Picture
Get to know your local dump or transfer station operators! People throw away so much good stuff, and it's amazing what you can find! I've sourced free paint to use on various projects, complete greenhouse frames with shelves which I've used as shelving in my greenhouse, and to create a unique climbing structure for the garden, and old bathtub which became my new worm farm, steel mesh which makes awesome trellising, an outdoor table and chairs, and old plastic table which I use as my outdoor plant station for hardening off plants, loads of garden pots, good tools, a sink which I turned into a planter, gates and bed bases I've turned into trellises, metal trays I use to hold pot plants, wooden pallets and so much more!
Picture
Picture
Picture
Free Bees & Honey - We've even managed to add beehives to our homestead without expense - our first two hives were given to us by a neighbour who was moving away, whom we had helped out from time to time. When one of those hives swarmed, we captured the swarm, which gave us three hives, and after splitting the queen cells from the brood and bees left behind by the swarm, our numbers increased to six. We have all the honey we can eat, and then some, increased pollination, surplus hives to sell and the proceeds provide more gear as needed.

Picture
Free ducks, chickens, sheep and worms - I read on Facebook that a couple in a nearby town had too many ducks and were giving some away, and that's how I added David, Delilah and Jemima to our homestead. A few months later, Delilah hatched out 12 ducklings, and our duck flock grew. They are terrific at getting rid of slugs and snails in the garden, and fun to watch splashing in their pools. And they produce eggs and meat. We also started our chicken flock with chicks we were given for free. The great thing about livestock - once you have them, they multiply for free, if managed properly. I started my worm farm with an icecream container of worms supplied by the local librarian. Our sheep flock did take a small investment in the first 5 lambs, and later a ram, but I haven't paid for a sheep, or lamb/mutton to eat in the past 5 years. Neighbours with unused land have provided extra grazing, and in return our livestock keep their sections tidy. Animals are a real blessing on the homestead - providing so many useful resources.

What's lying around? Your own property probably has all sorts of odds and ends that can be upcycled in the garden, and your neighbours might have things they don't use they'd gladly give you. How about scrap materials from the work sites of family members? We used an off-cut of trailer panelling to make a whiteboard in the greenhouse, free scrap wooden slats from a building supply company to build a gateway to the garden, a broken rake to make a holder for my small garden tools, a pallet stood upright in the shed holds my rakes, loppers, hoes and other tools, left over iron from re-roofing projects (ours and local friend's) to make animal pens and shelters, fences and more, driftwood from the beach and branches from forests to create garden edges, a pile of old concrete house piles I found lying in a corner were used to create a raised platform in my garden where I located the swing seat, trellises and yummy food plants, and old bike wheels make great trellis structures.
Picture
Picture
Picture
Bamboo a local was cutting down has been stockpiled and has endless uses for building structures & stakes.
Enter competitions - you can win all sorts of free gardening goodies! My daughter nominated me for Gardener of the Year my very first year gardening, and I won the Best Vege Gardener section, which came with all kinds of goodies including gardening books, gloves, tools, planters, fertilizers, seeds, bulbs, and subscriptions. This past spring, I joined in the Yates Spring Vegie Challenge, and won some neat prizes in some of the smaller challenges along the way, including for my Herb Tree, which was made with materials I found at an op-shop, and things I had lying around. These events have landed me in the local papers several times, which has led to speaking engagements - and in return for telling folk about my garden, I have gained some useful garden centre vouchers. I also have gained free seed packets from bread bag voucher codes, and won a lovely gardening book in a draw from Green Ideas magazine. If it's free to enter, it's worth a try!
Picture
Use Bonus Points: I use accumulated Fly Buys points to subscribe to NZ Gardener magazine and Lifestyle Block magazine - excellent sources of inspiration and information for the homesteader and gardener. There are various schemes around that reward you for things you're doing anyway, such as buying food or fuel, and with a bit of thought they can be turned into more free stuff for the homestead.
Above all keep your wits about you, a smile on your face, and your eyes open! There are useful free materials everywhere - you just have to notice, and ask or collect. A smile goes a long way, as does treating other people well - lending a hand when they need it, being kind, sharing what you have. When you treat others well, they're all the more likely to think of you when they have something you might be able to use. Also, most gardeners are a generous bunch - willing to share knowledge, ideas, and seeds and cuttings. If you see something you'd like to grow, or want to know more about - ask!

Homesteading and gardening without money is possible - but you do need some patience, as when you can't just go out and buy materials, it can take longer to get things to where you want them. But in the end, it brings greater satisfaction!

Of course, this is by no means an exhaustive list. If you've got other ideas or experiences for free items for the homestead or garden, please share them in the comments! :-)
1 Comment

Homesteading DIY

8/4/2015

0 Comments

 
Last weekend was the four day Easter weekend, and the perfect time to get some major jobs taken care of before winter. Fortunately the weather was fine. My husband took the days prior off work, so he could take care of some other things, and get some prep work done. And then it was into the first major job:
Picture
Re-roofing 1/3 of the house! The roof over our kitchen, office, foyer, laundry, bathroom and toilet has been needing replacing for a while. Naturally, these things are  never as simple as you hope - once the iron came off it turned out a lot of timber needed replacing too (the house IS more than 100 years old after all!), and more wire needed to be laid to support builder's paper under the new iron. Fortunately my husband is a great DIYer, and so is my eldest daughter. In this pic they are removing the old iron. Now the new iron is on. It needs to age a while before it gets painted.

Picture
Next up, splitting all the firewood. We were blessed to be able to cut up felled pine trees that had been thinned from a forestry block, and the huge pile of them has been waiting on splitting. A borrowed log splitter, a couple of strong lads and my husband got it all done. Enough wood to keep us nice and warm over the coming cold months. Well done guys! Half of it is stacked under cover, and the rest is piled waiting for us to decide where to stack it.

Picture
Of course, what would a busy weekend be without an unplanned plumbing emergency? We woke Saturday morning to find a joint in the main plumbing under the house was spraying water violently. We had the plumber out for a similar problem a couple of months ago when my husband was at work - he said if it went again, the kitchen wall would have to be taken off and the kitchen re-plumbed as there wasn't enough pipe left to recut and thread it. SO glad this happened Saturday morning, not any other day of the long weekend, as the local building supply company was open Saturday morning only. So, my husband cut out a section of the outside wall with the sabre saw, and put in new pipes and joints for both the hot and cold systems, replacing the old copper pieces you can see in the photo. It was the cold one that needed doing, but since the wall was open, we may as well do both, so we can seal it up again and not have to worry about it.

Picture
And while the others were busy with these things, what was I up to apart from running to the hardware store, providing meals and normal chores? Well, it was time to slaughter the first of our ducks. The guys helped me with the killing, but the butchering was up to me. In the end, as I had 7 to do and limited time, I opted to skin them, remove breast meat and legs plus wing meat and put some of the rest of the carcasses aside to make stock or soup bases. Click HERE for the You Tube clip that shows the method I used. From the 7 ducks, I got enough meat to make 2 meals from breasts for the 7 of us, and enough leg and wing meat to make a yummy casserole, as well as the frames for stock.

Picture
I also cleaned out one of the sheds, so the partition wall my husband removed from one of the kid's rooms could be moved out there - when he first built it, he made it so it could come out mostly in one piece once the kids were no longer sharing a room, and we decided to set it up in the shed to create a better space for storage, and block the view of the shed contents (it's open at the front). I also got my husband to lay some carpet in a hallway extension, and I moved furniture from the shed to create the set up there I've been wanting. A local second hand store was closing down, so we went to have a look and came away with some great useful bargains - including a new dryer for free (the current one makes the most awful racket and the timer doesn't work), a brand new garden edging tool ($20), a sturdy long handled brush that connects to a hose for washing the outside of the house and windows ($2), a case for holding my current-use seed packets ($1), and a small decorative wooden chest ($10) - ok that one was just because I really liked it. :-)
The aim of homesteading is to live more self-reliantly, and doing so involves many different skills. You don't need to have all those skills before you start out - all you need is a willingness to give things a go and learn along the way. As my husband repeatedly says, he's not an expert at any of these things, but he can figure them out as he goes along. When we got married, I never expected to do much DIY - I left that kind of thing to my husband. But these days I mow the lawns, build fences or garden structures, butcher animals, repair tools and a myriad other things. I'm by no means an expert, and often I need some pointers or extra muscle from my husband or others, but I can do so much more than I thought!

Teamwork is important too - and never waste an available pair of hands! A local young man who was accidentally locked out of his home for a couple of hours came over and helped my husband lay the iron on the roof. The son of our neighbours came over to return a tool he had borrowed, and went back for his tool belt when he saw what we were doing, and helped with some of the prep work. Two brothers, sons of friends, helped with the firewood on two different days. And of course, our own kids pitched in too, when they weren't working. Many hands make light work. Besides, it's fun to work together and chat while a task gets done, as well as learn from each other. My husband started most of this work not expecting anyone would be available to help, but helpers seem to turn up when things are underway.
0 Comments

A Herb Tree

18/2/2015

0 Comments

 
A few months ago, in early November, I created a "Herb Tree" and entered it in a competition for garden structures, winning a prize and ending up in the newspaper. This is the photo taken when it was completed, and entered into the competition:

Picture
I call it a “herb tree” but basically it’s a fancy structure to hold multiple hanging baskets, most of which I’ve planted with herbs. I was inspired by a post and hanging baskets I found at an op shop for a bargain $30 price. The base of the stand was completely rotten, so I began by dismantling it, having my husband cut some new base pieces (which needed some fancy work with the bench saw to make them interlocking), as well as cut some new blocks for the holders. I then rebuilt it myself, and also nailed it to a pallet for extra stability. I painted the pallet and the pole with free paint from the dump – first with a light green, then with a top coat of glossy enamel forest green.
Picture

Not all the baskets came with liners, so for the ones that did not, I used some wool from the last time we crutched our sheep to line the insides. Wool makes a great basket liner – it holds water but drains freely, and holds in the soil. Any dags in the wool are a bonus fertiliser!

I planted up 14 hanging baskets. They contained:
  • Basil
  • Dwarf Munstead Lavender
  • Rosemary
  • Nasturtium
  • Parsley
  • Pizza thyme
  • Golden Marjoram
  • Oregano
  • Curry plant
  • Chives
  • Yates Tiny Tim tomatoes
  • German Chamomile
  • Peas (which I hope will drape down over the sides of the basket)
  • Strawberries
Sitting on the pallet I also have four buckets which I drilled holes in the bottom of, filled with potting mix and planted two each with Borage and Geraniums.

Picture
I also created labels for each plant. I used some battens from a piece of trellis that fell apart, and cut them into 10 and 15cm lengths with the dropsaw. I drilled holes in each end, and I then painted them all with more free pale green paint. After they dried, I used a stencil from my kid's art supplies to pencil on the lettering, then painted with acrylic art paints and a fine art paint brush. I added some decorative touches to some of them. And then I sealed them with a coat of varnish. Lacing wire is threaded through the holes and over the edge of the baskets before being twisted to hold in place. The labels will make it easy for my children to identify which herb is which when they need them for cooking. Plus they look pretty cool.

My plan is to have everything on this stand be edible, and to make it easy to come along and snip a bit of this and a bit of that to add to salads or cooking.

There is room to add a few more baskets onto my herb tree stand as I am able.

The whole set up has been placed onto a barked area I created between several other garden beds, where there is just the right amount of space for it. I would prefer to put it closer to the kitchen door, but that area is very exposed and windy, while this spot is a wee bit more sheltered.
Picture
The downside of hanging baskets in summer is that they dry out very fast, and have to be watered every day without fail. Some plants have done particularly well:
  • Golden Majoram (which is neat, as when I've tried to grow any kind of marjoram in the past it's just died)
  • Oregano
  • Thyme
  • Parsley
  • Chives
  • Mint (a wee bit of a surprise, as I always think of mints as needing rather moist conditions). It now is putting out runners through the bottom of the basket - in time it may well be a whole ball of mint!
  • Geraniums
Some others are growing slowly and doing ok:
  • Rosemary
  • Lavender
  • Nasturtium
  • Sage
A few others were a bit of a "flash in the pan" - doing well at first and then either bolting or coming to the natural end of their cycle quite quickly, and not enjoying the hotter conditions:
  • Tomatoes
  • Dill
  • Chamomile (this is still growing, but it looks quite straggly)
  • Borage
  • Peas
  • Basil
By the time the photo below was taken for the newspaper in mid January, the borage and tomatoes were finished and had been removed, and the peas and dill were on their way out.

Picture
It was a fun project! I enjoy using free or very cheap items creatively in my garden!
0 Comments

Project: Trellis style fence with arch and gate plus raised garden beds

24/11/2013

0 Comments

 
Picture
We have two dogs, a big one and a little one, both of whom cause occasional problems in the garden. For some time, I've wanted to build a fence that would keep the dogs out of the garden, as well as create an attractive
boundary/entrance to the vege garden area, giving it better definition. The narrowest point between a caravan and out building is the place I wanted to put it - but the distance across was still close to 7 metres. To create a fence with arch and gate over that length can cost a lot of $$$! Plus I wanted an edged raised garden along both sides of the fence. This ended up costing me $179, even though I used a lot of free materials.  But, it's an important part of the "infrastructure" of my garden.  Here's how I created the finished set up you see above....
Materials:
2x 2.7m 100x100 posts = $35.53
1x 3m 100x100 post, cut in half to make one end post and top of arch = $18.63
1 sheet 4.65x1.97m steel mesh = $38.36
1 waratah, repurposed from a defunct fence = free
3 branches trimmed from trees = free
Bricks to surround garden, from Freecycle = free
Slats to make gate, left over from free materials collected from local building company for son's woodworking projects = free
1/2 Pottle of screws to put together gate: $4.99
Nails & fencing staples: $8.00
Butterfly catch for two way opening: $22.14
Gudgeon hinges and plates: $33.98
Screws and washers: $5.38
5 wheelbarrow loads purchased compost = $12
Total cost: $179
Note: materials were collected bit by bit as I was able. If I hadn't scored the free concrete bricks, I would have used something else to edge the garden - eg driftwood, bricks from an old chimney, etc. The really pricey part of this project was the hinges, latches and fittings for the gate. This could have been done in other ways, but I was very specific in what I needed, especially as I need to be able to walk easily through the gate in both directions carrying heavy baskets of washing.
Picture
First steps:

I decided where I wanted the garden bed to go and marked it out. My daughter dug up this strip and removed the turf (to make creation of actual beds easier later when the fence is in). Basically a strip was dug up from the location of each tall post out to each side, leaving the lawn as-is through what will be the gateway.

Two upright posts were dug in, so they are 2 metres above ground, and 70cm underneath. Spirit level essential to get them straight!


Picture
The 3 metre post was cut in half, and one half was used to form the top of the arch. The other is the post for the far end of the fence on the low side. I chose to make one side high, and the other low, so that a climber could be trained up the high side, and so that from the dining/living room I could still look out over the low side and see into the garden - that way I can enjoy the view, and also catch any intruding chickens in the act before they do too much damage!

The single sheet of reinforcing mesh was used to make the trellis of the fences - after cutting 2.2 metres of it to make the high side (put up with fencing staples), the rest of it was cut in half and the offcuts put together to make the low-side fence, joined in the middle.

A waratah (metal fence post) was used behind the join so the pieces could be wired to it for stability. A length of the reinforcing mesh that was cut off was tidied up and then used like a wire, bent over the top of the post that forms the arch, and attached with fencing staples on both sides of the upright posts.

The tops of both fences, as well as in front of the waratah, are finished off with branches pruned from some trees on our property, giving it a more finished, rustic appearance, as well as adding rigidity to the trellising.


Picture
A simple gate was made by laying two slats down parallel to each other, then laying the other slats over the top, using an extra slat to measure the spaces. They are all screwed to the rear slats top and bottom. Then, to give it stability and keep it square, a third slat is placed diagonally at the back, with it's corners cut to fit, and screwed in place.

The gate is mounted on gudgeons with a butterfly latch. The latch is designed to close over a metal pipe type gate, so my husband found a short piece of metal pipe, cut a slit in it, and fitted it over the end slat in the right place.

The gate opens in either direction.

Unfortunately it took my clever retired sled dog all of two days to figure out how to open the gate, so I'm going to need to add a sliding bolt to the back of it to close it securely at night, but during the day this works great. She only opens it at night, as she knows she's not supposed to, and then either opens the next gate to go out into the paddock, or rummages in my compost bins.


Picture
Next was creating the raised beds along the fences. Because our lawns are full of couch grass and creeping buttercup, I find the only way to restrain them from creeping into and filling new garden beds is a physical barrier a few inches down into the soil. So these beds are made by digging a trench, then standing concrete bricks on their ends side by side to form the sides of the bed, half in the ground and half above. This side was curved at one end to meet up with the edge of a building and work around plants in an existing garden, and on the other side, the edge of a pallet bed forms one part of the raised garden edge. Compost was mixed with the dug soil, and this first bed is planted with a climbing thornless Banksia rose, some impatiens flowers (this bed is shaded in the afternoon), a paper cascade daisy, and later I added some parsley.

Picture
The bed along the lower fence, planted with gherkins and marigolds, celery and cosmos, plus nasturtiums and alyssum.

I'm really please with how this project turned out!  


Picture
0 Comments

    Author

    This page is my blog formerly known as Kiwi Urban Homestead.

    I'm a Kiwi homeschooling mother of 5 living in a small town. After growing 1000 kg of produce in my back yard in 2013, I'm now expanding my edible gardens even further.

    Archives

    February 2016
    December 2015
    October 2015
    September 2015
    June 2015
    May 2015
    April 2015
    March 2015
    February 2015
    January 2015
    December 2014
    November 2014
    October 2014
    September 2014
    August 2014
    April 2014
    February 2014
    December 2013
    November 2013
    October 2013
    September 2013
    August 2013
    July 2013
    June 2013
    May 2013
    April 2013
    March 2013
    February 2013
    January 2013
    December 2012

    Categories

    All
    Bees
    Butchering
    Chickens
    Compost
    Corn
    Diy Projects
    Events
    Everything Else
    Firewood
    Freebies
    Frugal Fortnight
    Garden Diary
    Gardener Of The Year
    Getting Started
    Greenhouse
    Harvest
    Harvest Totals
    Health
    Herbs
    Home Made Cleaners
    Homesteading Skills
    Jungle Taming
    Livestock
    Media
    Monthly Garden Pics
    Moon Planting
    Musings
    Pests And Diseases
    Planting
    Preserving The Harvest
    Recipes
    Salads
    Soil Improvement
    Specific Crops
    Tomatoes
    Weekly Round Up
    Worms
    Yates Vegie Challenge
    Zucchini

    RSS Feed

Powered by Create your own unique website with customizable templates.