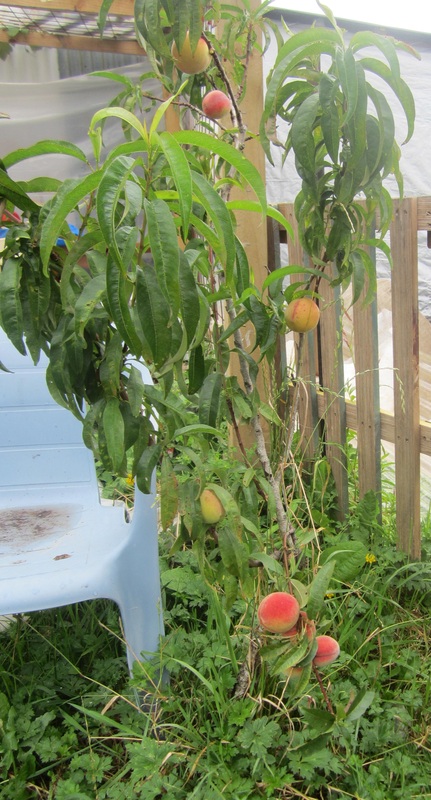
What can I say? I have an enquiring mind! When the Vege Gardener's group I'm a part of got into a discussion recently about the best way to grow tomatoes successfully in pots, and various methods were suggested, I just had to - you guessed it - set up an experiment to see for myself! So, 25 cheap buckets, 5 growing mediums, 5 varieties of tomatoes.....Here are the first two videos - the set up, and then an update one month later. More updates in the near future, of course.
|
Home-grown potatoes are very yummy and much better for you than commercially grown ones, which are loaded with nasty chemicals, as well as having less flavour and nutrition due to long storage. But, which of the available varieties grow best for home gardeners in New Zealand? And what is the best way to grow them? Which ones do well in containers? All these questions and more made me decide to set up some experiments, and invite other gardeners to do the same, then share and combine data at the end of the season. So, I decided that for my part of the experiment, which I called the 2014 Spud Challenge, I would grow 5 varieties of potatoes - Rocket, Swift, Jersey Benne, Agria and Ilam Hardy - in half-drums and potato planter bags, as well as some in planter pot and some in a garden bed, and see what happens. I came up with my own concoction of goodies to add to the drums and beds for nutrients and vigour too. To see how I've set this up, and how I prepared and planted the potatoes, check out these two short videos: Updates coming soon!
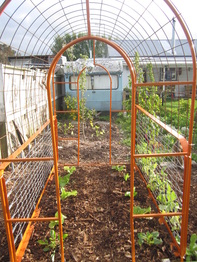 It's fun to create useful and attractive structures in the garden out of free stuff! Here's how I built a climbing frame and arbor for next to nothing this week. 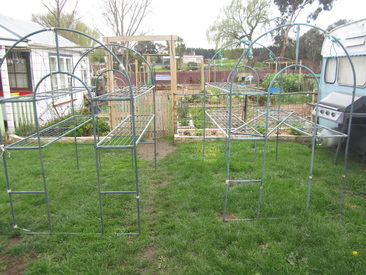 Living on a tight budget, I've learned to keep my eyes open for free stuff I can use in the garden. Not long ago, I discovered some old greenhouse frames & shelves in a metal recycling bin (and was given permission to take them home) - the sort meant to have a plastic cover, but without the cover. One set are now in my greenhouse, holding the trays and pots of seedlings. The other set was in worse condition, with some of the horizontal supports that should hold shelves rusted off. Knowing it won't last more than a year, maybe, outside, I figured I could use it to create some sort of cool growing frame for my cucumbers this season. I also found two old wire-mesh single bed frames in the metal bin on different occasions, and scored some free orange paint from the free paint swap at the local dump. Hmmmm......I'm starting to get an idea! 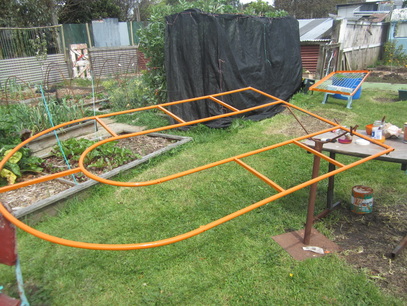 First, I set up the end pieces and bed frames on top of various objects on the lawn, and painted them with two coats of the orange paint. That took a few days, as the enamel paint took some time to dry, and I had to turn each piece over and do the other sides too, plus could only set up one bed and one frame at a time, and the weather wasn’t entirely co-operative! Painting them hid the rust on all the metal parts, and gave them a more uniform look. I also discovered it's a great way to kill lots of flying insects - every time I came back to check a coat of paint, it would be covered in aphids and other bugs - wiping them off killed them, but left lots of little legs stuck to the paint. Ah well, masterpieces of painting perfection, these are not! In between coats of paint, I prepared the bed where my trellis was to go – after harvesting the previous crops, I forked over the soil, then added 3 bags of compost, a wheelbarrow load of manure, and a couple of catchers full of grass clippings and stirred it all in. I raked it level, and then added wood chip mulch, and created paths for walking down both sides by digging out the soil forming a trench, which was filled with more woodchip and stomped gently down. Once the paint was dry, I moved each piece to the garden bed, and assembled it on-site. The pieces are held together with cable ties – that proved to make it relatively easy to put together, and it will be easy to take apart in the future if I need or want to, yet the whole structure is very rigid and sturdy. Cable ties were first put loosely in each corner, top and bottom, and then everything was leveled out and adjusted before tightening them up. Next came the fun part – adding the reinforcing mesh for the upper curved trellis. Fortunately, a single bed is the same length as the width of a sheet of mesh, but the sheets are 4.6m long. I managed to get one home from the building supply store by tying it down to the roof of my van. :-) Now, I measured the length of the curve, cut the 2.8m of mesh needed, and got ready to lift it into position. Knowing it would involve a bit of sliding the mesh around, and not wanting to damage the new paint on the frames, I first found a couple of long cardboard tubes from inside rolls of weed mat, and cut a slit down the length of each, and then used them to slide onto the top arch of the frame for protection. These were removed after I had the mesh secured in place. The mesh was lifted up (this part was the only time where I required help from a second person, to lift one side, then hold it while I bent the mesh into position). I used cable ties along both sides to hold the mesh to the top of the bed frames (which have convenient holes where the springs go through the frames) and then at the top and sides of the arch. Voila! A climbing frame/trellis/archway! 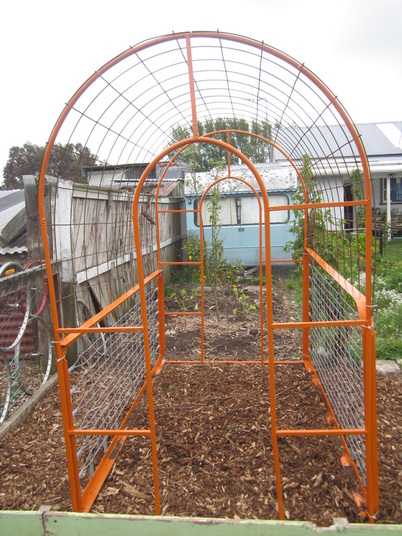 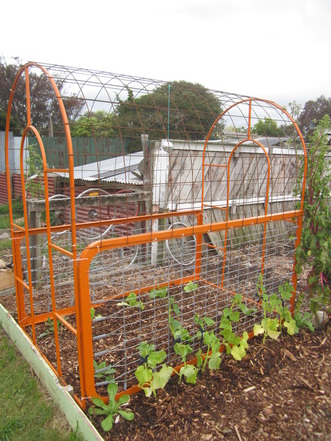 Along one side I planted 3 each of Lemon Cucumbers and Apple Cucumbers, which have been hardening off outside after I raised them from seed in my greenhouse. I added a self-sown calendula seedling from elsewhere in my garden to each end of the row, as it’s good to have orange or yellow flowers close to the cucumbers to attract bees close enough to spot the fairly inconspicuous cucumber flowers. This is also why I chose orange for the paint – hopefully it will be like a signpost to the bees – “Hey bees, good stuff over here! Come check it out!” A couple of handfulls of sheep pellets were put in the bottom of each cucumber planting hole. 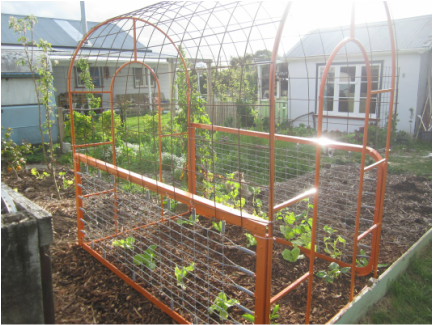 On the other side of my trellis, I have sown Sugar Snap Peas, which will grow tall and will appreciate a bit of shade provided by the cucumbers as summer gets under way. 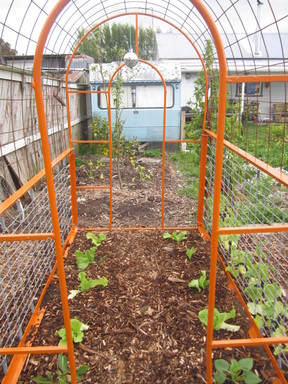 Inside the arch/arbor, I have planted a dahlia seedling on each side at the sunny end, and a row of four hearting lettuce seedlings along each side. When these are harvested, I will replace them with leaf lettuces. In summer, it should be fairly shady in there once the other plants have grown over the trellis, and hopefully this will keep the lettuce from bolting in the summer heat.
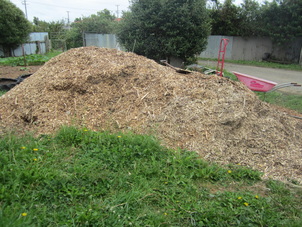
I also added a ball covered in mirror squares, dangling on a string from the top, as a bird scarer. After watering the seedlings, I sprinkled slug pellets around to keep the slugs and snails from devouring my lovely wee plants! This was a really fun project to make – and it only cost a total of $23 – $20 for half a sheet of mesh, $1 for my bird scarer/disco ball, and $2 for the cable ties. The beds, frames and paint were free, and the only tools needed were a paintbrush plus measuring tape and bolt cutters to cut the mesh. I can’t wait to see all the plants grown up over it! Over this past winter, my darling, capable husband put up my new greenhouse, built from recycled windows. Here's a little video tour of it, and the first batch of seedlings getting ready for spring planting. It's a little shaky as I'm moving a lot, and using a simple digital camera - this was my first ever attempt at a video :-). I hope you enjoy it. Sometimes, video is an easier and more useful way to communicate and show how things are, or how they're done. So I've started making some short videos and putting them on YouTube. You can subscribe to my YouTube channel so you won't miss any of them. This first one is an introduction that shows the first year in my garden in pictures. Enjoy! (You will probably find it easier to read the words in Full Screen mode - so click the wee four-corner icon in the bottom right of the video). It's spring time in the garden - a time of new things, starting over, and looking forward to the summer bounty. I have spent most of this past winter overhauling garden beds, going through the laborious process of digging out each bed, covering the dug-out base of the bed with cardboard, and the paths around them with cardboard and carpet (to kill off all the couch grass that keeps creeping back into the beds), before re-laying the beds, sieving through the soil for roots and weeds, and refilling the beds. Because of this, I haven't grown a lot in the garden over winter, and am now gearing up for spring planting. So, an update of how the garden looks at the beginning of spring, and what's new..... 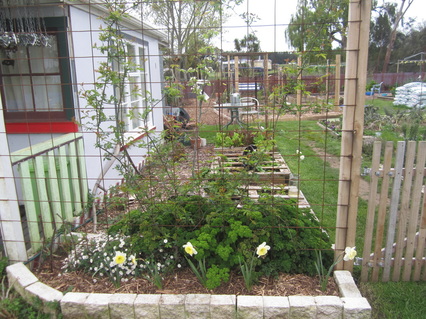 The Banksia climbing rose I planted on this trellis next to my garden gate has slowly expanded over winter, and now has its first, tiny, fragrant roses blooming - they are a lot smaller than I expected, but when this whole trellis is covered, will look nice. I bought some daffodil bulbs way late in the season from a sales table, and planted them anyway - they've flowered nicely. Looking forward to expanding daffodil numbers in years to come! The parsley on the other side has grown large and lush over winter - I keep pulling out handfuls just to give the other plants a bit more room! 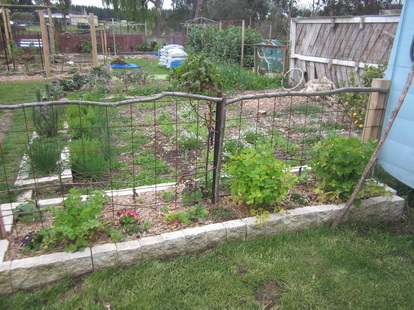 To the right of the garden gate, celery and alyssum are still growing. I've transplanted a rose to the middle of this bed, behind the central upright. The herb bed along the side of the path is doing well, and the carrots behind them are due for harvesting. In the middle where the yacons were I've planted peas as a green manure crop, and will soon dig them in, ready to plant popcorn next month. Beyond that is the bed where I grew potatoes last summer - it has had brassicas, beetroot, onions and carrots in it over winter. 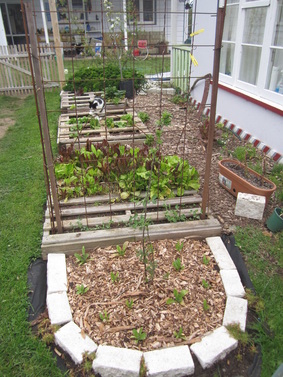 I've got cut and come again lettuce growing in one of the pallet beds, and more self-sown lettuce in another. Some spinach remains in the third pallet - I need to tidy them up and sow more salad greens. I've added a small half-circle bed at the end of the first pallet, and transplanted a Damson plum seedling into it, along with calendula seedlings. Damson is a small, self-fertile plum, and in summers to come will provide some shade to the pallet beds, preventing lettuce from bolting. I like having these pallets of salad greens just inside the gate, so I can easily snip a bowl full of greens for lunch time salads. I've popped in some Roman Chamomile on top of the weedmatting I laid under the bricks and over the edge of the lawn, which will soon be covered in cardboard and mulched - so that the chamomile can spread a bit and smell nice when walked on.  The main vege beds - looking fairly empty due to my overhauling. The closest one has some Rainbow Chard still in it, and the back half has been planted with some beetroot seedlings. Behind it my broadbeans, which were sown under the nearly-finished tomatoes in March, are starting to get very tall, and I've had to lash bamboo around them to "fence" them in. Of the two beds covered in netting, the closest has my winter-sown garlic and shallots in it, and the one behind contains broccoli. The rest are empty or nearly-empty awaiting their new summer crops. 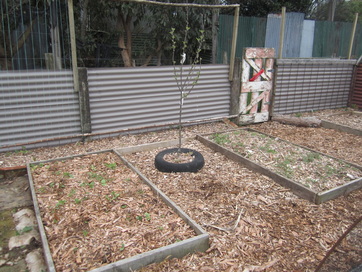 When I dug out last year's strawberry patch to overhaul it, the wooden frame fell to bits, so I have replaced it with two smaller garden beds, using edging from the original four garden beds I started with back in 2012 - they were two boxes high, so taking one apart yielded these two. I'm slowly completely removing the original four beds, as I found that they dry out far too fast in summer due to their height, and I want to use the space (and the wooden boxes) for other things. I've planted a Cox's Orange apple tree in between these two beds, which now need weeding and planting. The tyre the tree is in has the lower side wall removed, so the tree's roots aren't restricted. I also painted the iron fence you can see at the back of this photo - it was an ugly collection of mixed colours. I rummaged in the paint shed at the local dump, and found two cans of paint - a yellow, and a brown fence stain, and mixed them together to give me this neutral colour. I've started creating trellises for peas and beans against the fence, from old branches and string. As you can see, I'm slowly mulching all paths between beds with woodchip over cardboard. 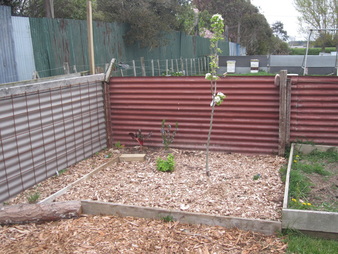 In the corner where I removed the first of the original beds, I've created this new bed. In the middle is planted a double pear tree. Along the side fence, I've nailed up a piece of reinforcing mesh I got free from a recycling bin as a trellis for the sugar snap peas I've planted at its base. From the tree to the front of the bed is planted in brown and red onions, but they're so tiny and fine you can't see them in the pic. I've also popped in a lemon balm plant, a sage seedling, and a wee rosemary bush, and along the side some chives and garlic chives. Edges of the bed created with random piece of wood or logs I found laying around. Rear of bed will be filled with flowers/herbs 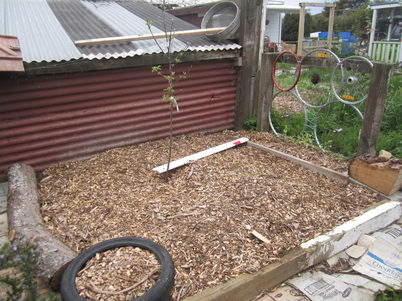 At the other end of that strip, I've created another bed, this one with a Gala Apple in the middle. I made a trellis for peas out of old bicycle wheel rims. This bed will be planted in flowering herbs, mostly. Maybe a rose in that tyre in the corner. The white plastic thing blew down just before I snapped this pic - it doesn't belong there. The cardboard along the front will be overlaid with more and mulched with woodchip as a pathway. 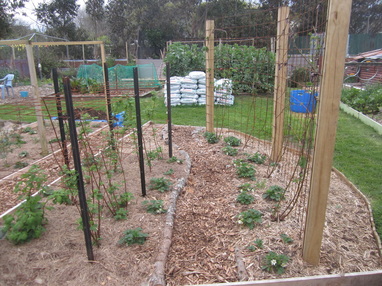 With help from a young man who was staying, I erected 3 posts and a reinforcing mesh trellis for my boysenberries. Another day I built the rest of this bed around it - with a warratah and mesh frame for raspberries to grow up through and be supported by without tying them in, and a rustic pathway between made from pieces of branch my son brought home to cut up for firewood, but was a bit slow. Strawberries are planted under the boysenberries and around the raspberries. The other side (right of photo) of the boysenberry trellis is what will face anyone walking into the garden, so will be planted in colourful flowers. 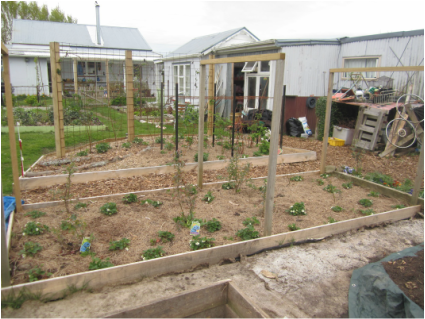 I put new sides on the blueberry bed, and raised the soil level a bit with compost, then transplanted most of the strawberries from their original bed here. I've put frames up over the ends and middle of the bed which will later have crosspieces added to the top, and be covered with bird netting. They're a lot higher than needed just for strawberries, to allow for the fact the blueberries will get very tall in time. I've left room down the middle for borage plants, a great companion for strawberries with lovely, edible blue flowers. 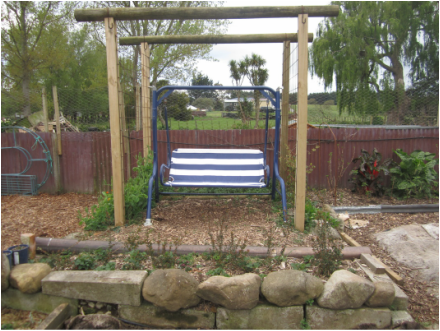 My daughter got tired of waiting for me to make the new seat for the free swing seat frame I'd picked up, so she set to and created it. She and the toddler she looks after now regularly enjoy it. To the left are planted sweet peas and calendula, which are both finally starting to really grow, after sitting there most of the winter. The Stauntonia to the right is slowly looking like it might grow too. Along the front, the Chilean Guavas are now surrounded by some spare strawberry plants as ground cover. Just in the right of the photo you can just see the edge of a patch I added lots of goodies too, then covered with black plastic and old carpet underlay for the winter, to kill off weed and let everything rot down. Soon it will be uncovered and planted with watermelons. 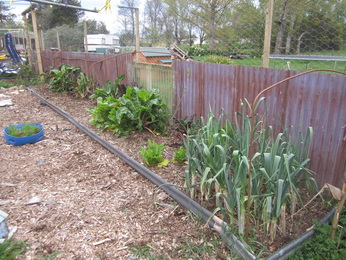 Along the back fence, the Rainbow Chard and green silverbeet have been growing well all winter. The blackcurrants are in bud, and the leeks are doing fine. I mulched this bed with home made compost, and there have been very few weeds. Will probably plant leafy greens along here this summer, so the shade of the fence can protect them from the hot summer sun. I used the bottom off a blue plastic drum to plant catgrass, a grass that is preferred by cats, dogs, chickens and rabbits. We'll trim it every now and then and feed to the rabbit. 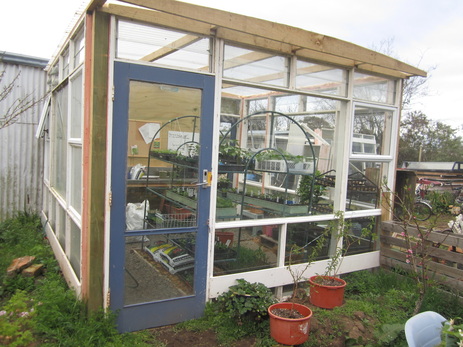 My lovely husband build my new glasshouse over winter, made from recycled windows! I love it so much! 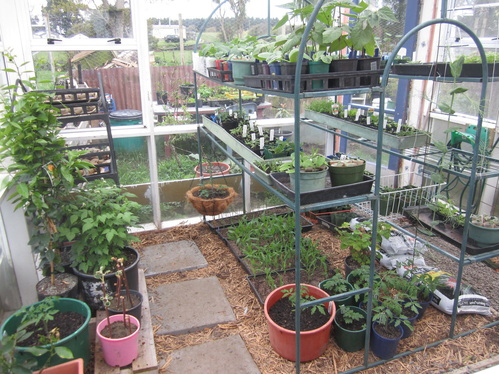 The glasshouse is full of seedlings I started sowing in August, and will soon start planting out in the garden. The shelves are an old plastic greenhouse frame, which I found, sans plastic cover, in a local metal recycling bin. At the time this photo was taken, I'd just moved a lot of seedling outside to harden off, but the new spaces soon fill up with new seed trays! 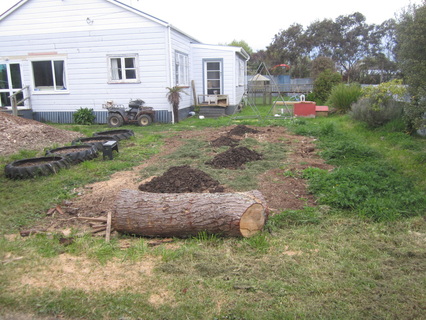 And finally, I've started clearing my VERY overgrown front yard, and preparing it for a potato growing experiment, and lots of sweetcorn. More on this soon.
Each spring Yates has a Vegie Growing Challenge - it's free to join and there are some cool prizes up for grabs! Any New Zealander can enter - but entries close Sept 30th. Those who join in are asked to put up at least 3 blog entries over the 3 months of the competition - one each showing getting started growing a vegie type, making progress, and success with that vegie. Of course, you can post as many times as you like, but 3 is the minimum to be in the running for prizes. It's fun, motivating, and inspiring to read the other blog entries. If you live in NZ, you can sign up HERE
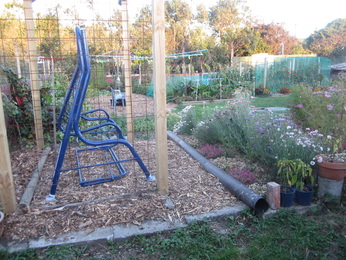
I have signed up, and will be making short blog entries most days, so if you would like to read short daily posts about the vegie growing going on in my garden, check out my posts so far here: http://www.yates.co.nz/vegie-challenge/2014/gardeners/Kiwi%20Urban%20Homestead. I will still be posting on this blog, but mostly longer, more detailed entries less often. Will YOU join the Vegie Challenge?  Since I haven't been posting my normal monthly garden pics over the last few months, I thought I'd just do a catch up by posting some photos from this past summer, so you can see the continuing development of the garden. With help from my son and his friends (fortunately all well over 6 feet tall!), the beginnings of my seating area was erected - 4 posts, with old fence posts across the top. The plan is to have a swing seat underneath and trellis up the sides and over the top, covered in fruiting vines, creating a shady place to sit in summer and survey the garden.  This year I finally did something I've meant to for several years - grew swan plants for monarchs! I ended up having to buy and plant more and more plants, as well as netting them to limit the number of eggs laid. Next summer I'll also grow some milkweed as extra food for them. To my surprise, the swan plants don't die over winter, so I trimmed them back a bit after the caterpillars were all done, ready to shoot off in summer.
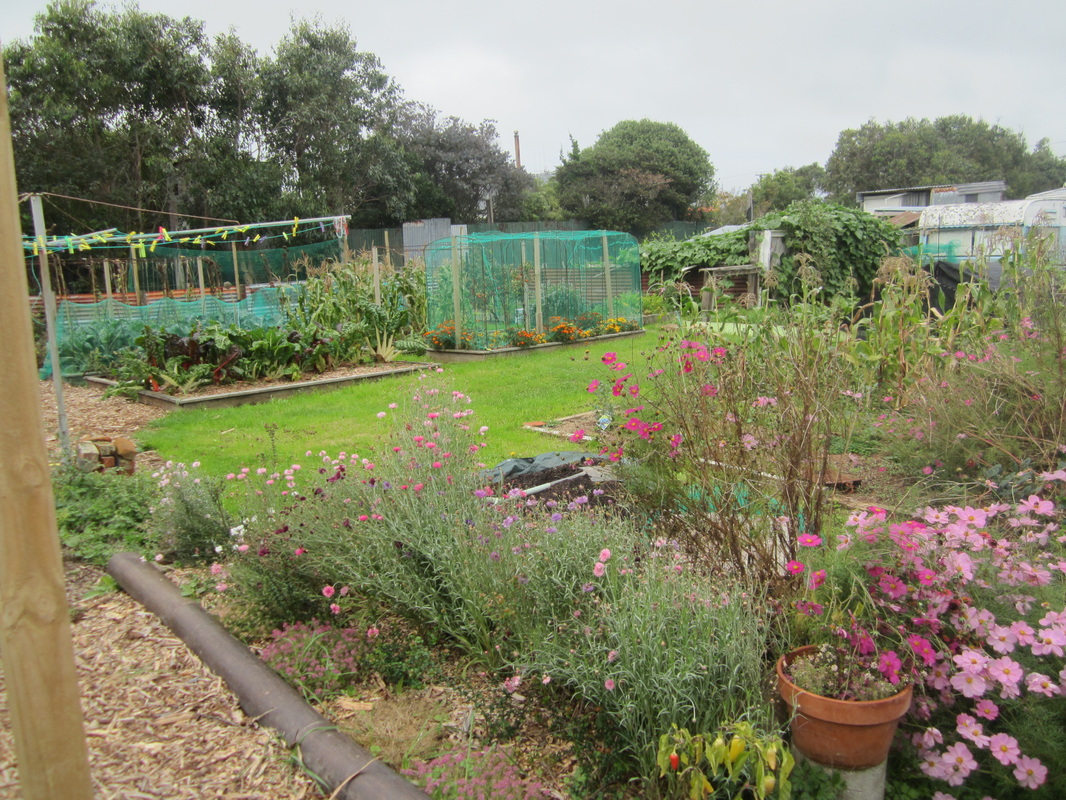
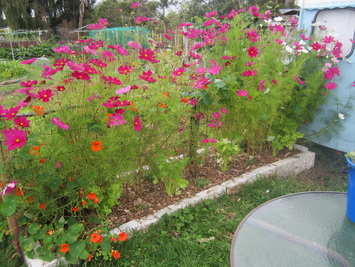 The cosmos just kept on blooming and blooming and blooming - and getting bigger and bigger! They were supposed to be dwarf ones....but ended up over 1.5m tall! The bees loved the flowers, and the finches loved the subsequent seed, which are also very easy to save (if you beat the birds), so more cosmos will be seen next summer too! Frost tender, they died off as soon as the frosts came. This is also the first time I've successfully grown nasturtiums - next year I might even try pickling some of their seeds to use like capers.
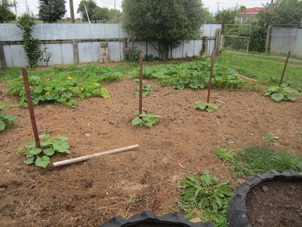
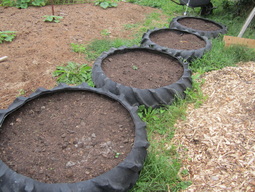 In the front yard, we installed some tractor tyres filled with soil and compost, to act as a barrier between the soon-to-be expanded driveway parking area, and the front garden area. These were then planted with extra potatoes in 3 of them, and various flowers in the 4th.
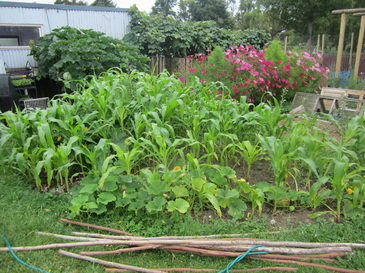 I planted 4 different varieties of corn this summer - Rainbow Inca (a multi-colored, multi-purpose corn), Golden Bantam (a yellow sweetcorn), Kaanga Ma (traditional Maori corn, seeds saved from last year) and Strawberry Popping Corn (a pinky red colored popcorn) - all are heritage varieties. I've stopped buying or planting regular packets of corn seed, as almost all are imported and/or treated with a fungicide which is systemic - it's residue is throughout the growing plant and is bad for the bees, bugs and us. Unfortunately I was running late with planting corn this year, and while I got a reasonable harvest, it wasn't as good as it could have been. In this pic are the young Rainbow Inca patch in Feb. As I planned to save seed from each of the varieties, I had to make sure they were planted at least 8m apart to prevent cross-pollination. I have discovered that the first season I grow any given corn, it often produces so-so cobs, but if I save seed from the best of them, and replant the following season, I get really excellent, large cobs. 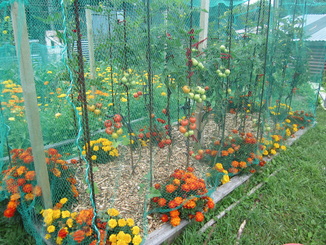 It turned out to be a bad season for both Tomato-Potato Psyllid (TPP) (will write a separate post about this major but tiny pest) and blight in my garden, but I still managed to get a reasonable amount of tomatoes from the first bed I planted - seen here surrounded by marigolds and underplanted with dwarf beans. The marigolds are lovely and cheerful too, as well as being good for the bees. I'm not sure yet how I'm going to avoid TPP next season - probably planting as early as possible, and possibly using quarantine cloth known as Wondermesh - the only really effective organic non-spray way to keep the little blighters off your crops! 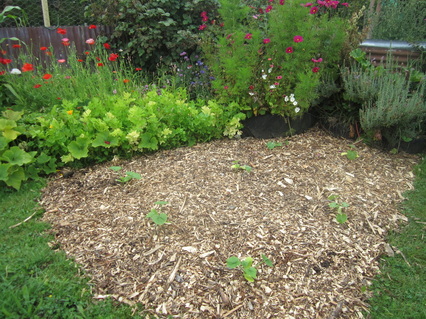 The "wild corner" blooming nicely - and in front of it, a no-dig bed I put in early Feb as a demonstration for some lovely visitors who came to stay and learn about gardening. We mowed the grass short, lay down overlapping newspaper, wet it down, piled on compost and soil, then mulched with woodchip, and planted some late zucchini.
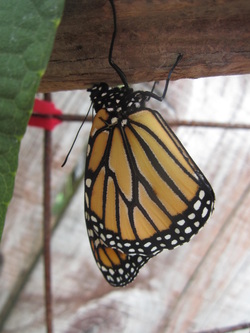 First Monarch to emerge from it's chrysalis, which takes around 2 weeks, depending on the weather. Their long, curling tongues are fascinating to watch moving in and out! They hang like this for several hours to fill out their wings and dry, before flying off. 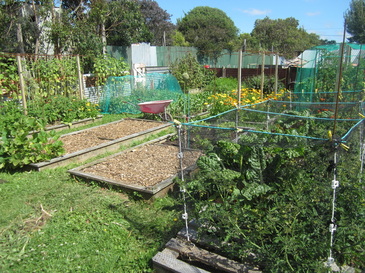 The main garden beds as of Feb 4th - lots of things growing. The netting is over a bed of Tiny Tim tomatoes with a row of Rainbow chard (multi-coloured silverbeet). Thanks to the TPP substantially reducing our tomato harvest, I ended up buying in an extra 60 kg of tomatoes when they were at their lowest price for the season - they were in the store for $2.50/kg, and due to buying in bulk we were able to negotiate a price of $1.60/kg. Together with what we harvested and didn't eat fresh, I was able to make a nice amount of tomato soup, tomato sauce, diced tomatoes to use in winter dishes, and dried tomatoes. I would ordinarily use quite a lot of tinned tomatoes in cooking, but cans are lined with plastic which leaches BPA and other chemicals into food. Acidic canned goods (such as tomatoes) cause higher rates of leaching. Wanting to avoid that, I prefer tomatoes preserved in glass - easy to do at home. 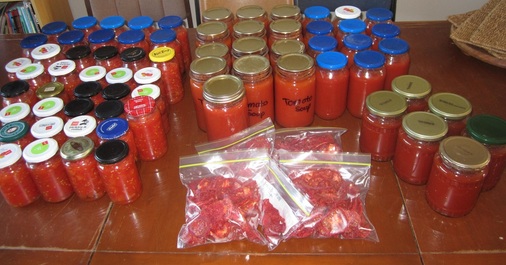
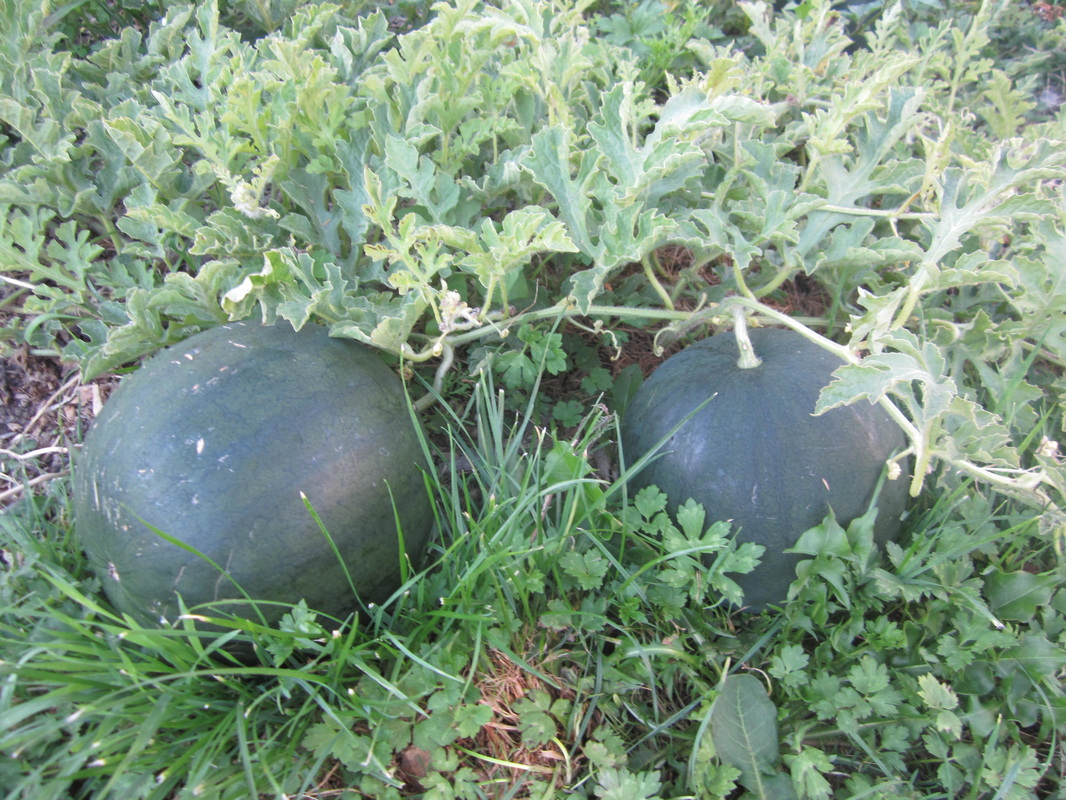
 After fully pruning our grapevine by myself for the first time last winter, we yielded crates and crates of luscious grapes this summer. They were very popular with the local kids! I managed to make some grape leather too, but it didn't last long. The bunches were very large! Pruning can be a bit scary - you reduce this huge mass of growth to just a few selected canes, tied in to the trellis. But it's definitely worth it - lots of good you-tube clips on the two different methods of pruning (cane pruning or spur pruning) can be viewed online. 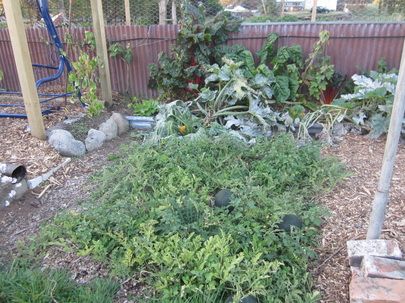 Summer saw another first for me - growing watermelon! I honestly didn't know if they would grow and ripen here, so I just planted 4 Sugar Baby watermelon plants in a patch I dug under one of the washing lines. They did very well, considering my lack of experience, late planting, and a summer drought, giving us 6 lovely watermelons. Will definitely try more melons next summer! You can also see in this pic the Stauntonia vine I've planted on one side of the seating area trellis - an unusual vine, it apparently can handle the cold, is evergreen, has nice flowers and produces a passionfruit-like fruit. Time will tell. 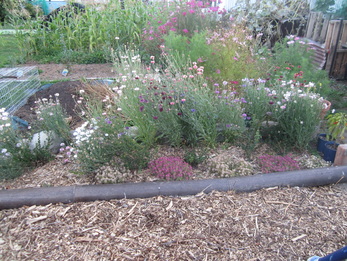 I planted some cornflowers behind the wee Chilean Guavas, and they provided a mass of colorful blooms all summer - in fact they continued most of the winter too, getting bigger and bigger, finally coming to and end in late July. The bees love them, the flowers are edible, they self-seed prolifically, and are easy to grow. What's not to like?
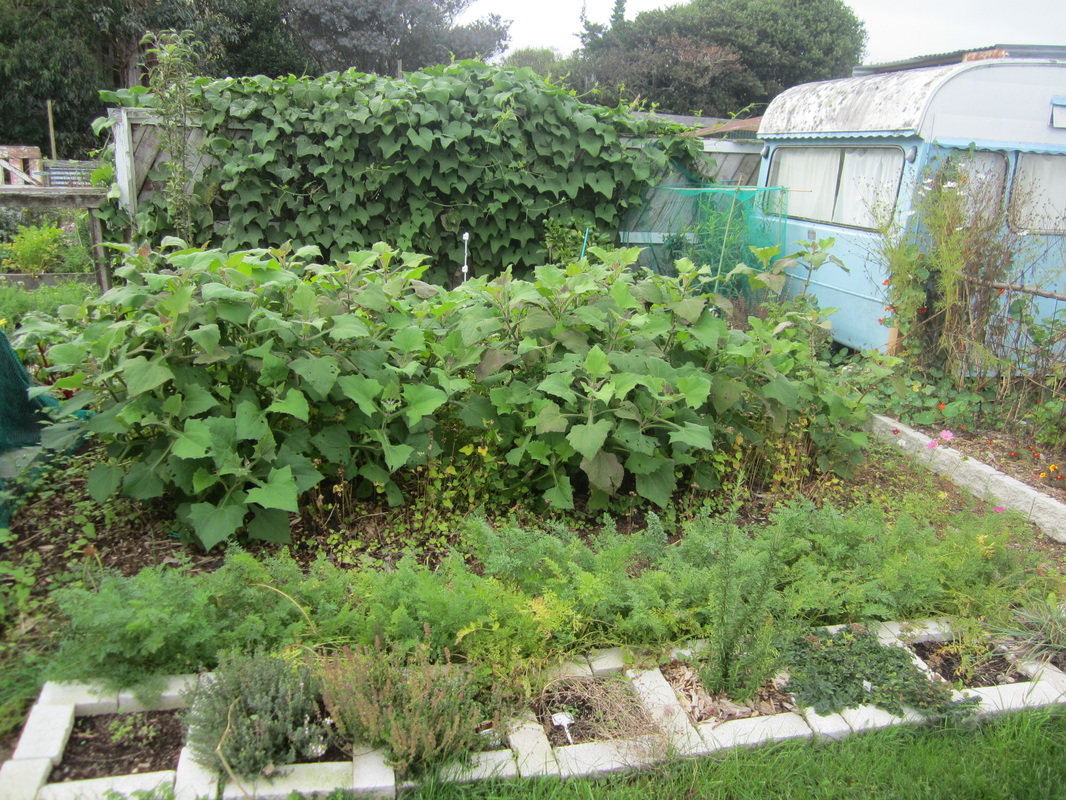
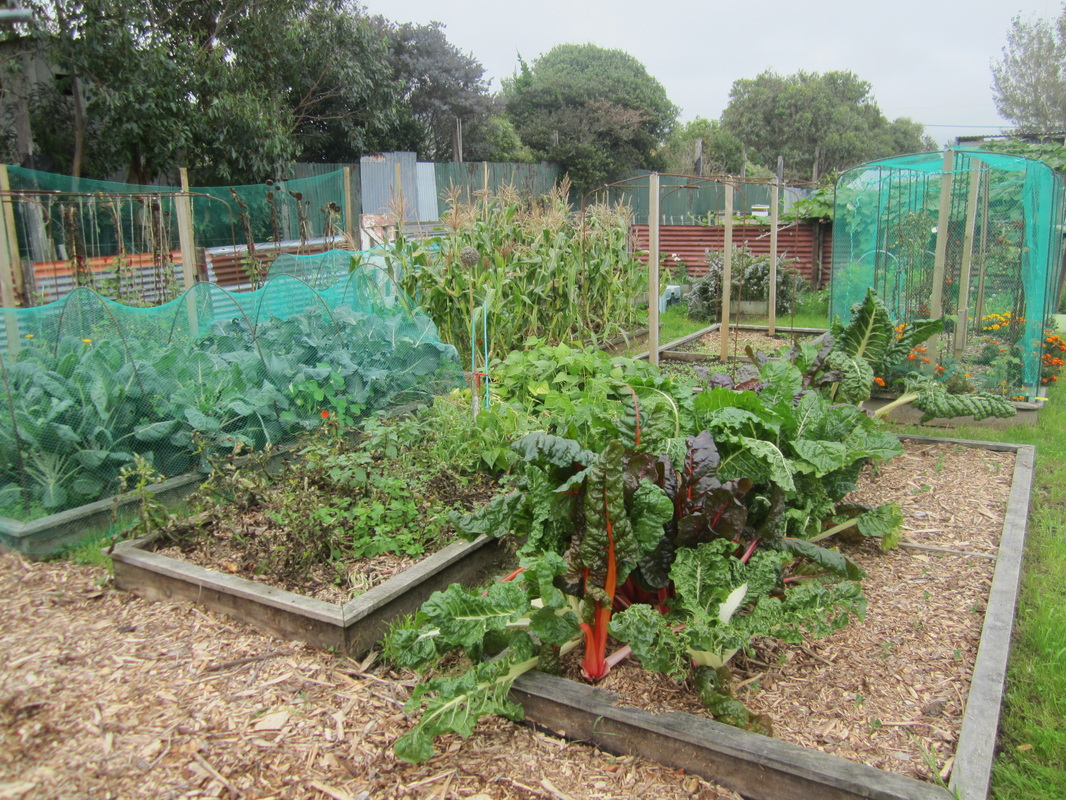
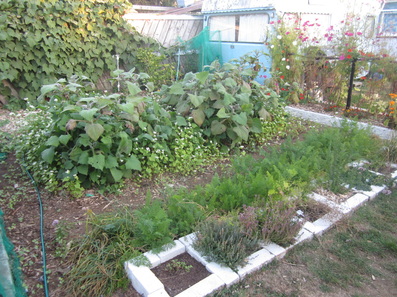 Herbs growing in brick squares, carrots surrounded by chives behind them. Yacon underplanted with buckwheat. Choko vine sprawling over fence. The yacon grew more slowly this year than last, and never got quite as tall. 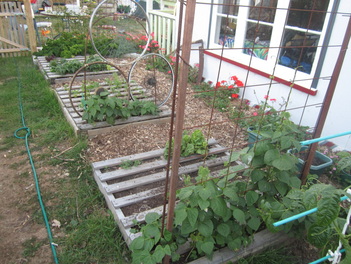 The pallet beds turned out not to be too good for lettuce over the summer, as the sun was on them longer than I anticipated, and they dried out constantly - needed to be watered every day, and even then the lettuce all bolted. Have now added some trellises to two of the pallets, to grow beans up, and shade the pallets a little. More greens being planted. 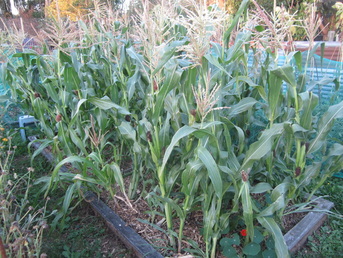 Strawberry popcorn looking good! 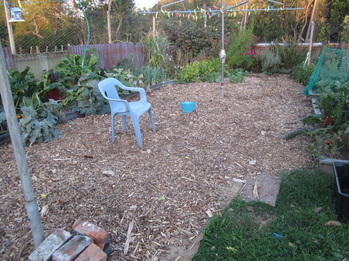 Tired of the fact that every winter the area under the washing lines turns into a muddy bog, I laid down cardboard, covered it with old woolen carpets, then mulched with woodchip. We also dug a swale out along the end of the garden beds, where water tends to pool, then filled it with woodchip. I hope that this will reduce surface flooding. 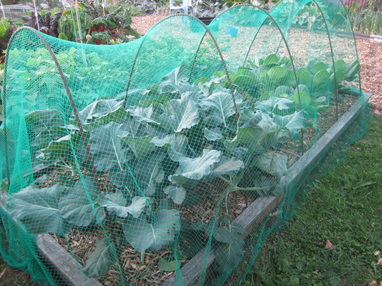 A bed full of brassicas - broccoli in the fore, with brussel sprouts behind. I have found that brassicas planted out in Feb reach a good size by winter. Any later and they never grow very well, remaining small over winter then bolting in spring. The nets are to keep the white butterfly off - originally I had windbreak fabric over them, but now they're getting bigger I wanted to give them more light. Some butterflies still squeeze through the bird netting, but by the time they're this big, it's not too unmanageable.
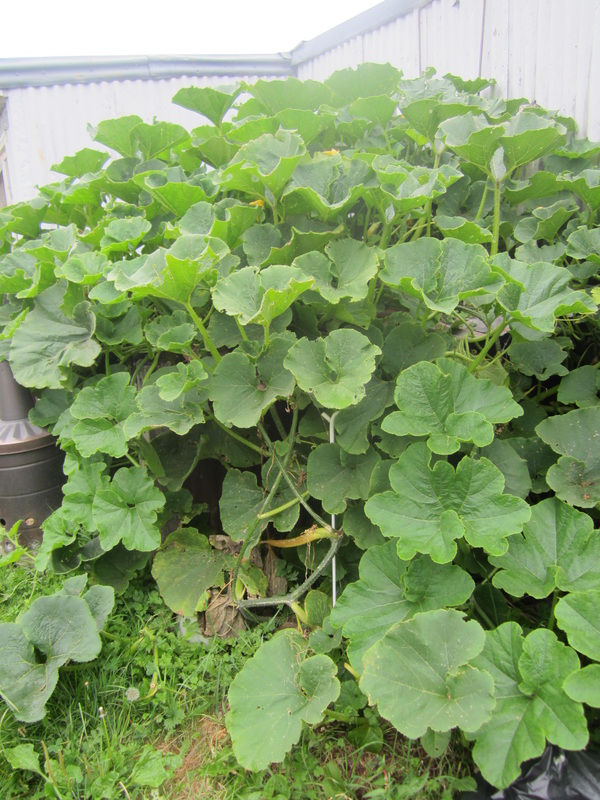
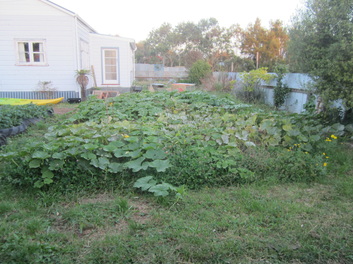 Pumpkin patch, late March. The following photos show the garden as of 1st April 2014: 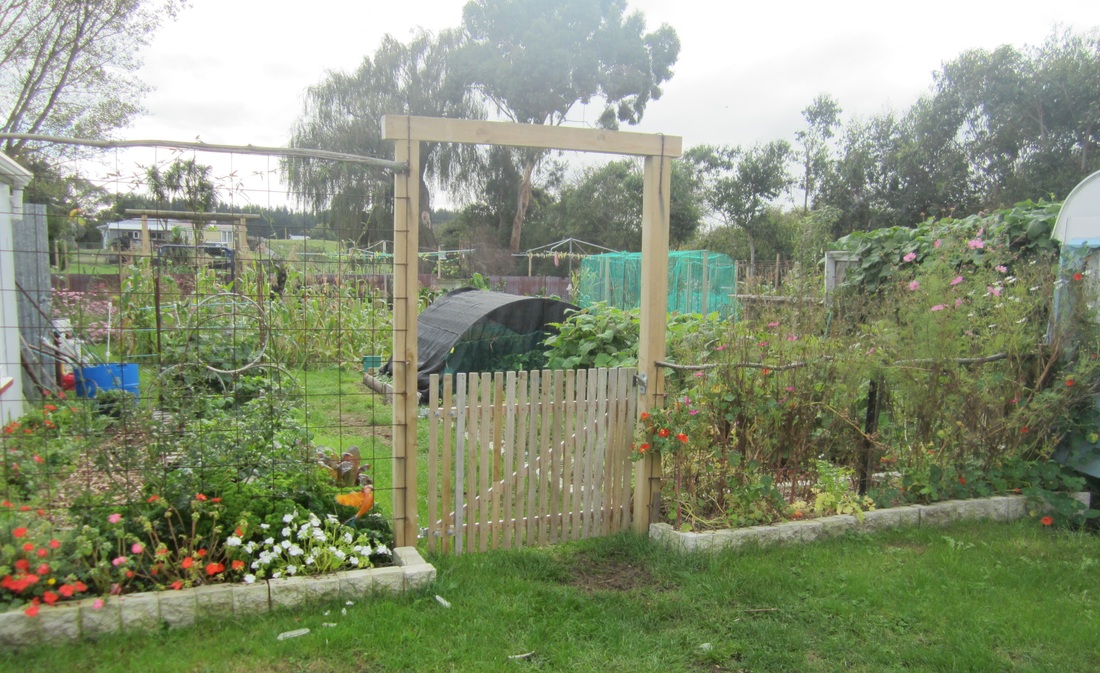
Some of the critters enjoying an over-ripe watermelon 
 Due to things going on at home, I've been taking a break from blogging over the last few months. But lots has been going on in the garden too, and I've got many things to share. First, just for the record, let me share that I DID exceed my goal to grow 1000 kg of produce, starting at the beginning of 2013. It took me 1 year, 1 month and 4 days - by the 4th of Feb 2014, my harvest totals were 1027.96 kg (after that I stopped weighing and recording). At the end of 2013, I had so far harvested 863.35 kg - in Jan another 98.36 kg came in, and in the first 4 days of Feb, another 66.244, taking me over my goal.
When I set that goal, it sounded HUGE, I had no garden to speak of, and no idea if I could do it, especially with little money to spend, and starting halfway through the summer. But I figured a big goal would motivate me to do all that I could. Turns out, I could do it. And so can you! What are your growing goals? Remember, a goal should be specific, measurable, achievable, relevant to you, and time-specific. On this cold, overcast Sunday afternoon, I watched the first two episodes of a new TV series - "Living with the Amish" - with my daughter. In it, 6 young people from England spend several weeks living with various American Amish families, getting a taste of the lifestyle. A very enjoyable program! But what is one to do in response to something like that?
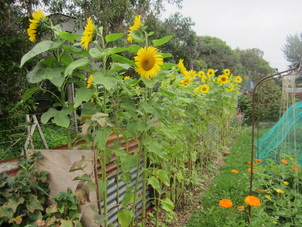
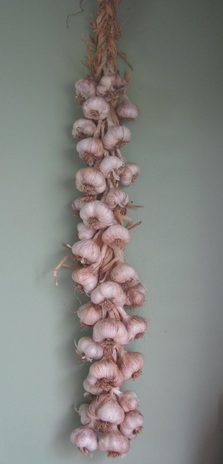
When the credits rolled, I found myself slipping on an apron. After asking one of the guys to fill the woodbin and light the fire, and my daughter to bring the laundry in off the washing line, I headed into the garden and picked a bowl full of tomatoes, some celery, parsley and a marrow. After spending a few minutes checking on the progress of our monarch caterpillars and sampling some beans and strawberries, I headed inside to begin cooking dinner - making a tasty pasta sauce from the things from the garden, adding stored garlic and onions, home-canned tomato sauce, salt and molasses. While that simmered on the stove, I pulled from the freezer some of the lemon peel I had put away for just such a reason, and began a batch of home-made lemon cordial. Going to the store cupboard I pulled out a catering-size can of pears, bought in bulk at a sale and put away. After mixing flour, baking powder, butter and sugar together, I spread it over the pears and slid the fruit crumble into the oven to cook for dessert. Popping back out to the garden, I cut a watermelon from the vine, and brought it inside to be cut up later and enjoyed, the thought of all that sweet juice making my mouth water! Feeling peckish, I took out a slice of homemade bread, spread it with home made grape jelly, and enjoyed nibbling on it while stirring things. That done, I mixed up a large batch of museli - wholegrain rolled oats, various nuts and seeds, with some oil, honey and brown sugar melted together and stirred through - in a baking dish, ready to slide in the oven when the crumble came out. Supper almost ready, I hung the still-damp washing on the ceiling-mounted rack above the fire, where some sunflower heads also hang in paper bags to finish drying. Raising the rack back up on it's pulleys, I contemplated the simple pleasures of a warm house, the smell of good food cooking, and family gathered around reading and chatting. Feels good. Almost a little bit Amish. |
AuthorThis page is my blog formerly known as Kiwi Urban Homestead. Archives
February 2016
Categories
All
|
 RSS Feed
