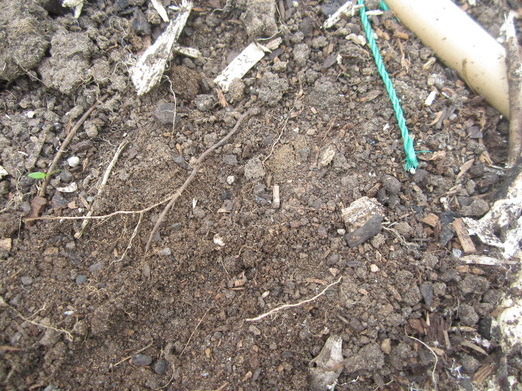
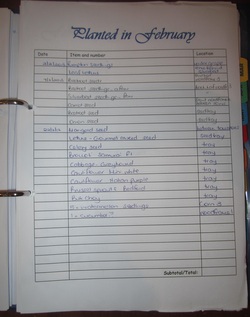
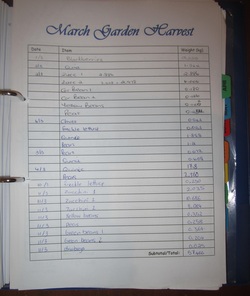
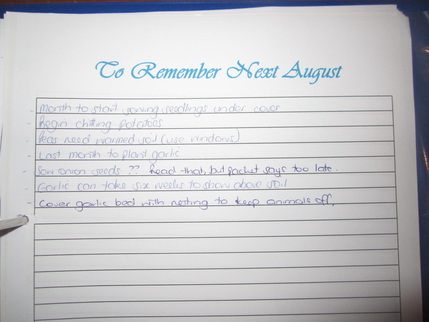
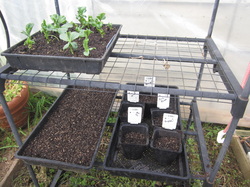
I've discovered an incredibly easy, cheap and effective way to build wonderful, fluffy, dark, soft, luscious soil! I carried these steps out a month ago on the soil in one bed which was pretty average - dry, lumpy, hardish, fairly light in colour despite added compost etc (first pic). I've done this before in several of my other beds, and know the soil in a few months will be incredible - so soft and fluffy and rich (second pic)! Here are the steps:
1) Mow a patch of lawn, then carefully spread a thin layer of grass clippings over the soil of the bed, being careful not to have it up against the stems of any plants. These grass clippings will provide nitrogen, to feed the bacteria that are going to do all the work…..
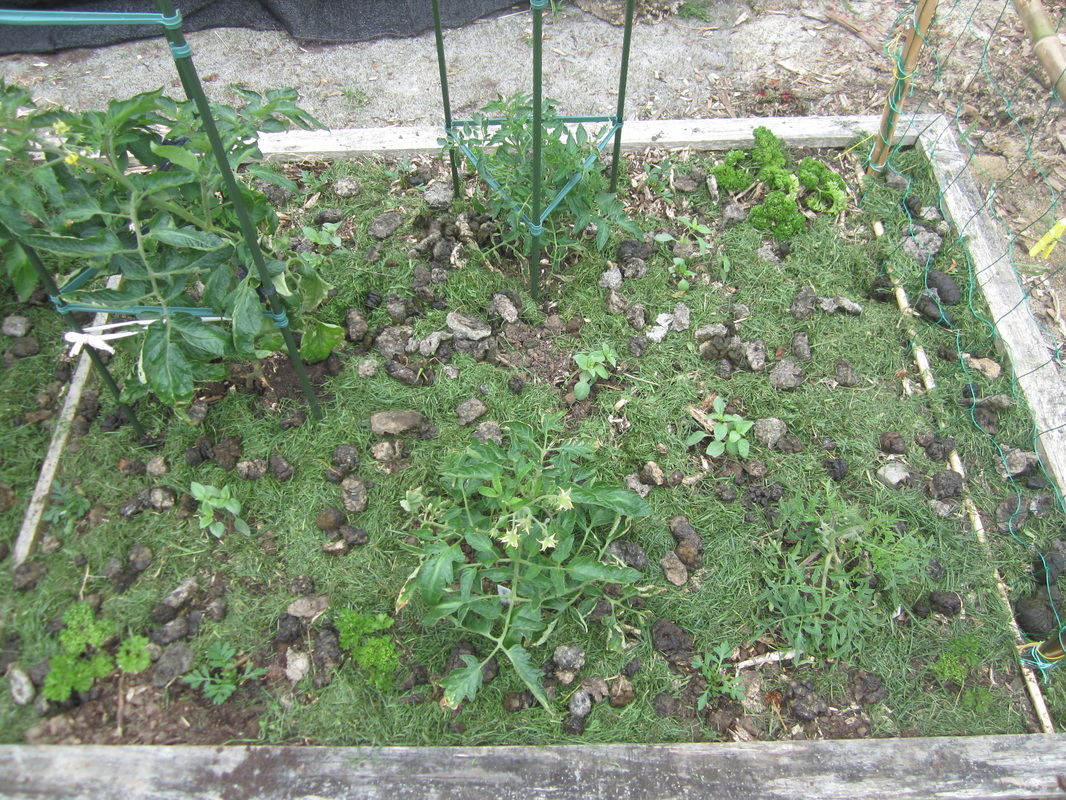
2) Next I collected a couple of buckets of sheep manure (REAL sheep pellets ;-)) from my paddocks and sprinkled it over the grass clippings. Manure is optional – and you can use any sort – I’m using it to provide some extra nutrition to the plants in the bed, as well as some more nitrogen for those hungry bacteria…..(third pic)
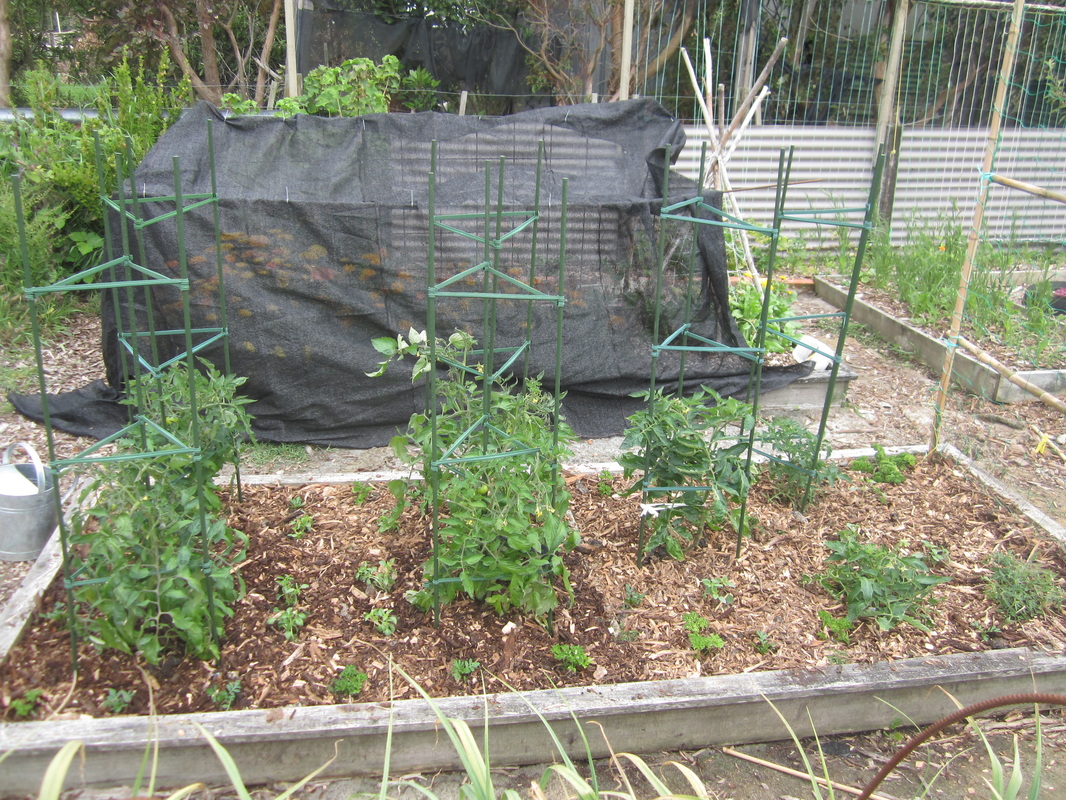
3) Thirdly, and this is the really essential part – I added a nice layer of wood chip (that’s mulched whole tree – wood, bark AND leaves) to the bed, again not putting it up against the plant stems. (fourth pic) And it’s for THIS that the nitrogen is needed – the bacteria that break down woody materials and turn it into incredible soil consume nitrogen when doing so. By providing extra nitogen, I ensure they don’t need to rob it from the garden bed and thus the plants in there. When they’ve finished their job, they die, and release the nitrgen back into the soil. And leave behind that rich, fluffy, lovely soil!
And in the meantime, the manure adds nutrition for the plants, the woodchip acts as a mulch and holds in moisture and suppresses weeds, and the microorganisms in the bed do all the hard work – all I had to do was supply the raw materials.
And by the time this round of plants are harvested, the soil will be magnificent. It will also be easy to weed, as it will be loose and fluffy (I did mention fluffy, right? – it really is the most incredible texture!) and weeds will pull out with no effort at all.
The lawn clippings and manure cost me nothing but the effort to collect them. The woodchip costs me next-to-nothing – I trade some drinks for a truckload every now and then from local contractors. And, for improving your garden soil, woodchip is THE BOMB!
Try this in your garden – you’ll soon be fondling and admiring your magnificent soil too!
1) Mow a patch of lawn, then carefully spread a thin layer of grass clippings over the soil of the bed, being careful not to have it up against the stems of any plants. These grass clippings will provide nitrogen, to feed the bacteria that are going to do all the work…..
2) Next I collected a couple of buckets of sheep manure (REAL sheep pellets ;-)) from my paddocks and sprinkled it over the grass clippings. Manure is optional – and you can use any sort – I’m using it to provide some extra nutrition to the plants in the bed, as well as some more nitrogen for those hungry bacteria…..(third pic)
3) Thirdly, and this is the really essential part – I added a nice layer of wood chip (that’s mulched whole tree – wood, bark AND leaves) to the bed, again not putting it up against the plant stems. (fourth pic) And it’s for THIS that the nitrogen is needed – the bacteria that break down woody materials and turn it into incredible soil consume nitrogen when doing so. By providing extra nitogen, I ensure they don’t need to rob it from the garden bed and thus the plants in there. When they’ve finished their job, they die, and release the nitrgen back into the soil. And leave behind that rich, fluffy, lovely soil!
And in the meantime, the manure adds nutrition for the plants, the woodchip acts as a mulch and holds in moisture and suppresses weeds, and the microorganisms in the bed do all the hard work – all I had to do was supply the raw materials.
And by the time this round of plants are harvested, the soil will be magnificent. It will also be easy to weed, as it will be loose and fluffy (I did mention fluffy, right? – it really is the most incredible texture!) and weeds will pull out with no effort at all.
The lawn clippings and manure cost me nothing but the effort to collect them. The woodchip costs me next-to-nothing – I trade some drinks for a truckload every now and then from local contractors. And, for improving your garden soil, woodchip is THE BOMB!
Try this in your garden – you’ll soon be fondling and admiring your magnificent soil too!
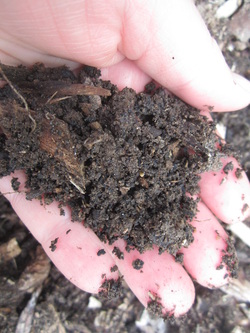
I've discovered an incredibly easy, cheap and effective way to build wonderful, fluffy, dark, soft, luscious soil, like that in my hand in this picture - so soft and fluffy and rich!
I carried these steps out a month ago on the soil in one bed which was pretty average - dry, lumpy, hardish, fairly light in colour despite added compost etc - the before photo is below.......
I carried these steps out a month ago on the soil in one bed which was pretty average - dry, lumpy, hardish, fairly light in colour despite added compost etc - the before photo is below.......
Here are the 3 easy steps:
1) Mow a patch of lawn, then carefully spread a thin layer of grass clippings over the soil of the bed, being careful not to have it up against the stems of any plants. These grass clippings will provide nitrogen, to feed the bacteria that are going to do all the work…..
2) Next I collected a couple of buckets of sheep manure (REAL sheep pellets ;-)) from my paddocks and sprinkled it over the grass clippings. Manure is optional – and you can use any sort (commercial bagged sheep pellets work ok in a pinch) – I’m using it to provide some extra nutrition to the plants in the bed, as well as some more nitrogen for those hungry bacteria….
3) Thirdly, and this is the really essential part – I added a nice layer of wood chip (that’s mulched whole tree – wood, bark AND leaves) to the bed, again not putting it up against the plant stems. And it’s for THIS that the nitrogen is needed – the bacteria that break down woody materials and turn it into incredible soil consume nitrogen when doing so. By providing extra nitogen, I ensure they don’t need to rob it from the garden bed and thus the plants in there. When they’ve finished their job, they die, and release the nitrgen back into the soil. And leave behind that rich, fluffy, lovely soil!
And in the meantime, the manure adds nutrition for the plants, the woodchip acts as a mulch and holds in moisture and suppresses weeds, and the microorganisms in the bed do all the hard work – all I had to do was supply the raw materials.
And in the meantime, the manure adds nutrition for the plants, the woodchip acts as a mulch and holds in moisture and suppresses weeds, and the microorganisms in the bed do all the hard work – all I had to do was supply the raw materials.
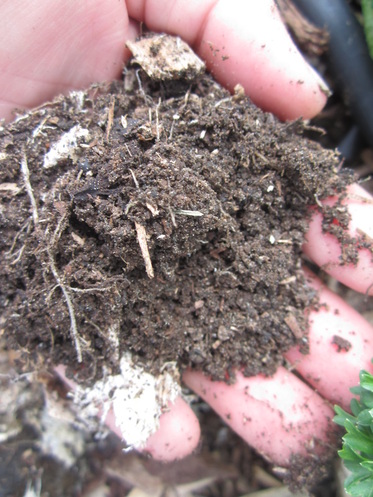
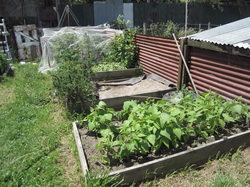
And by the time this round of plants are harvested, the soil will be magnificent. It will also be easy to weed, as it will be loose and fluffy (I did mention fluffy, right? – it really is the most incredible texture!) and weeds will pull out with no effort at all. In fact, this photo to the left shows the soil just under a month later - already dramatically improved. Not only is it darker and richer, if I squeeze it in my fist, it will hold together in a clump, but if I then rub it lightly between my hands it immediately flakes into crumbles - the perfect soil structure!
The lawn clippings and manure cost me nothing but the effort to collect them. The woodchip costs me next-to-nothing – I trade some drinks for a truckload every now and then from local contractors. And, for improving your garden soil, woodchip is THE BOMB!
Try this in your garden – you’ll soon be fondling and admiring your magnificent soil too!


 RSS Feed
