Thrifty Kiwi
Like our Facebook page
  • Home
  • Blog
  • Homesteading
  • Gardening
    • 2021 Garden Blog
    • 2019-2020 Garden Blog
    • 2017-2018 Garden Blog
    • 2016-2017 Garden Blog
    • Kiwi Urban Homestead 2013-2015 Garden Blog
    • Pest & Diseases
  • Recipes
    • Autoimmune Protocol
    • Meals and Snacks
    • Preserving
    • Household Cleaners
    • Health & Beauty
  • Skills
    • Menu Planning & Grocery Shopping
    • Money & Budgeting
    • Preserving How-Tos
    • Housekeeping
    • DIY
    • How to Find Stuff Free or Cheap
  • Animals
    • Critter Blog
  • About
  • Contact

Garden Tomato Sauce

16/4/2015

0 Comments

 
Picture
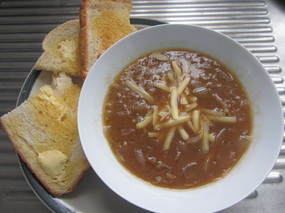
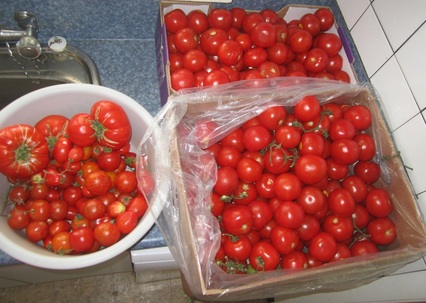
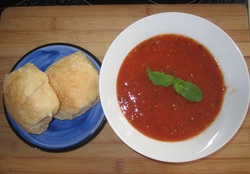
A yummy sauce to use up extra tomatoes - all ingredients except the carrot and olive oil came from my garden (really must get around to planting more carrots!) Apart from the tomatoes, it's just a little of this and a little of that, so if you have tomatoes to use up but not tons of anything else, this is a great recipe for you. Serve with pasta, chicken or veal, or use on pizza or any other way you like it.

This recipe came from The Big Book of Preserving the Harvest by Carol W. Costenbader. This book has lots of lovely, easy recipes.

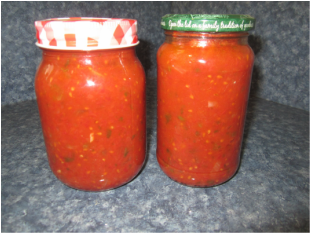
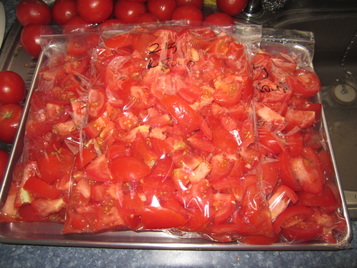
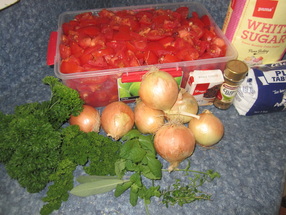
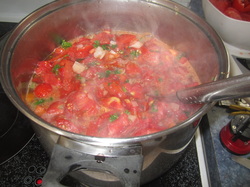
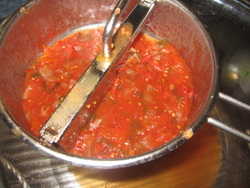
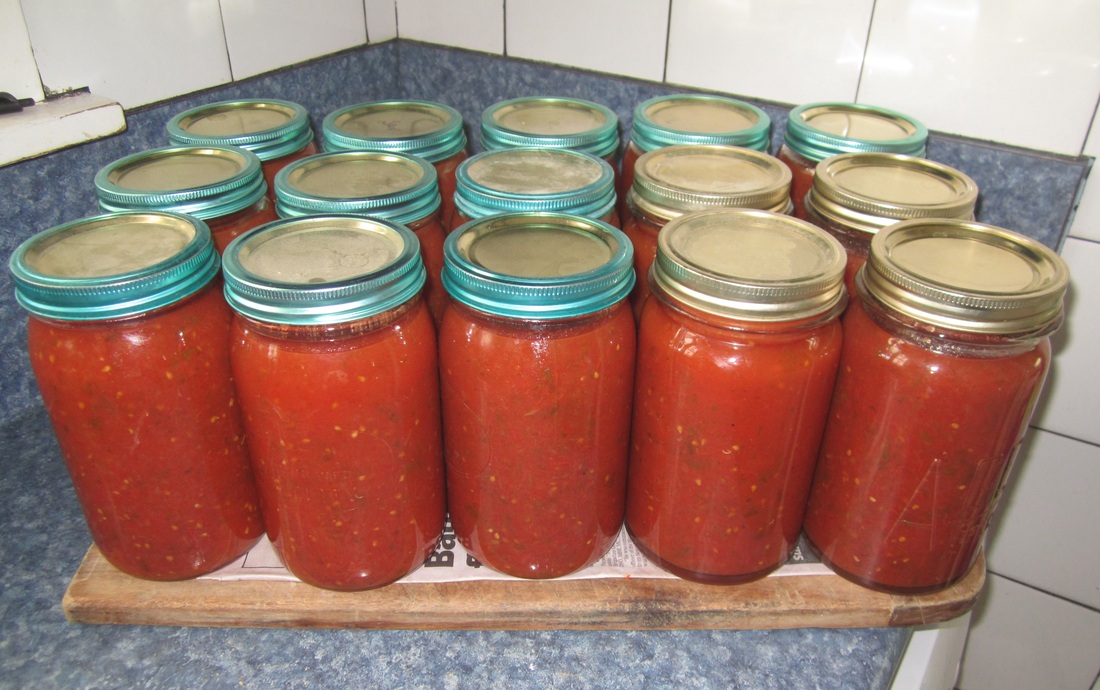
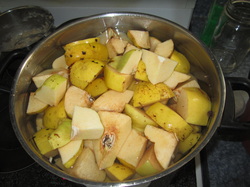
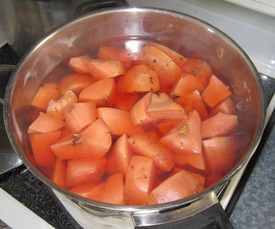
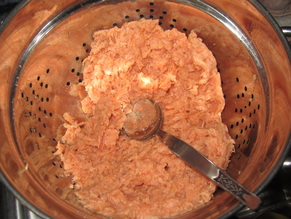
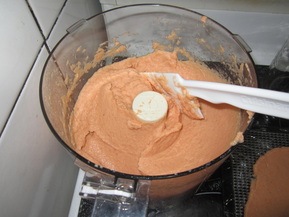
Ingredients:
12 cups chopped tomatoes
1 TBSP olive oil
1 medium onion, chopped
2 cloves garlic, crushed
2 TBSP chopped green bell pepper
2 TBSP chopped carrot
2 TBSP chopped celery
2 TBSP chopped fresh parsley
1 tsp chopped fresh oregano

Method:
1. Wash, core, and coarsely chop the tomatoes
2. Puree in the bowl of a food processor
3. Heat the olive oil in a heavy saucepan and saute the onion until soft, about 5 mins
4. Add the garlic, pepper, carrot, celery and herbs.
5. Add the tomato puree to the mixture and simmer, uncovered, for about 2 hours. Be careful not to let it burn. Stir the sauce occasionally as it thickens. (This process can also be completed in an uncovered casserole dish at 180C/350F in the oven)
6. Cool slightly and pour the sauce into 1 cup freezer containers, leaving 1/2 inch of headspace, label and freeze for up to 3 months. OR ladle hot, simmering sauce into hot, sterile jars, leaving 1/4 inch head space, and seal.
Picture
Picture
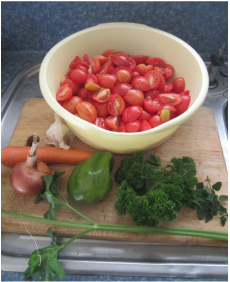
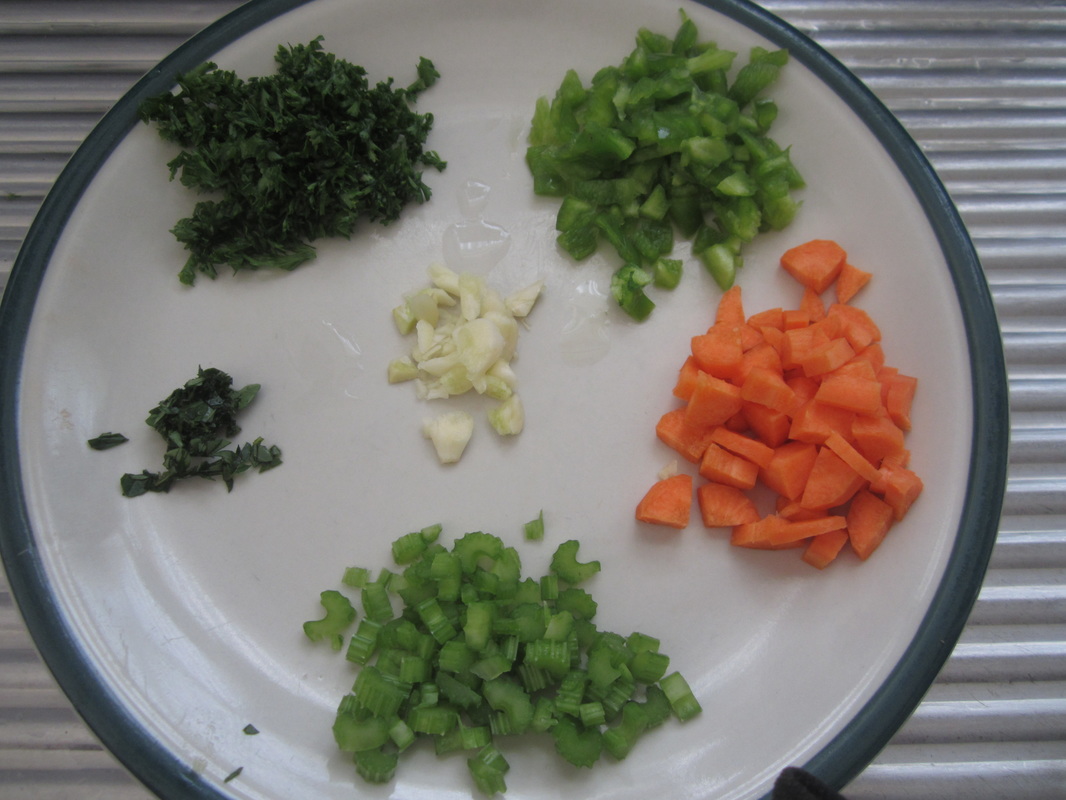
Everything but the chopped onion and tomatoes is shown on the plate above.
0 Comments

Onion Soup

7/4/2015

0 Comments

 
Yesterday was wet and cold, and with lots of onions hanging to dry in the shed, what better time for delicious onion soup? The recipe freezes well too - in fact it comes originally from one of my oldest cookbooks, entitled "Food for the Freezer."

Delicious, warming and filling!
Picture

Onion Soup

Ingredients for 8 servings:
Picture
1 kg brown onions
25 g butter
2 TBSP flour
2 litres beef stock
Salt/pepper to taste
Grated cheese

Method:
Peel and slice onions (I cut them in half then slice thinly). Melt butter in large pot, then saute onions over medium heat until golden and starting to caramelize a bit (original recipe says "golden brown" but mine never brown). Sprinkle over flour, stir in and cook 1 minute. Add beef stock slowly, stirring. Bring to the boil, season if desired, cover and simmer for 20 mins. (Hint - if using commercial beef stock, be careful about adding extra salt or the result may be far too salty). Ladle into bowls, top with grated cheese and stir in.

Toasted and buttered home made bread makes the perfect accompaniment!

To freeze: Cool after simmering (without adding cheese) and pour into suitable containers to freeze. To use, thaw and reheat, then serve as above.

0 Comments

Delicious Applesauce (with Cinnamon, Honey & Lemon)

23/3/2015

0 Comments

 
When apples are in season and cheap, I love to make and preserve lots of our favourite applesauce. It contains no sugar, but is sweetened instead with honey, and the cinnamon and lemon in it give it a delicious flavour! During winter, my kids would have a couple of spoons full on their breakfast porridge instead of sugar. We also like it on top of cereal, added to plain yoghurt, served with pork on the rare occasion we have that, or if I Iet them, the kids (and my husband!) will just eat it straight!

I'm going to walk you through how I make it, then the concise version of the recipe is at the bottom of this post.

I can't wait for the day our baby apple trees produce enough to supply our own apples for this recipe, but in the meantime I'm grateful for our own honey and lemons from our tree or a friend's.
Recently, some nice apples were on sale for 99c/kilo, so I purchased several bags full. Pictured are just over half the apples I used this time. All together, the apples made just over 11 litres of applesauce.

The first step is to wash, core and cut up the apples. There is generally NO need to peel them for this recipe - in fact I prefer not to, as it gives the sauce a richer flavour and retains maximum nutrients. However, when using apples that are not spray-free, I do peel them as even after washing, a lot of spray residue is on and in the skin. So I peeled these ones. 
Picture
Picture
I have a nifty gizmo for coring and cutting up the apples in one fell downward push - this makes the job very fast, especially when peeling isn't needed, and ensures the pieces are of an even size, so cook at the same rate. But it doesn't really matter too much - just chop them up and dump them in a large pot with some water in it as you go.

The gizmo has a metal circle in the middle, and metal blades radiating out from it, within a plastic holder with two handles. Various models are available, such as THIS ONE at Fishpond.
As I was short of time, I chose to make this applesauce in stages. First, I cut up and cooked the apples; I had to do this in two batches as I could only fit half in my largest stock pot. Actually, when doing the second half (pictured above) there were too many for the pot, so I put the rest in a smaller pot too cook. Once they were cooked, I pureed the cooked apples in the food processor, only adding just enough of the liquid to enable it to whiz them smoothly. I measured the amount of applesauce, and placed it in a large bowl, covered, in the fridge overnight - I had just on 11 litres. The next day, I poured half the applesauce back into the pot at a time, adding the other ingredients and bottling it. Now, here's the recipe:
Ingredients:
Apples
Note: the quantity of the rest of the ingredients depends on how much apple puree you have. I will give the amount for 6 cups of puree and 6 litres of puree (the amount I get after filling my biggest pot with apples)

Cinnamon & Honey Applesauce

To each 6 cups of puree:
3 TBSP lemon juice
1/3 cup honey
1/3 tsp finely grated lemon rind (zest)
3/4 tsp cinnamon
Dash salt (optional)
For 6 litres of puree:
180ml lemon juice
1 1/3 cup honey
Finely grated rind from 1 1/2 large lemons
3 tsp cinnamon
Dash or so of salt (optional)

Method
Wash, peel if desired, core and cut up apples. Cook in a large non-aluminum pot with sufficient water until soft. Use a slotted spoon to scoop apples into blender. Puree in blender or food processor until smooth, adding minimal fluid for a thick sauce, or a bit more for a thinner sauce. Measure total volume of puree.

Return puree to washed pot and add rest of ingredients. Bring to boil, stirring regularly, and simmer 5 minutes. Ladle into hot, sterile jars, leaving 3/4 inch head space, and seal.

For details on how to prepare and sterilize jars and seals, see THIS POST.

After the jars have cooled overnight, wipe outside with cloth to remove any spill residue, check seals, and store. If any have not sealed properly, put in fridge and use up, or pour into containers and freeze.
Picture
0 Comments

Making and Preserving Tomato Soup

17/2/2015

4 Comments

 
Picture
Picture
It's the time of year when tomatoes are plentiful and cheap - the ideal time for putting up jars of soup, sauce, diced tomatoes and relishes to enjoy throughout the year. Last week I had a bowl of tomatoes from my greenhouse and a couple of boxes of slightly damaged tomatoes I purchased at a good price locally in need of processing - close to 35 kg in total. I was short on time that week, as I had a lot of other commitments, so decided to turn this batch into our favourite tomato soup. I first learned this recipe last year - the kids complained I didn't make enough of it to last longer than a couple of months.

Picture
Each batch of soup takes 6kg of tomatoes. I got the first batch cooking away on the stove, and then since my time was so limited, I washed and chopped up another 12 kg of tomatoes, filling ziplock bags with 2kg each, and then laying the bags on trays of 6kg each before popping them in the freezer. 12 kg frozen -  ready to make up more soup another day. There was no more space available in my freezer, so I had to get on with processing the rest.

This is a simple and delicious recipe; I particularly like it because it uses lots of fresh herbs from the garden. This recipe comes from Lynda Hallinan's lovely book Back to the Land.
Picture
Ingredients:
6kg tomatoes, roughly chopped
6-8 onions, roughly chopped
1 cup sugar
3 TBSP non-iodised salt
2 TBSP celery salt
14 sprigs parsely, chopped
7 sprigs thyme, chopped
7 sprigs mint, chopped
7 whole cloves
3-4 sage leaves, chopped (don't use more as its flavour is strong)

Picture
Method:
1) Place all ingredients in a large stock pot. Yes, even the cloves - they don't need to be in a muslin bag. Bring to the boil, stirring from time to time. Simmer with the lid off for 1 hour, stirring occasionally.


Picture
2) Process soup through a food mill, or blend in batches then force through a sieve, to remove most of skins and seeds.

3) Return soup to pot, bring back to the boil, and then bottle in prepared hot, sterilized jars and seal. Exact details for how to prepare jars and lids or seals, and how to bottle effectively can be found HERE. Note, I leave about a 1/2 inch of head space.

That's all there is to it!

In this particular case, again due to time constraints, on day one I cooked and bottled one batch of soup, cut up and froze enough tomatoes for two more batches, and cut up and put another 2 batches worth in the fridge overnight. On day two, I cooked up those two batches of soup, and put it through the food mill, but didn't have time for bottling. So I put it back in the fridge for another night. Day three, I returned the soup to the boil, simmered it for a few minutes, and then bottled it. Three batches produced 15 quart jars of soup. To use the soup, simply open a jar, reheat in a pot, and serve. Delicious with home made bread!
Picture
4 Comments

Pickled Beetroot

17/10/2013

4 Comments

 
Picture
My family and I have long enjoyed slices of canned beetroot with summer salads and sandwiches, in home-made burgers and so on. It used to be something I regularly purchased from the supermarket in summer, but no more! That's because beetroot is super easy to grow, and making your own bottled beetroot is super easy too! Plus, of course, when you make it yourself, you know just what's in it (no nasty preservatives for us, thanks!), bottling (canning) it in a glass jar means no plastic can lining contaminants, and growing and preserving it oneself saves money. Not to mention you get a free bonus - beetroot greens (leaves) are super yummy and nutritious, and they freeze really well - cooking them for dinner involves dumping the frozen greens in a pot of boiling water and cooking for only 2 minutes!

Pickled Beetroot

Ingredients:
3 cups vinegar (I use malt)
2 cups water
2 cups sugar
2 tsp plain salt
prepared beetroot (see below) - note I used about 2 1/2 times above ingredients for about 6 kg of beetroot.

Method:
Bring all ingredients except beetroot to boil in large pot. Add prepared beetroot in small batches, return to boil, then bottle using the overflow method.
Picture
How to prepare beetroot:
  • Pick fresh beetroot, shaking off worst of dirt, then rinsing
    under running water.
  • Twist off leaves, leaving about an inch of
    stems attached to beetroot (to prevent excessive bleeding). Do not remove long tap root at the bottom.
  • Scrub the beetroot well to remove any remaining dirt.
  • Place clean beetroot in a large pot, cover with water, bring to boil and then simmer until tender (about 40-60 mins).
  • Drain and allow to cool

Picture
  • Slip skins off, removing tap root and remaining tops at the same time.
  • Slice beets evenly and place in bowl
  • They are now "prepared" and ready to be bottled.

Picture
Picture
Freezing Beet Greens
To prepare beet greens for freezing, pick through leaves and remove any that are damaged. Wash remaining leaves carefully, shake off excess water. Chop leaves roughly, then bag and label before placing in freezer. Simple!

Of course, beet greens can also be eaten raw (in salad or sandwiches) or cooked fresh - freezing is for when you've harvested lots of beetroot and so have more greens than you can use at once.

4 Comments

Preserving Quince

23/4/2013

0 Comments

 
Picture
This year we were blessed with an abundance of Quince. Quince is an old-fashioned fruit, a relative of the pear, but with hard, astringent flesh that must be cooked to be edible. It is naturally very high in pectin, and in days gone by, every garden held a quince tree, and the farmer's wife used it to help set her jams and jellies, as well as for preserving of all kinds.

This year, I used the quince to make quince jelly (last year I made jam), bottled slices in syrup for later baking, and also dehydrated the pulp, intending to make a fruit leather, but it turned out more like chips. When I ran out of time, but still needed to get the final box of quince processed (after I'd given away umpteen boxes!) I boiled up the last of the quince and bottled or froze the resulting liquid to be later made into jelly.

Recipes and instructions are below...

Quince Jelly

Quince jelly is quite simple to make, and the steps can be done in stages if desired, so the process does not have to be completed all at once. Quince is pretty much never-fail for jams or jelly, as it's high pectin content means it sets easily. Quantities don't matter until you get to the step of adding the sugar. Use what fruit you have, and that part will work itself out.
Picture
Step One
Wash the quince to remove the fuzzy coating. Chop whole fruit into relatively even size chunks. There is no need to peel or core, though if you are planning to keep the pulp for dehydrating, you may wish to do so.

Place in a pot and cover with water.

Picture
Step Two
Cover pot, bring to boil, then simmer until fruit is tender, approx 1 hour, by which time it will have changed to a rosy colour - quince changes colour when cooked for prolonged periods.
Set aside to cool.

Step Three
Using a potato masher, mash the quince up in the pot of water as much as you can.

Picture
Step Four
As with all jellies, the part you are after is the liquid from cooking the fruit. Usually you strain the contents of the pot through a cheesecloth, keeping the liquid. In practice, with quince I found it was easier to "roughly strain" the mixture through a metal colander first, removing most of the fruit pulp, and then strain the resulting liquid through a cheesecloth to remove any remaining pulp. IMPORTANT: do NOT squeeze the cheesecloth if you want the jelly to have a nice, clear look to it without cloudiness.
The photo above shows the pulp left in the colander, which I dehydrated (see separate instructions below).

Picture
Optional:  If for any reason you are unable, or do not want to, proceed to making the jelly at this point, then the liquid may be refrigerated overnight, or poured into bottles and frozen for later use. It may also be preserved by bringing it to the boil, then pouring into hot, sterile jars and sealing. If you choose to freeze it, leave the top part of the plastic bottle empty, then squeeze out some of the air before screwing on the lid. This will allow for the expansion of the liquid as it freezes.

Picture
Step Five - making the jelly
1. Measure the volume of the liquid you are working with, and pour it into a large, heavy pot. For every litre (4 cups) of liquid, add 4-5 cups of sugar. Using less sugar will not change the sweetness of the final result - the jelly will set when it reaches a certain temperature, at which point its sugar content will be 65% or so - adding less sugar simply means you will have to boil it longer.

2. Bring the pot to the boil, then boil it uncovered until setting point is reached, stirring frequently to avoid burning. How long this takes will vary depending on conditions. Some recipes claim as little as 10 mins, but I've always found it takes about an hour (though I work in large quantities, which may have something to do with it).

Setting point is reached when a dribble of jelly dropped onto a cold plate goes wrinkly when touched and stays in one place.

3. While the jelly is boiling, prepare your jars - wash them, rinse out, place in a cold oven, then turn the oven on to 100C and sterilise for 30 mins. Keep the jars hot until you are ready to fill with jelly. Also boil lids or seals and rings in a pot of water for a few minutes before using.

4. When the jelly is ready, fill the jars. I stand the jars on newspaper on top of a wooden chopping board, one at a time straight from the oven, as close to the pot as possible and ladle in the jelly, leaving an inch headspace before sealing with a lid or seal. A bottling funnel is a great help to getting it all in the jar rather than down the sides. I made my own by cutting out around the stem of a spare large funnel - it sits in the top of the jar and directs my preserves in the right direction. Set the jars aside to cool.

Bottled Quince

Picture
I bottle quince using the same overflow method I use for most fruit. It is described in detail HERE.

For quince, the fruit is washed, peeled, cored and sliced, then kept in a large bowl of water until I'm ready to process it. Don't worry if it browns a little - it turns white again when you cook it.

I heat a pot with a small amount of plain water in it, to which I then add a drained colander full of fruit at a time to cook before spooning into jars with a slotted spoon.

A separate pot contains the boiling syrup solution, which is ladled into the jars over the fruit. Quince needs a reasonably strong syrup - I use approximately 1 cup sugar to 4 cups water.

Bottled quince can be used as a preserved fruit on cereal or in baking. Our favourite use is to combine it with apples and make a fruit crumble.

Dehydrated Quince Pulp/Leather/Chips

Picture
I loathe waste! When making jelly, it seems a shame to throw out all the pulp (though the chickens appreciate it!). It occurred to me perhaps I could dehydrate it to make a fruit leather for snacks.


Picture
After straining the fruit pulp out of the liquid, from a batch which I had peeled and cored especially, I processed the pulp in a food processor to make it smooth. Lacking Tefal sheets for my dehydrator, I covered the racks with cling wrap, then smoothed the pulp out on them.
After dehydrating overnight, the "leather" was dry enough to remove from the cling wrap and finish drying on the mesh trays.

Picture
The resulting product was crisp rather than leathery, so I broke it into "chips" and sealed in bags. The kids eat it as a snack.

0 Comments

Really Radish Relish

6/4/2013

0 Comments

 
Picture
When I was sowing carrot seeds in January, I decided to try a tip I had read - to mix a few radish seeds in with the carrot seeds, because carrot is slow to germinate whereas radish grows quickly - this would mark the location of the carrot seeds until they came up. Good idea - I thought.

Turns out that I, ahem, mixed a few too many radish seeds in. They grew quickly and well. Radish, after all, are one of the easiest things to grow. Unfortunately, my husband is the only one who likes to eat radish, and even he couldn't eat 4.5 kgs of radishes in a short period of time!

I have to admit though, they sure are pretty!

Anyway, not being one to waste homegrown food, even if it's not something I personally like, I began hunting around for some ideas of what to do with a bunch of radish. I finally decided on a Radish Relish recipe I found
HERE.

Turns out it's pretty yummy, even to a radish-hater like me!

I did a couple of things different than the recipe - first I roughly chopped the radishes, onions and celery, then I put them through the food processor to chop them more finely. When that was done, they looked like this:

Picture
And then, after mixing it with the rest of the ingredients and allowing it to stand for the required 3 hours, I brought it all to the boil, cooked it for 10 mins, then simply bottled it into hot sterile jars and sealed. Mine turned out a little darker and drier looking than the photo on the recipe page, but it works fine.

Oh, and by the way, the leaves of radish plants are a good salad addition.
0 Comments

Easy Pickled Zucchini or Cucumber

27/3/2013

0 Comments

 
Picture
Many years ago, when we lived in Golden Bay, a very capable and frugal Dutch homeschooler shared this recipe with me, and I've been using it ever since. It's super easy, very tasty, and always a hit with visitors. You can use cucumber, zucchini or marrow to make this pickle.

Whenever I have a flood of zucchini in the garden, I put up lots of jars of this pickle to use throughout the year.

As you can see in the above photo, you will get a slightly different look depending what you're using exactly. The jar on the far left was made using yellow zucchini. The left-of-middle is a mixture, but mostly marrow sized ones I took the rind off of. The right hand jars are made with smaller zucchini I could mostly simply slice up and leave the rind on. Cucumbers always look pretty too.


Pickled Cucumber or Zucchini/Marrow

Day 1

Thinly slice 10-12 cups cucumber, zucchini or marrow. If using marrow, remove rind and seeds 

Slice 4 or more onions.

Place vegetables in a large bowl. Sprinkle ½ cup salt over, then cover with water. Place a plate in the top to hold the veges under water, cover with a tea towel and leave overnight.
 

Day 2

Sterilise jars, seals and rings as for overflow bottling.

Strain veges in a sieve or colander. (Rinsing is optional) Drain well.
 
In a large pot, bring to boil:

4 cups white vinegar
2 (or less) cups sugar (I use 1.5)
1 tsp mustard seeds
1 tsp dill seeds or fresh dill (The last few years dill seed has suddenly stopped being in the supermarket herb/spice section, but you can still find it at Asian and bulk food places. If you can't get it, you can leave it out, but it does as a wonderful flavour and aroma). 
1 tsp tumeric
 
Add vegetables, one colander at a time, return to boil, bottle and seal.
Makes approx. 2 quart preserving jars of pickle.

If you are a novice preserver, see my post on Easy Home Preserving with Overflow Method

0 Comments

Easy Home Preserving with the Overflow Method

24/3/2013

19 Comments

 
Picture
There are many different ways to preserve the harvest, and home bottling (or "canning" in the U.S) is one of them. I especially like it because it doesn't need freezer space, and once preserved this way, the contents of the jars last a long time and can be stored pretty much anywhere.

But even bottling can involve different methods. There's water bath and pressure canning, and the overflow method, to name the three main ones. My personal favourite is Overflow Bottling - it's the quickest, the simplest and the best place to start when you're new to home preserving.

Note: Overflow bottling is only suitable for preserving things that are at least somewhat acidic. It's perfect for most fruit, anything containing tomatoes or vinegar and so forth. It's not suitable for non-acidic veges (unless done with vinegar, as a pickle) or meat.

There are a few simple steps to this method, and each is important:
1) Prepare your jars. Gather up the jars you are going to use, and wash them thoroughly, then rinse to remove any traces of soap. Drain, but don't dry them (to avoid lint from tea towels). Any jars at all can be used, so long as you have a metal lid or dome and ring that will fit them. I reuse jam, salad dressing, pasta sauce etc jars from the supermarket (with labels removed), as well as Agee preserving jars. Discard any jars that are cracked or chipped. Next, place the jars into a COLD oven, simply standing them on the oven racks right way up. If the jars are small and won't stand easily, place them on an oven tray first. Turn on the oven to 100C, and leave them until the oven has warmed up and the jars have been at temperature for at least half an hour. I do this, then just leave them there until I'm ready to bottle. IMPORTANT: jars must be HOT when you bottle, or adding the hot contents will cause them to crack or break.

2) Prepare your lids. Simply heat a pot full of water to boiling, and shortly before you need to use the lids or seals and rings, drop them in the pot of water and boil for 5 mins. Keep them hot until use too.

3) Prepare whatever you're going to put in the jar. With the overflow method, this usually means that you are bringing to boil in a large pot either a sugar solution (for doing fruit) or a pickle solution (vinegar and spices). You will have also separately prepared the fruit or veges that will be going into it.

4) Get everything ready to go - I place a large wooden board onto a handy surface and cover it thickly with newspaper. This is where you will place the filled and sealed jars and leave them to cool. The newspaper helps to prevent sudden changes in temperature cracking jars. I take another chopping board, and again cover it very thickly with newspaper. This is placed right next to my stove, and when I'm ready to go moved as close as possible to the pot. When it's time to begin bottling, I lift one jar out of the oven onto this board, fill it quickly from the pot, then wipe the rim, add the lid and seal, then move to the cooling board. The newspaper on the "action board" both helps to prevent cracking when you bring a hot jar from the oven, and also absorbs any liquid that overflows from the jars. Also get out the utensils you will need - a slotted spoon for filling jars, a ladle for adding liquid, a flat knife for releasing trapped bubbles, tongs for lifting lids out of boiling water, and tea towels to help you handle hot jars. Place utensils in pot of boiling water for a few moments to ensure sterility before use too.

5) Ready, set, bottle! Add a colander full at a time of produce to the pot of boiling solution (if you work in too great a quantities at a time, some of it will cook to long and be mushy before you get it bottled). Bring it back to the boil and hold it there for the prescribed time depending on what you're doing. Lift a jar from the oven and set on board by stove, ensuring you do NOT put it down in a wet patch from previous jars - this will crack it. Use your slotted spoon to lift produce from pot to jar until full, then ladle in liquid from the same pot until almost overflowing. Insert flat knife down sides of jar to release trapped air, then top up with more liquid until just overflowing. Quickly wipe jar rim to ensure full contact with seal, add lid or seals, and tighten as much as you possibly can. Most jar failures are because the lids wasn't tightened enough. Set aside to cool. Move around the paper or remove layers to ensure a dry spot for the next bottle out the oven next to the stove.

6) When the jars have cooled right down (l just leave them overnight), check all are sealed - the lid or dome should be depressed in the middle - you've probably heard them "plinking" as they sealed. Was down outside of jars in hot soapy water, and remove rings if using Agee domes and rings. Dry and store in cupboard. If any did not seal, either put it in the fridge and use soon, or tip into another container and freeze. If there are a number which didn't seal, it is an option to reheat the contents to boiling, and rebottle in fresh, hot jars.

Now, if you are bottling something thick, like applesauce or jam, you can do exactly as above, except that you do not overflow the jar - fill the jar with the finished hot product, leaving about 2 cm empty "headspace" at the top of the jar, and then seal and set aside. The cooling jar and product will still form a vacuum and seal the jar, and it will keep a long time until opened.

One more tip. If you're bottling fruit, and you want the liquid in the jars to look beautifully clear, then the way to achieve that is to heat two pots to boiling - one containing the syrup for bottling, and the other with simply water. The fruit is heated and cooked in the pot of water, then spooned into the jars, and the syrup is ladled into the jar from the other pot.

And lastly, in the photo at the top of this page, you can see two slightly different quart-size preserving jars. These are the most common sort you find at garage sales etc. The one of the left has a thick, pronounced ring of glass that sticks out just below the threaded part. These require gold rings. The one on the right does not, and needs green rings. Both take the same large dome seal. It's very important that when preparing to bottle you make sure you have the right size lids or rings for your jars before you start - otherwise you could be left with lots of cooked produce and no way of sealing the jars. The green and gold rings are just slightly different in size, and both should be available from your supermarket. Rings can be reused many, many times. Domes (seals) can also be reused so long as they are undamaged, particularly in the food-contact side surface. I check my domes for any sings of damage or corrosion, and discard those, then reuse the rest.

I've written out quite a bit to explain all this, but really, overflow bottling is super easy and fast to do. I use it for all my bottling. One day perhaps I'll be able to invest in an American pressure canner so I can do beans and meat, but until then I happily bottle all fruits using the steps described here. I also bottle pickles, tomatoes, applesauce, pasta sauces, relish, jams and jellies in the same way, except with those I leave a half inch of empty "head space" at the top of the jar. Happy preserving!


19 Comments

    Author

    This page is my blog formerly known as Kiwi Urban Homestead.

    I'm a Kiwi homeschooling mother of 5 living in a small town. After growing 1000 kg of produce in my back yard in 2013, I'm now expanding my edible gardens even further.

    Archives

    February 2016
    December 2015
    October 2015
    September 2015
    June 2015
    May 2015
    April 2015
    March 2015
    February 2015
    January 2015
    December 2014
    November 2014
    October 2014
    September 2014
    August 2014
    April 2014
    February 2014
    December 2013
    November 2013
    October 2013
    September 2013
    August 2013
    July 2013
    June 2013
    May 2013
    April 2013
    March 2013
    February 2013
    January 2013
    December 2012

    Categories

    All
    Bees
    Butchering
    Chickens
    Compost
    Corn
    Diy Projects
    Events
    Everything Else
    Firewood
    Freebies
    Frugal Fortnight
    Garden Diary
    Gardener Of The Year
    Getting Started
    Greenhouse
    Harvest
    Harvest Totals
    Health
    Herbs
    Home Made Cleaners
    Homesteading Skills
    Jungle Taming
    Livestock
    Media
    Monthly Garden Pics
    Moon Planting
    Musings
    Pests And Diseases
    Planting
    Preserving The Harvest
    Recipes
    Salads
    Soil Improvement
    Specific Crops
    Tomatoes
    Weekly Round Up
    Worms
    Yates Vegie Challenge
    Zucchini

    RSS Feed

Powered by Create your own unique website with customizable templates.